
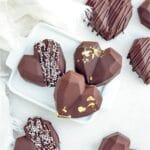
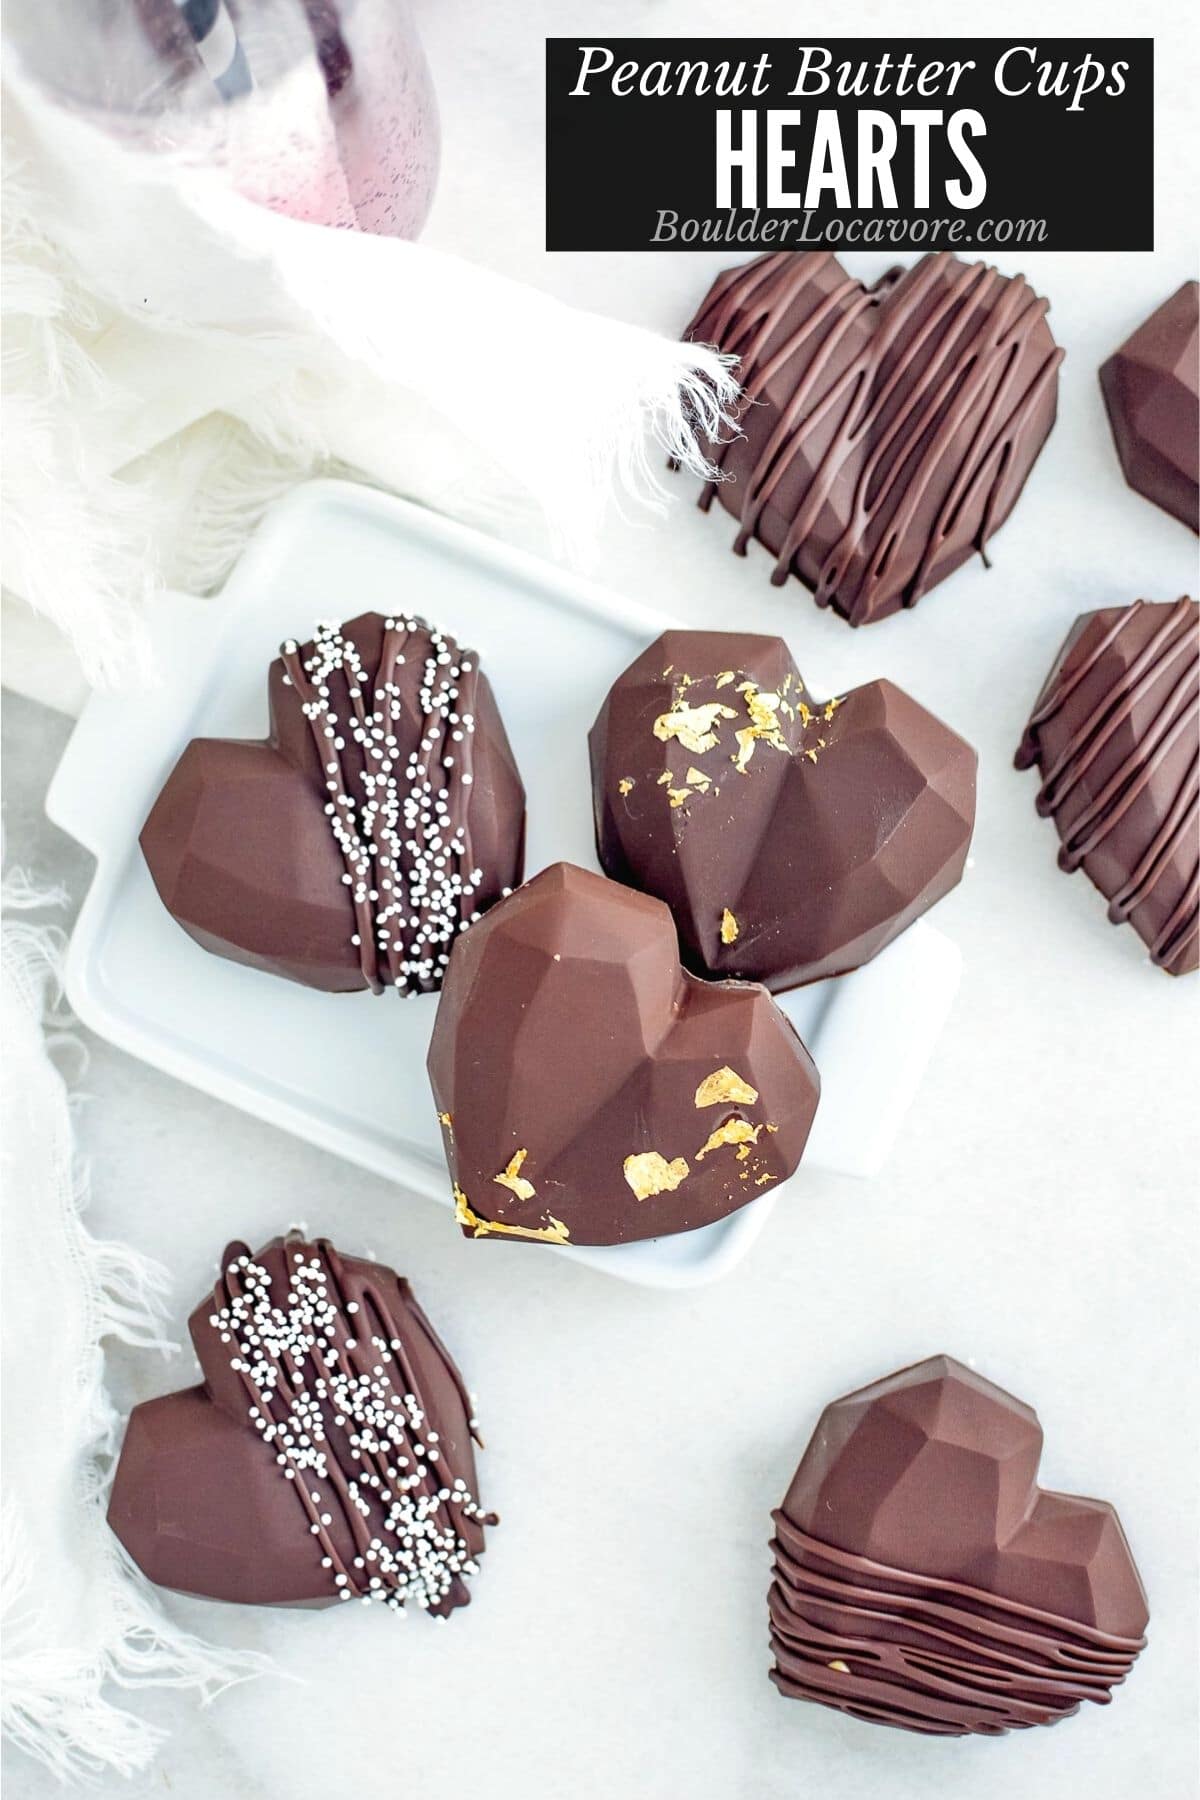
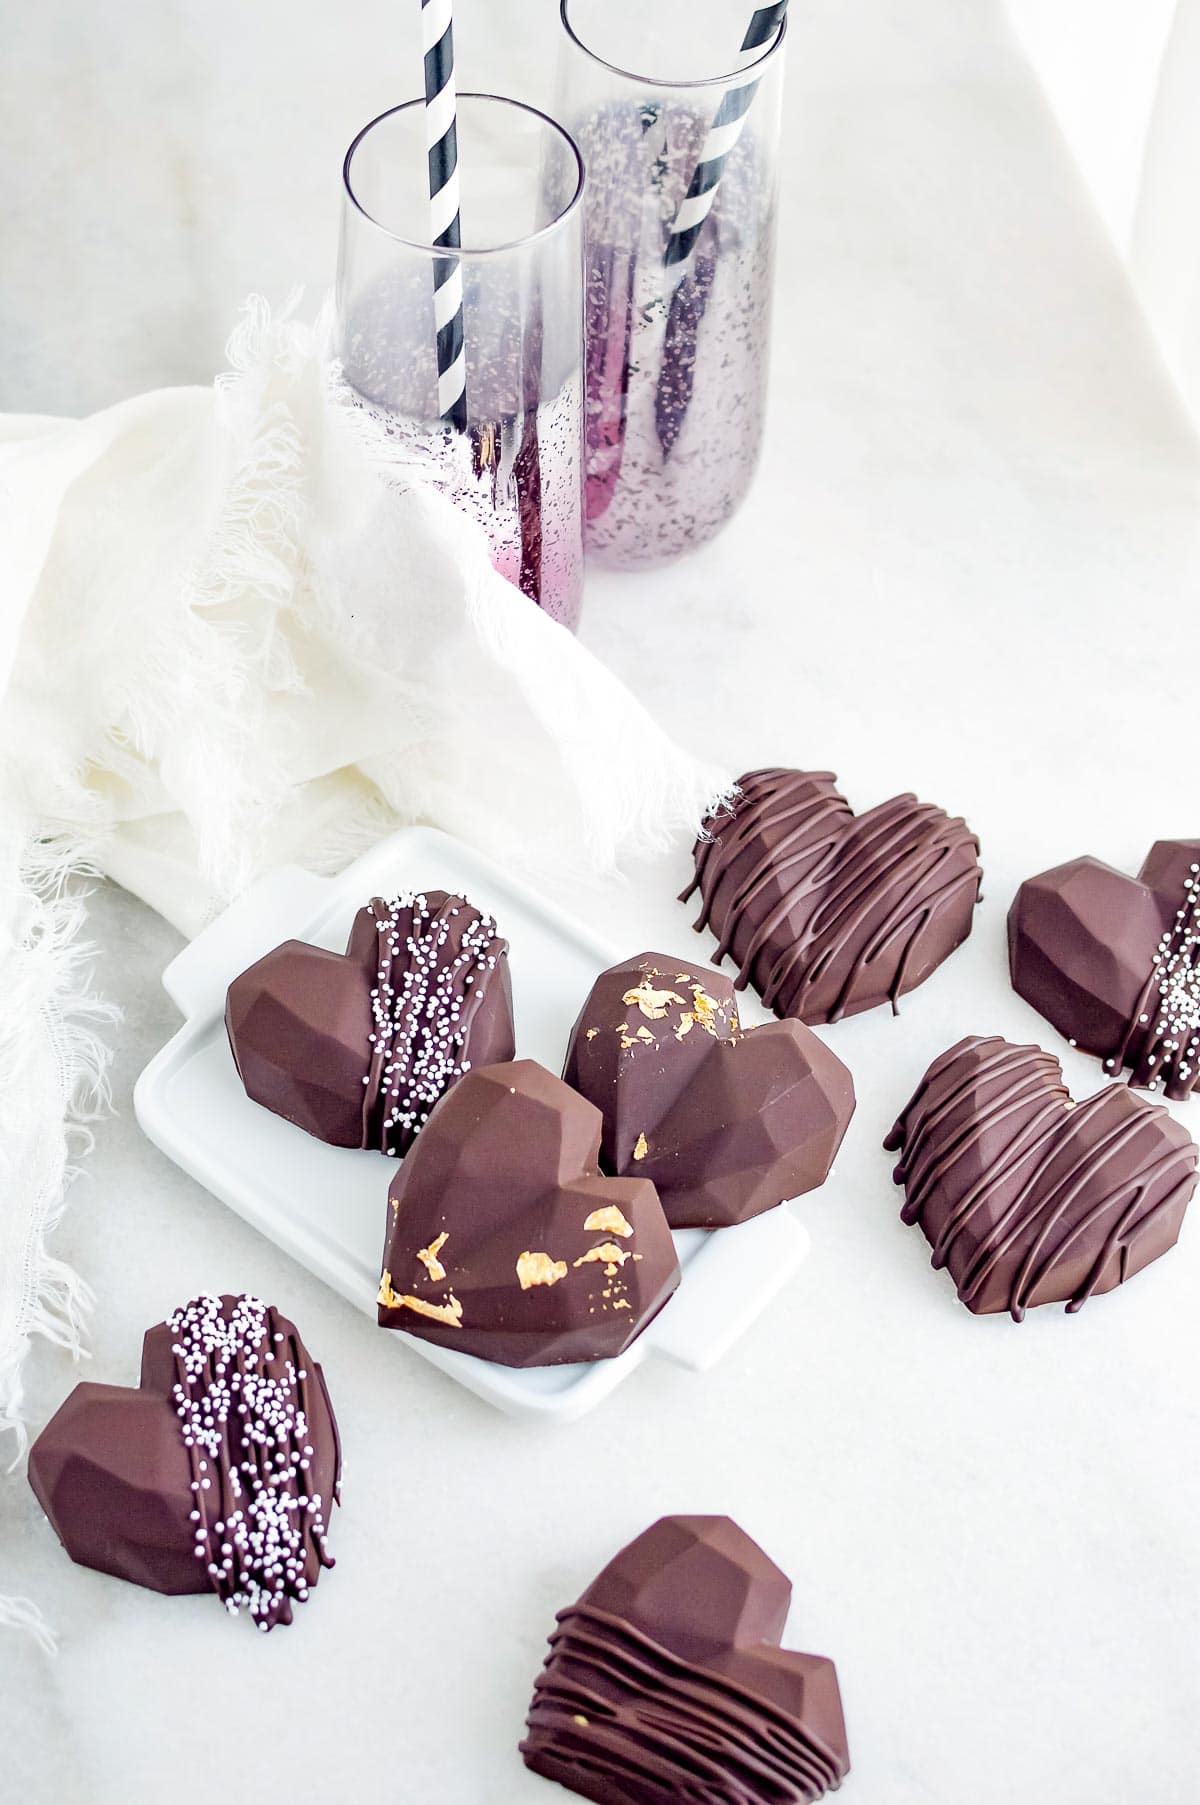
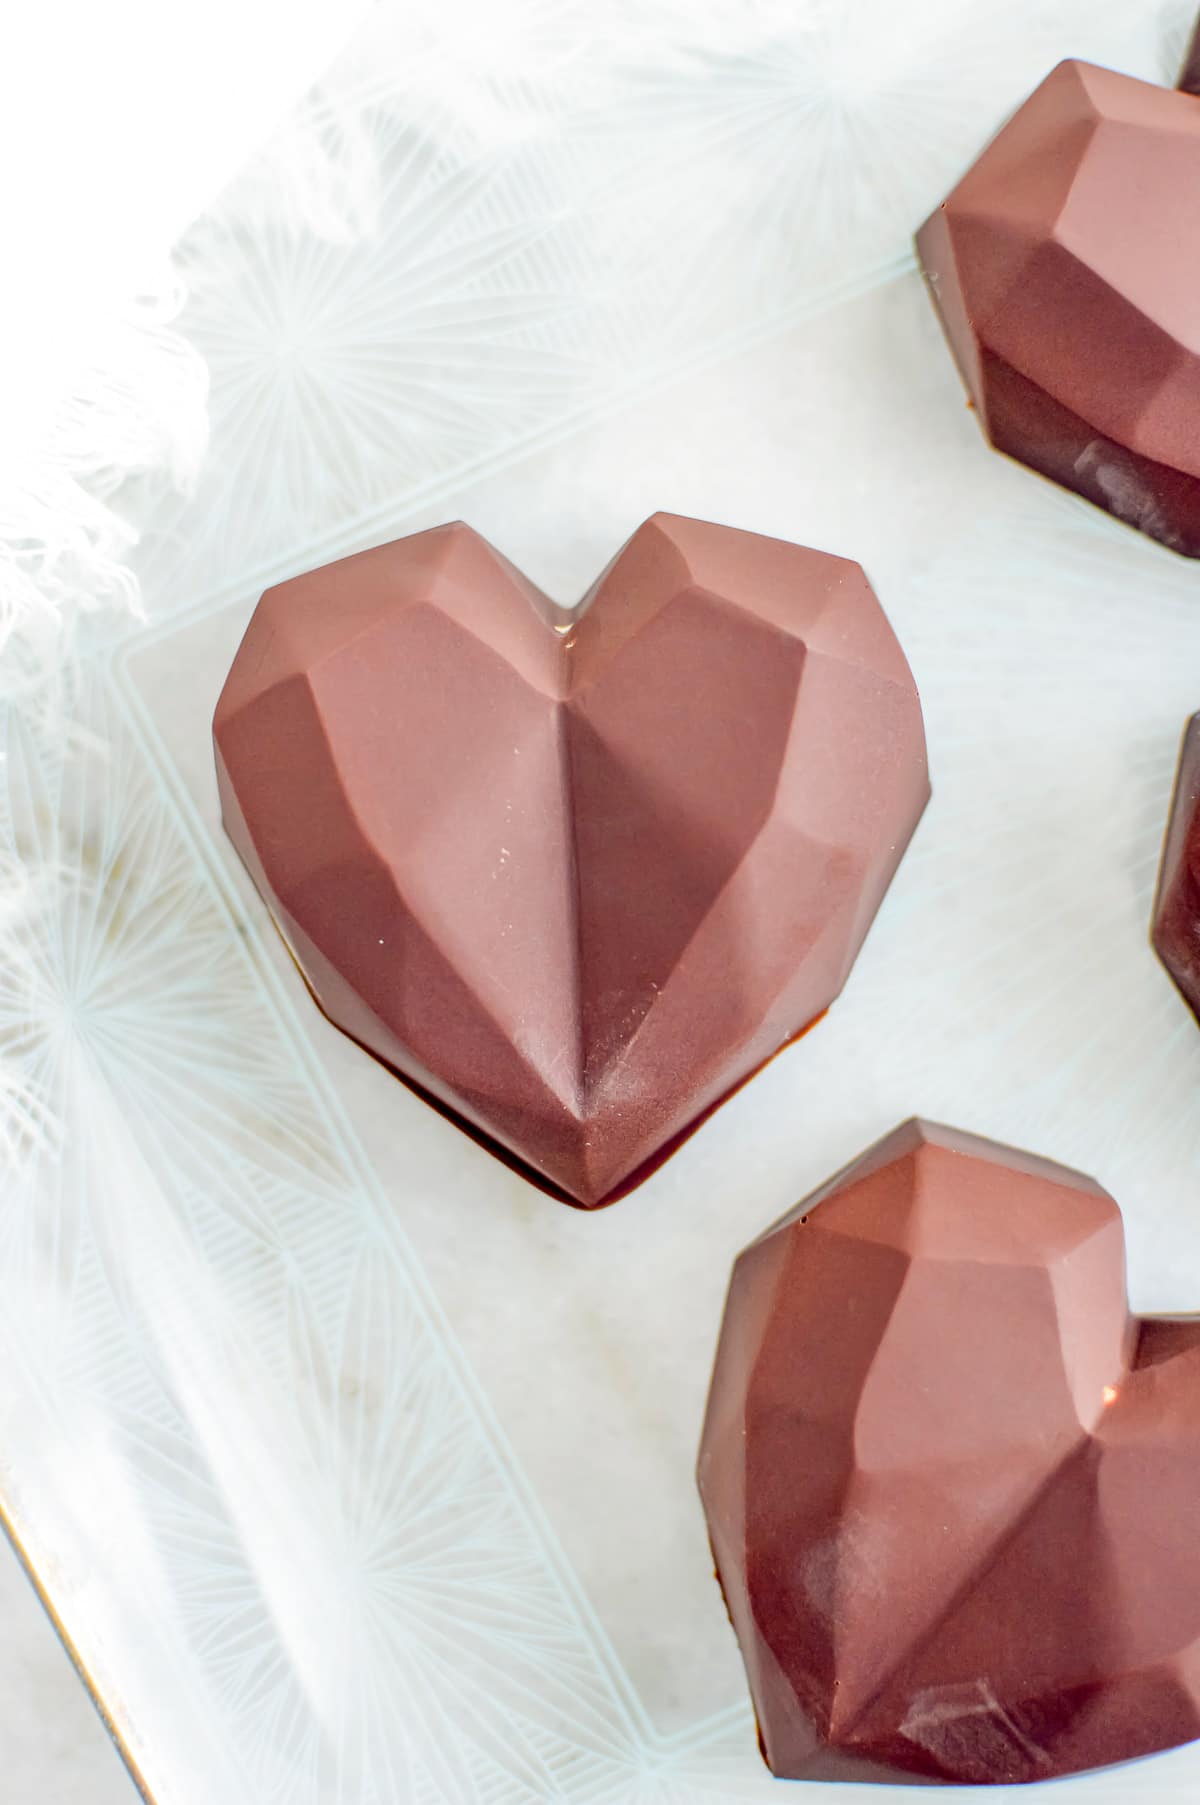
Homemade Peanut Butter Cups are the perfect combination of peanut butter and chocolate. Smooth dark chocolate outside with a soft peanut butter layer inside. These rich no bake dessert treats are made in heart molds for a delicious Valentine’s Day surprise.
These homemade confections are a dream come true for peanut butter chocolate lovers.
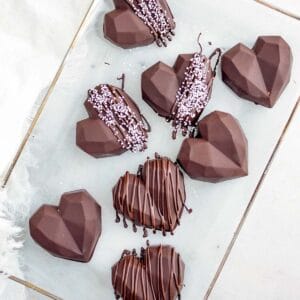
Festive peanut butter cups in heart form can be decorated in many ways perfect for Valentine’s Day!
Everyone will love them and YOU for making them!
For a full Valentine’s Day celebration add in some Strawberry Roses, Sweetheart Bark (candy chocolate bark) and Love Potion Number 9
It’s delicious and rewarding to make favorite store bought treats at home.
For those who love Reese’s cups this tasty spin is a recipe you’ll love making.
Though we’ve made them in heart shapes, this recipe would be easy to change up into different shapes.
Think eggs shaped for Easter, shamrocks for St. Patrick’s day and round for any time.
Just change up the mold to a similar size and you can have them all year.
Recipe Ingredients + Notes
Dark Chocolate Melting Wafers. Candy melting wafers are designed to melt quickly and smoothly as well as harden quickly to a shiny finish.
They are perfect for this type of recipe and doesn’t require fussy tempering of the chocolate for a nice end result.
I recommend Ghirardelli brand wafers for multiple reasons (link and details in the Supplies section below). Most importantly great flavor.
Smooth Peanut Butter. Any brand of smooth peanut butter can be used. The recipe shown here used natural peanut butter which is moister in texture than prepared peanut butters.
If using natural peanut butter that is separated, be sure to stir it together fully before starting the recipe. No excess oil should be present.
Powdered Sugar. The powdered sugar (aka Confectioner’s sugar) is mixed with the peanut butter for the filling.
Quality salt. Use sea salt or kosher salt if possible. Just a pinch is needed.
Pure vanilla extract. Will add the best vanilla flavor to the filling.
Variations
Dairy free or vegan chocolate. We tested these peanut butter cups with Enjoy Life Foods allergy-free chocolate and it worked well. If needed or desired, feel free to substitute that.
Nut free butter. Have a peanut allergy? Nut free butters should work great for this recipe too! Just substitute the same amount instead of peanut butter.
Use a different nut butter. Almond butter or hazelnut butter would be great alternatives to peanut butter.
Non Natural Peanut Butter. Because natural peanut butter has more oil if substituting regular smooth peanut butter less powdered sugar may be needed.
OR it may create a drier textured filling more like a Reese’s peanut butter cup copycat!
Supplies Used
For this recipe the supplies are key. Other substitutes or shapes could certainly be used however the ingredient amounts would need to be adjusted.
These are the supplies I used for this recipe:
Heart Mold. This is the heart mold I used. It is food-safe, BPA free and makes 8 peanut butter cups.
Dark Chocolate Melting Wafers. I love Ghirardelli brand melting wafers. They melt to a very smooth, easy to work with consistency.
They also taste great. Some melting wafers have a very waxy taste in my opinion and these taste like chocolate. Here are the specific wafers I used.
Parchment paper sheets. Parchment paper is widely available at grocery stores in rolls. I love these parchment paper sheets. No tearing is required and they fit well in baking sheets too.
Chocolate handling gloves. Yes there is such a thing! One tricky thing about chocolate is because our fingers are warm when handling chocolate it can transfer fingerprints.
To avoid this you can wear food-safe gloves or actual chocolate handling gloves. They are white cotton gloves.
If you don’t want to use gloves, rinse your hands in cold water (and dry them) before handling the finished chocolate.
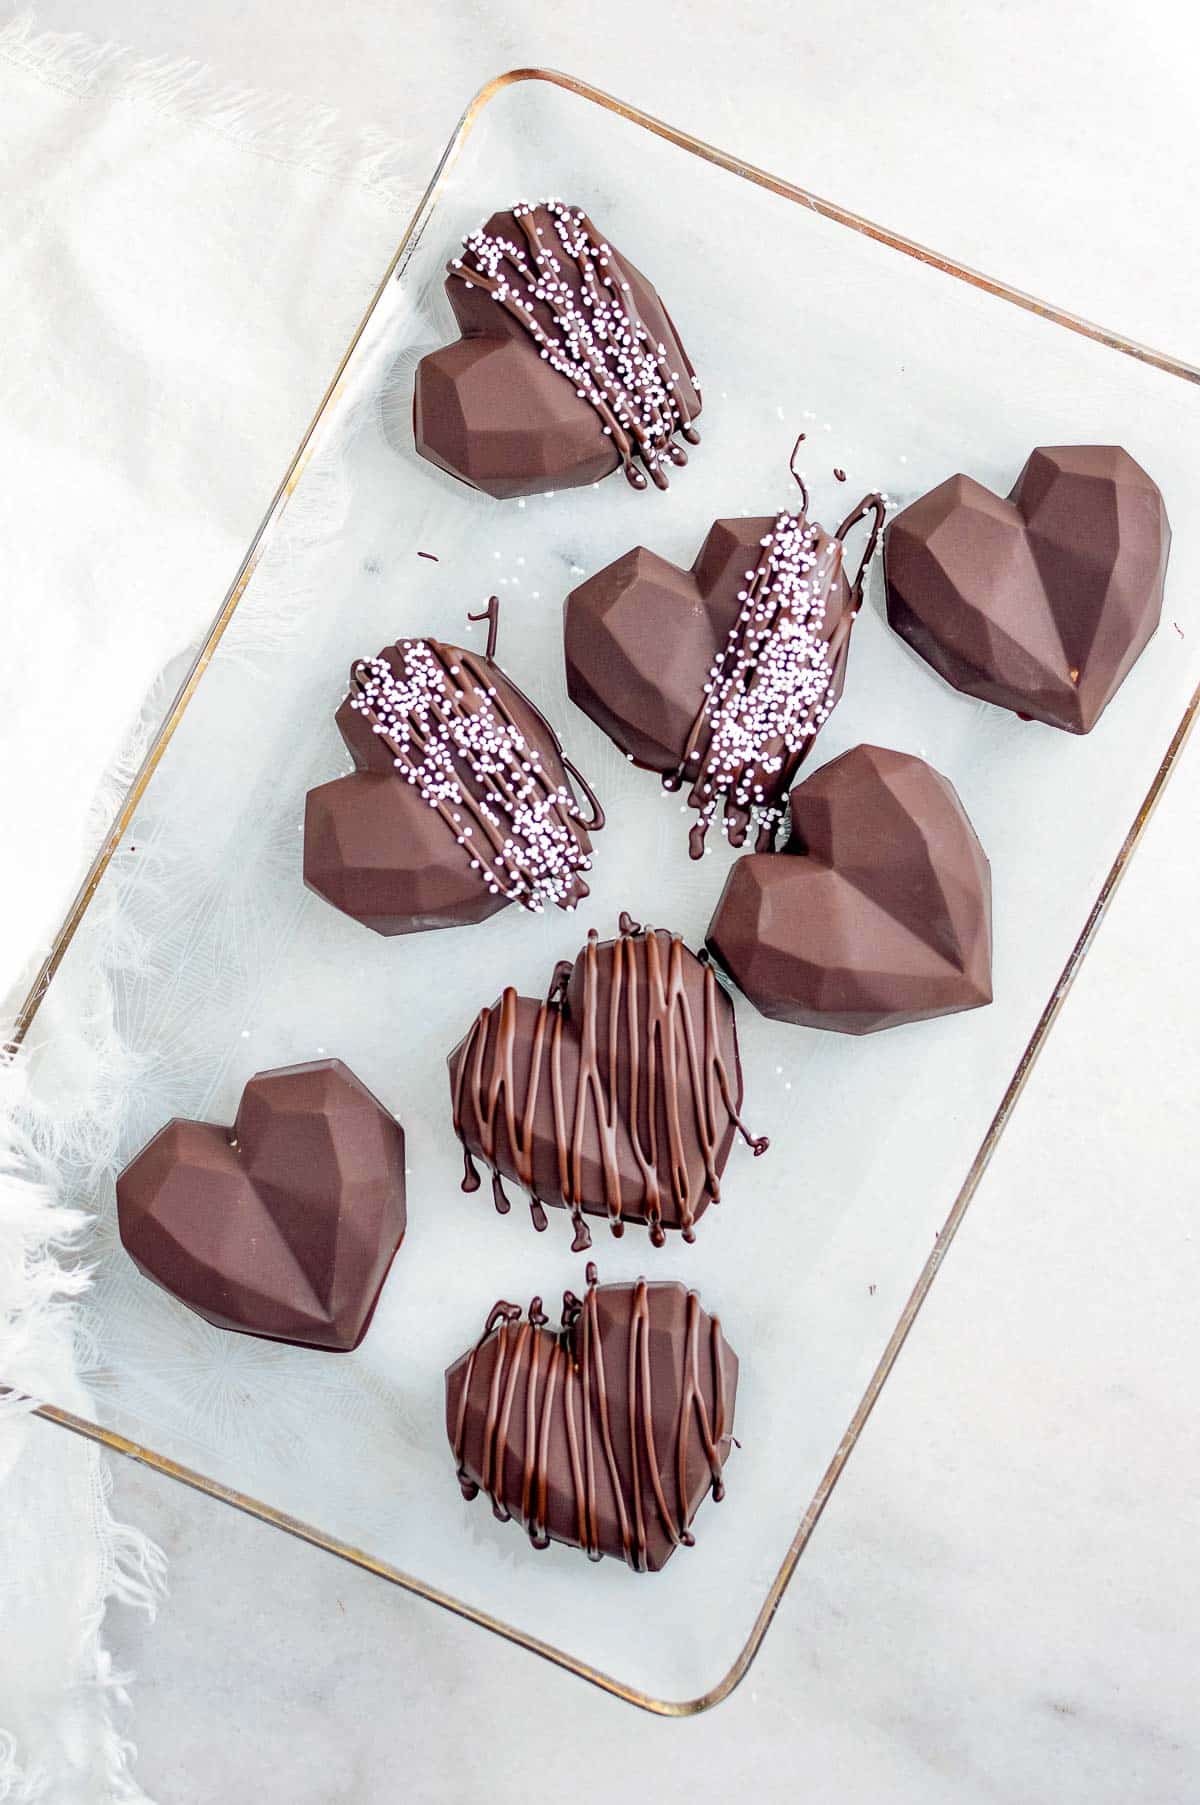
Tiny nonpareils. These are the tiny white nonpareils seen on the finished hearts. Any brand will work but the tiny size works best with the size of these hearts.
Edible gold leaf. It you want to try your hand at applying some edible gold leaf this is the brand I used. It IS edible (not all versions are).
Here are some culinary tweezers too. You’ll need some to handle the gold leaf.
How to Make it – Step-by-Step
STEP 1. Make the peanut butter filling.
Combine the peanut butter, powdered sugar and vanilla extract until smooth (photos 1-2).
Place the peanut butter mixture on a folded piece of parchment paper. Cover and smooth to 1/2-inch thickness (photos 3-4).
Place in the freezer.
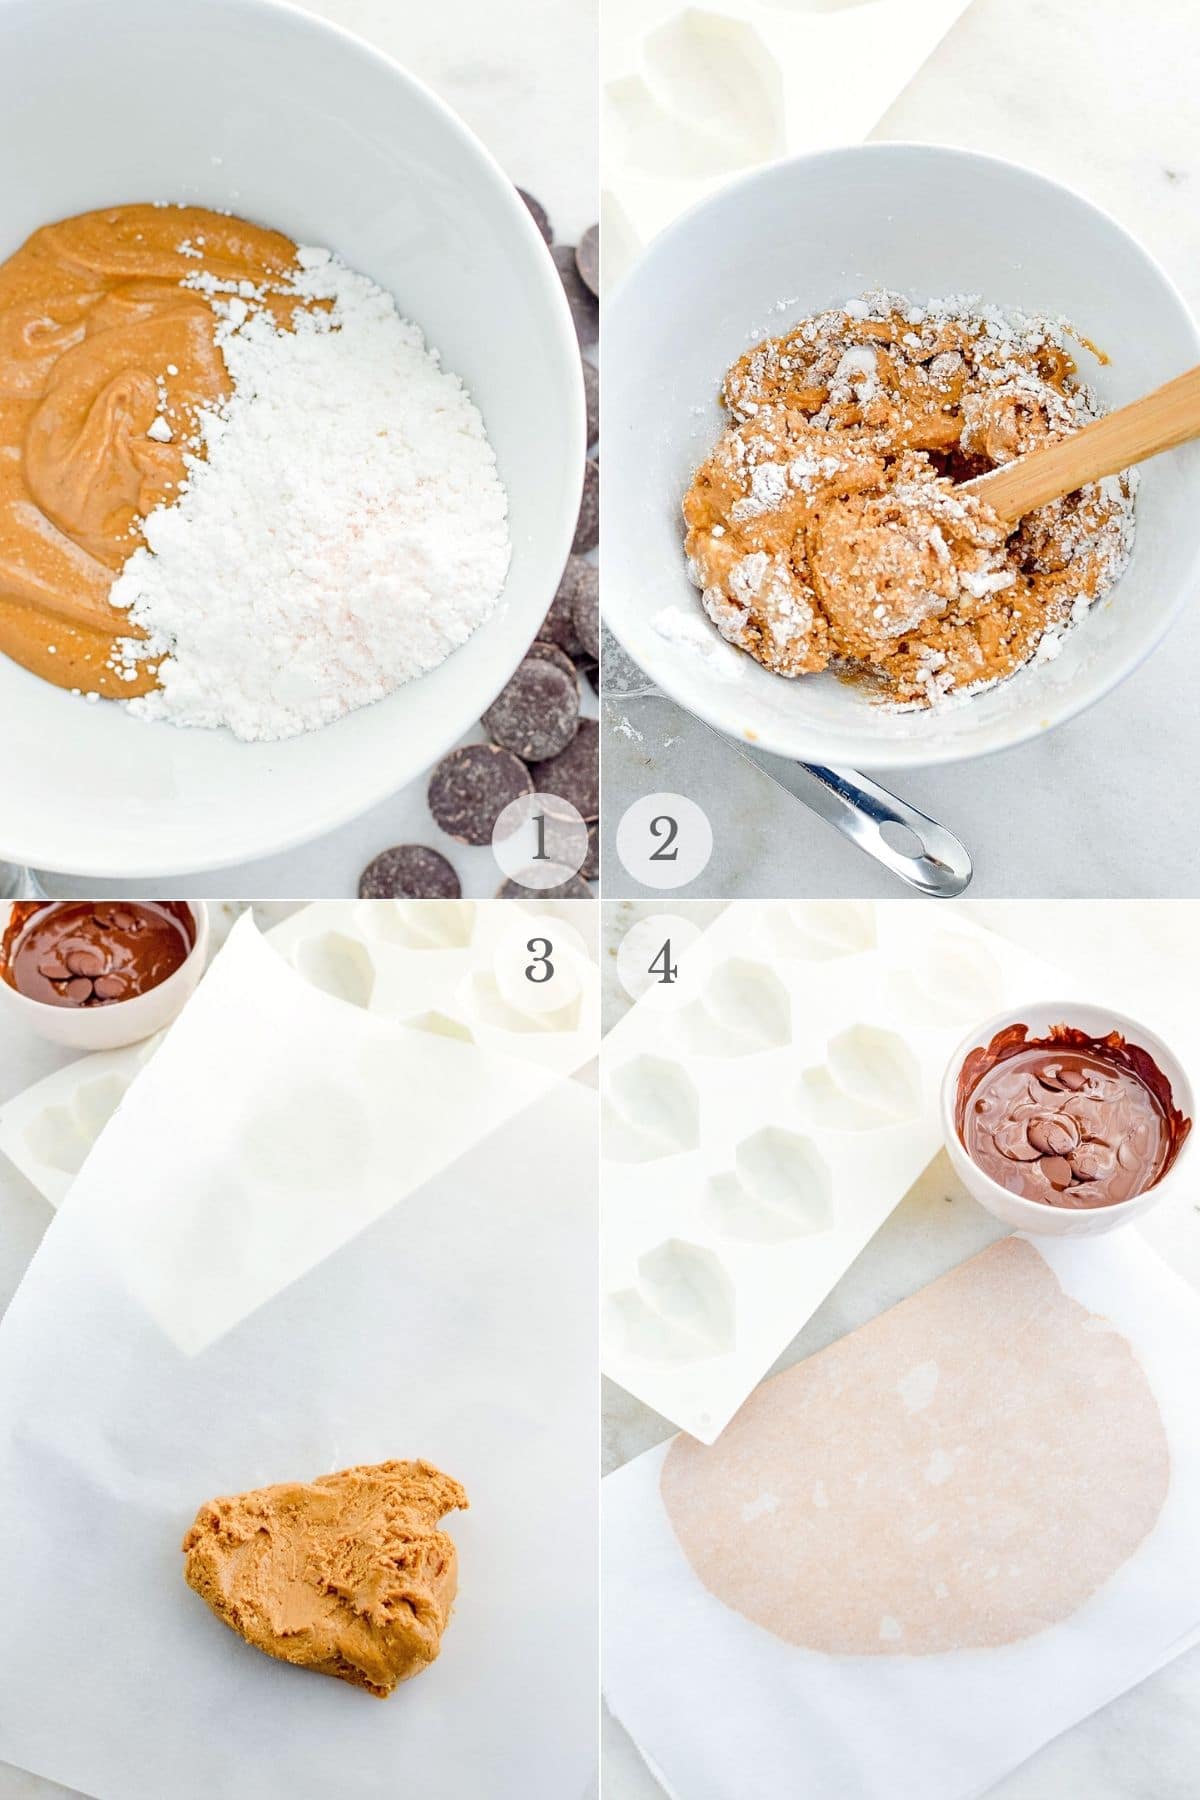
STEP 2. Make the chocolate molds.
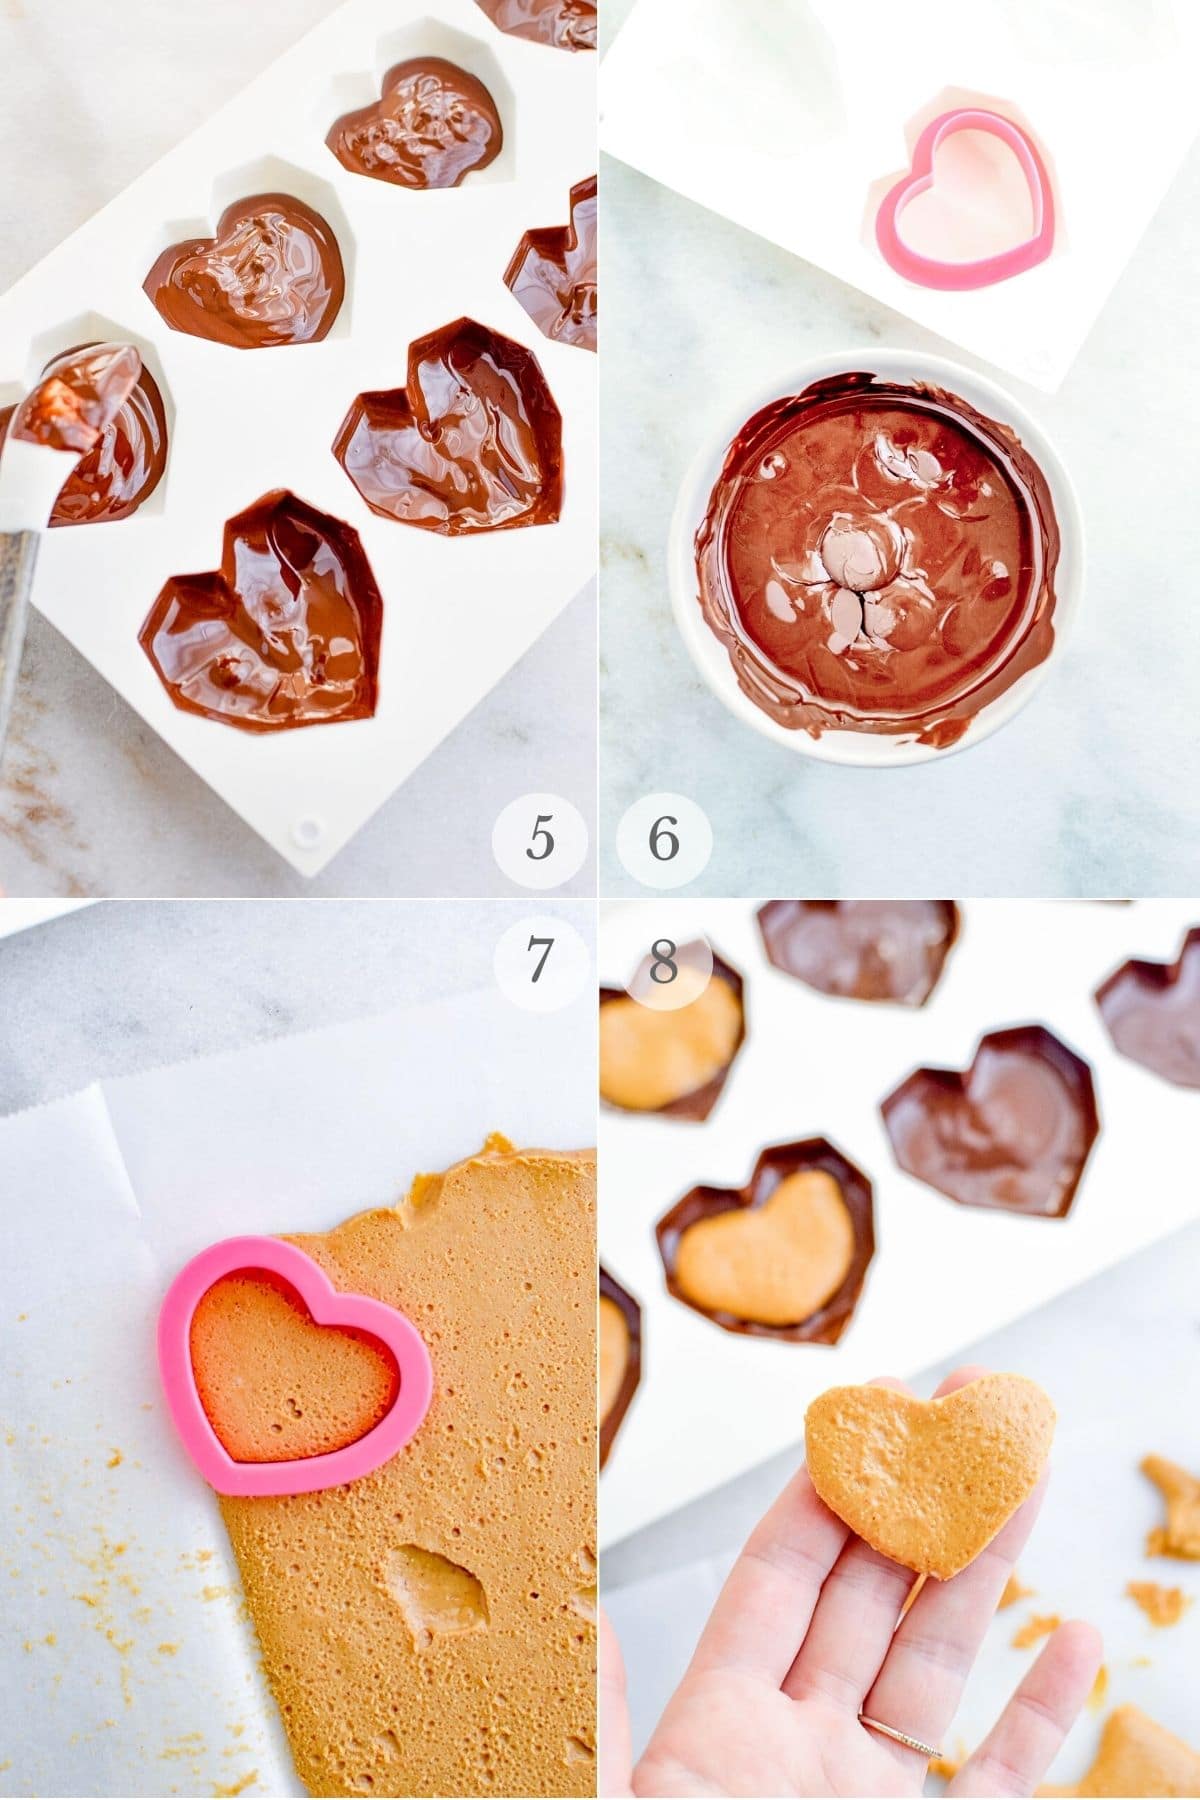
Melt the chocolate wafers and fill the molds as shown below (photo 5). Spread the chocolate over all sides inside each mold cavity.
Allow the chocolate to sit at room temperature.
STEP 3. Making the peanut butter cups.
Remove filling from the freezer and cut into hearts that will fit the mold. This can be done free hand or with a cookie cutter (photos 7-8).
TIP: photo 6 illustrates how to check a cookie cutter size to the mold before using.
Push the filling gently into the chocolate (photo 8 background).
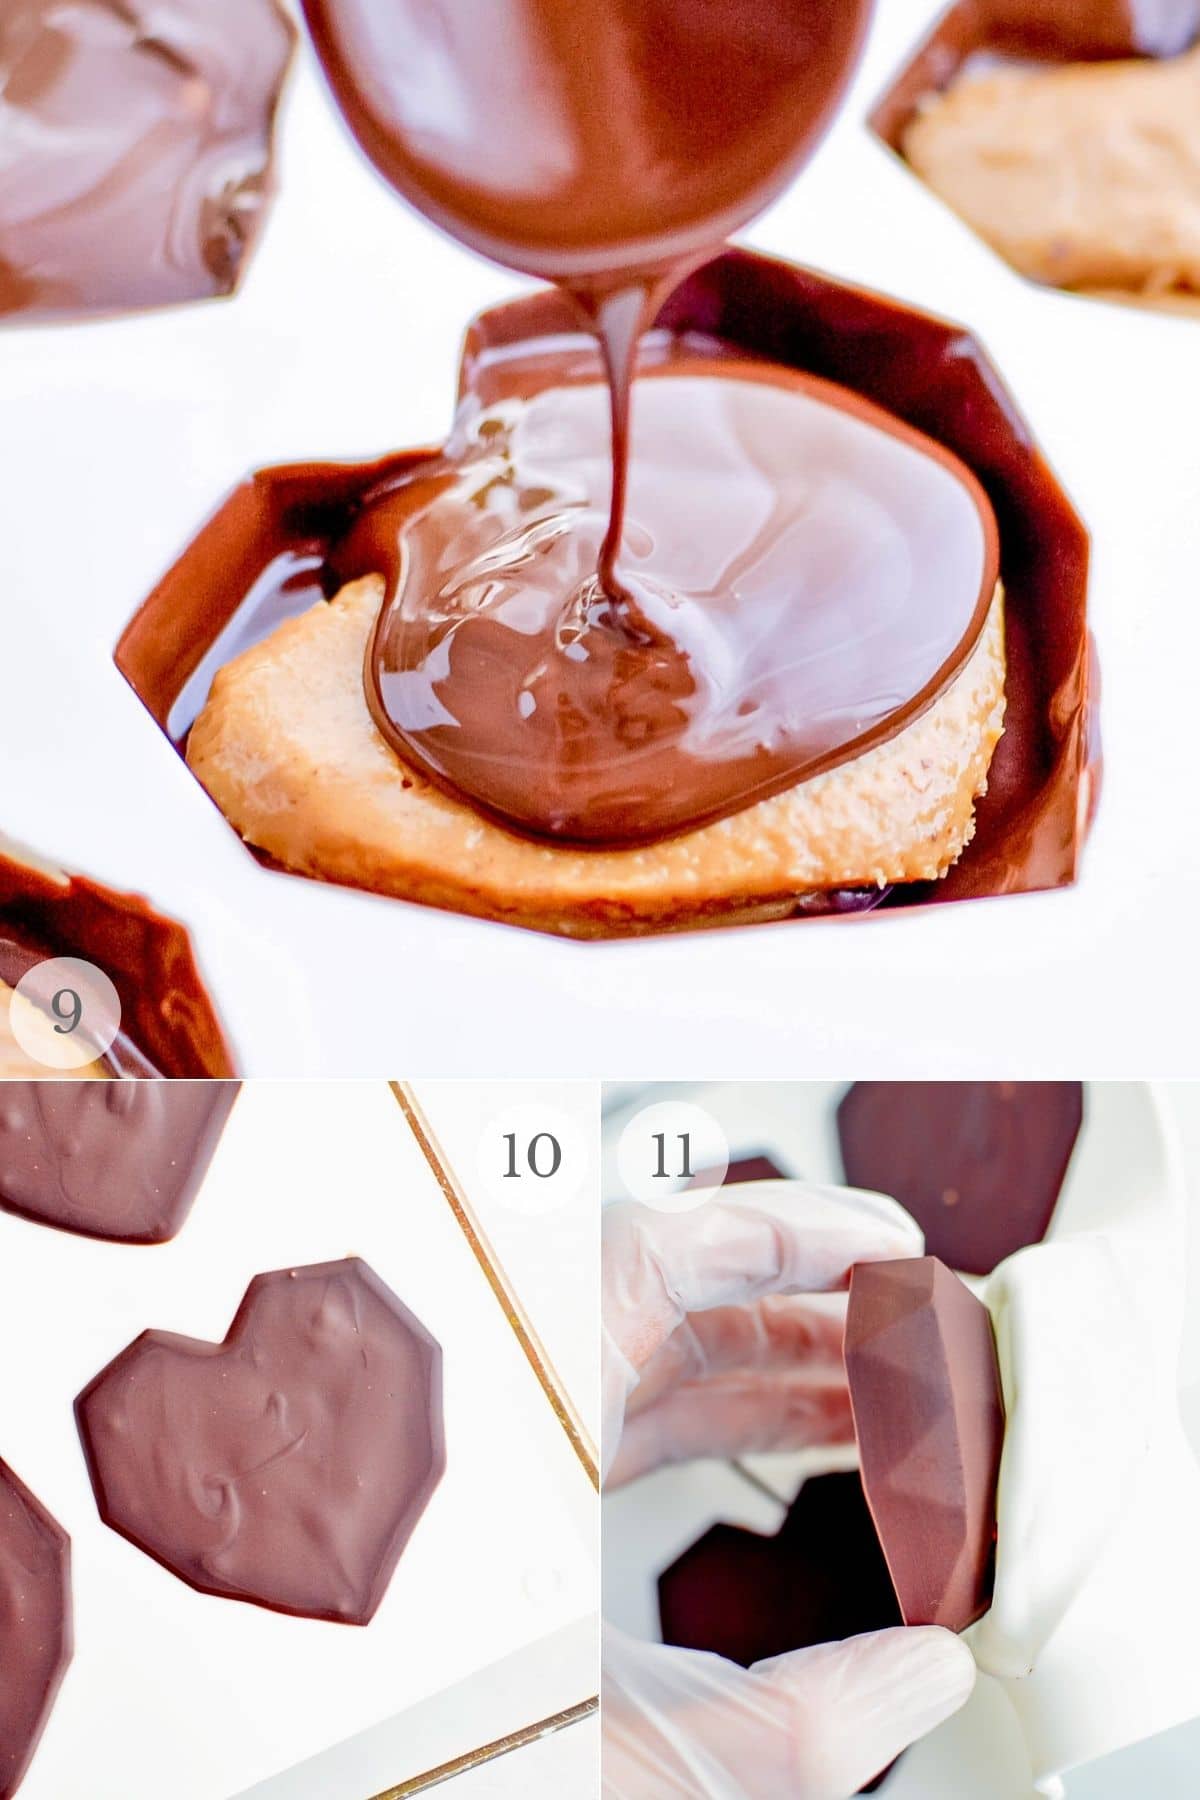
Pour some of the remaining chocolate into the molds (photo 9). Do not overfill or the back of the peanut butter cups will not be flat (photo 10).
STEP 4. Chill and remove.
Place the mold in the freezer (recommended) or refrigerator for 20 minutes until the peanut butter cups are set.
Gently remove (photo 11) and decorate with more chocolate and sprinkles if desired.
FAQ’s + Pro Tips
Working with chilled peanut butter filling is easiest. Letting the filling sit in the freezer makes it easier to work with. It is softer and stickier at room temperature.
Do these taste like Reese’s Peanut Butter cups?
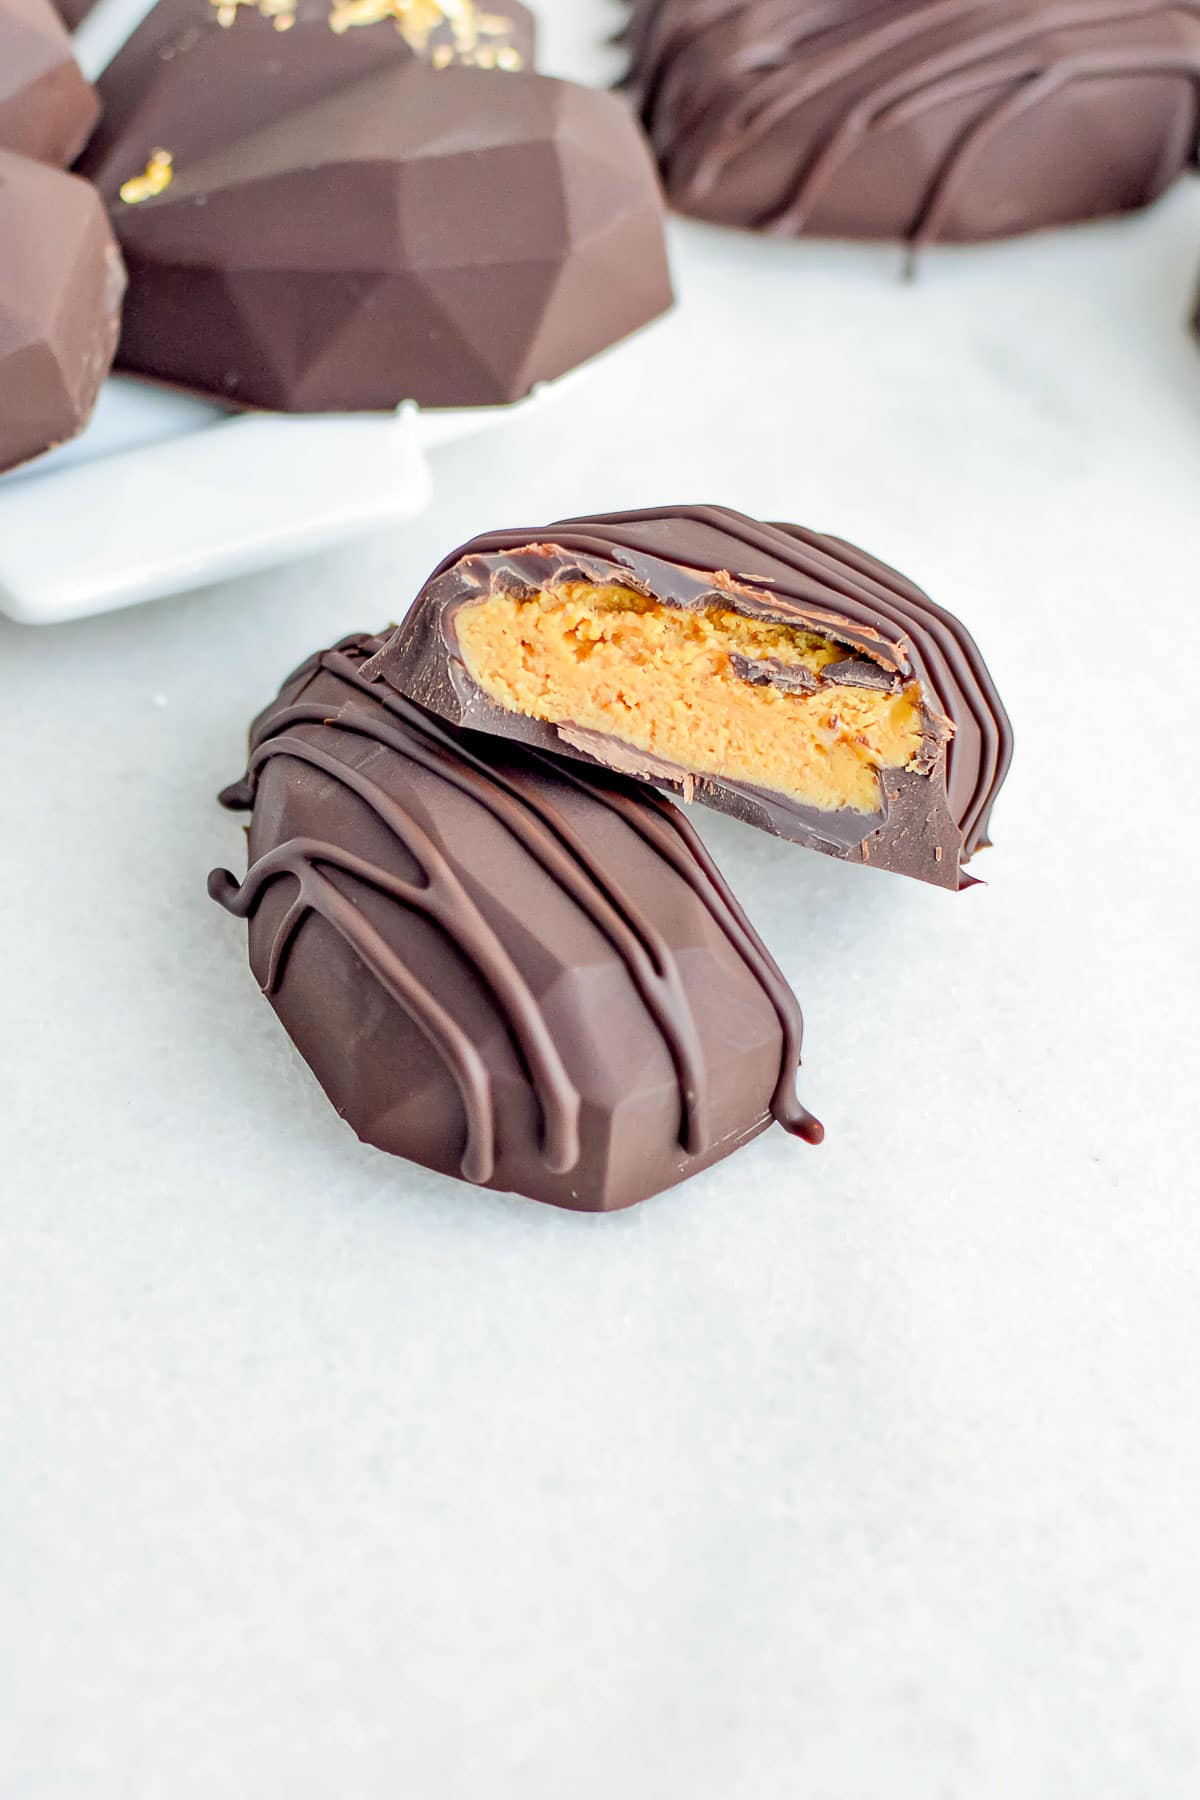
They are similar but not an exact copycat. These homemade peanut cups use dark chocolate versus Reese’s which use milk chocolate.
The peanut filling is not as dry in texture thanks to using …..
Do I have to use Natural Peanut Butter?
Natural peanut butter was definitely just a preference. It is moister than non-natural peanut butter so if substituting the powdered sugar amount may need to be decreased slightly.
For a texture closer to a Reese's peanut butter cup, having a dryer mixture will have a slightly crumbled texture.
Is the 6 ounces of peanut butter a weight or volume measurement?
Weight!
How to Store them
Store in an airtight container for up to a week.

More Recipes You’ll Love!
- Peanut Butter Oatmeal Sandwich Cookies
- Apple Peanut Butter Sandwiches
- Hidden Heart Valentine's Pound Cake
- Rose Marshmallow White Chocolate Oven S'Mores
- Valentine’s Hot Chocolate Bombs
Please SUBSCRIBE and FOLLOW ME on FACEBOOK , TWITTER , INSTAGRAM and PINTEREST !
Recipe
Heart-shaped Peanut Butter Cups
Ingredients
Peanut butter cups
- 1 1/2 cups dark chocolate candy melting wafers divided; so you have some to drizzle on the top after as well
- 6 ounces smooth-texture natural peanut butter see notes
- 3 1/2 tablespoons powdered sugar
- 1 pinch quality sea salt or kosher salt
- 1 teaspoon pure vanilla extract
Optional toppings
- Tiny nonpareils
- Additional dark chocolate for drizzling
- Edible gold leaf sheets
Instructions
Making the peanut butter filling
- Mix the peanut butter, powdered sugar, salt and vanilla until smooth.
- Fold a piece of parchment paper in half. Transfer the peanut butter to one half, fold the other side of the paper over so the peanut butter is in the middle of the two sheets.Smooth the peanut butter mixture to an even ½ inch thickness.
- Set the parchment with the peanut butter filling in the freezer for about 20 minutes. NOTE: it is easier to work with frozen peanut butter.
Making the chocolate molds
- While the peanut butter mixture is chilling start on the chocolate mold portion.
- Melt the chocolate wafer to package instruction. Place the silicon heart mold on a baking sheet or plate to stabilize it before adding the chocolate.
- Add some chocolate to the heart molds, carefully smooth it into each corner of the heart molds with a small rubber spatula. Reference the process photos above.NOTE: to ensure to create a solid, even coating (necessary), carefully check the coating from every direction to ensure no spot has been missed.
- Leave the mold with the chocolate out at room temperature while the filling chills.NOTE: there will be chocolate leftover which is used to fill the back of the mold over the filling and drizzling for final decoration.
Making the peanut butter cup hearts
- Remove the filling mixture from the freezer. Cut out hearts free hand cut or use a cookie cutter sizing them to easily fit into the center of the chocolate hearts.
- The chocolate in the molds will not be set. The peanut butter filling hearts should easily push into the chocolate.Press them in so they are inside the mold fully but not so far that they will press through the chocolate on the bottom of the mold. If so they would penetrate the exterior layer of chocolate that will be the top of the peanut butter cup.
- Pour the rest of the chocolate over the filling and carefully smooth out so the chocolate evenly fills all of the space around and over the peanut butter filling. Do not overfill.
- Set into the refrigerator or freezer (recommended) to set. Chill for about 20 minutes.
- Gently remove the completely solid hearts from the mold. TIP: to avoid fingerprints wear food safe gloves.
- Set the hearts onto the same cold/frozen tray that the silicone mold was on in the freezer.
- Use the remaining melted chocolate to drizzle over the top of some or all of the hearts as desired. Sprinkles or nonpareils can be sprinkled into the chocolate.
Adding gold leaf (optional decoration)
- For an extra fancy touch, consider adding some gold leaf. After any chocolate drizzle is set determine the location for the gold leaf.
- Using food safe tweezers pick up some of the gold leaf. Add a tiny water droplet in the location where the gold leaf will be placed. NOTE: gold leaf needs liquid to adhere but too much water will negatively affect the chocolate's appearance.
- Add the gold leaf and very gently smooth with the tweezers. One it has been adhered it will be secure through any temperature changes or storage conditions.
How to Store
- Store in an airtight container for up to a week.
Notes
- Heart Mold
- Dark Chocolate Melting Wafers
- Parchment paper sheets
- Chocolate handling gloves. To avoid fingerprints on the finished chocolate you can use food-safe gloves or actual chocolate handling gloves.
- Tiny white nonpareils
- Edible gold leaf
- Culinary tweezers. You'll need some to handle the gold leaf.
- Natural peanut butter is moister than processed peanut butter. If using natural peanut butter ensure if it had separated that it is completely stirred to combine be starting the recipe.
- Processed peanut butter can also be used. The powdered sugar amount may need to be reduced.
- The peanut butter type used should be smooth texture (not chunky).
- It is easier to work with frozen peanut butter mixture which is our recommendation. You can make the filling without the freezer step it will just be a little bit harder to work with.
- The 6 ounces of peanut butter is a weight not a volume measurement.
wilhelmina says
Love these! They are so much easier to make than I thought they would be. I can’t wait to surprise my family with these!
Erin says
These Peanut Butter Cups disappeared in our house! I have to make another batch now.
LAUREN KELLY says
These are so delicious! And perfect all year long!
Wanda says
I love this recipe!! They turned out so good. Peanut butter and chocolate are my fave combo.
Avery says
I love your step by step pictures. You make it so easy and the finished product is beautiful. I did a test run and they turned out great! I am definitely making these again for my kids for Valentine’s Day!
Mary says
These turned out SO pretty! I was worried I couldn’t do it but they were really easy.
Natalie says
Love the dimensions! Peanut butter & chocolate together is my favorite combination! They are a fun & yummy Valentine treat!
Matt Taylor says
hahaha aweseome, Toni! I was just thinking about making some of these. I have a different heart-shaped mold, so fun and easy to make!
Claudia Lamascolo says
This is just perfect timing I just bought hearts molds seriously and I was going to make ice cubes with them because I had no idea what to use them for! your the best and this is the husband favorite candy Thanks so much Toni!
Rebecca says
I absolutely love peanut butter cups and the idea that I can make them myself is mindblowing! I tried the recipe yesterday and they came out so cute. I can’t wait to make them again for gifts. Bookmarking this for sure.