

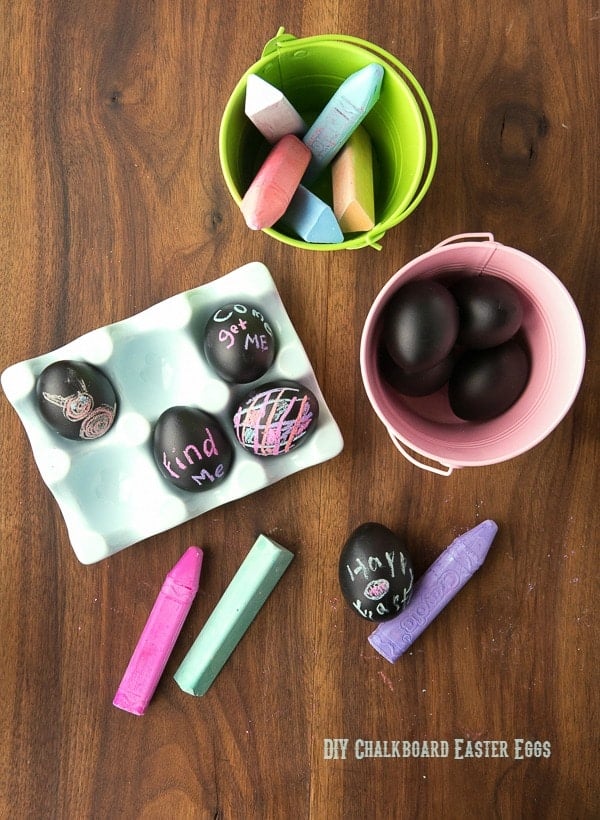
Making DIY Chalkboard Easter Eggs is a fun holiday craft and a unique addition to Easter egg hunts. They can be personalized for table decor as well as to deliver special messages!
I've spent most of my Easters like everyone else; dying eggs in little colored plastic cups with unwieldy wire dippers. As a child I loved watching the pellets fizzing like Alka-Seltzer in the brightly colored plastic dying cups which reeked of vinegar.
I loved that the dingy colored dye buttons often dazzled by turning the water into a completely different color than their drab, dry appearance let on. When newer dyes no longer required vinegar but could be used solely in water I thought we'd met an Easter revolution! Really, I did not think decorating eggs could reach a higher plane. Boy, was I wrong.
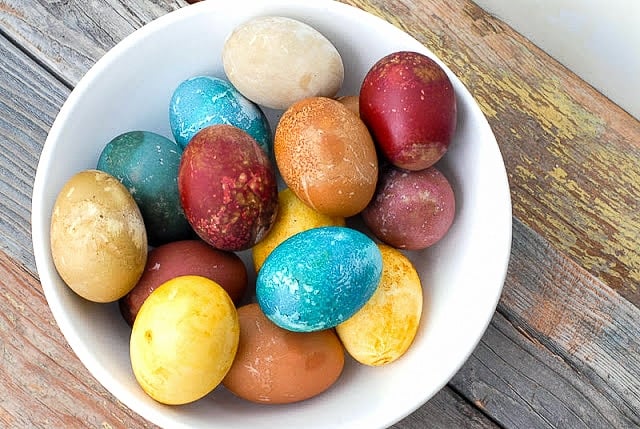
Four years ago I decided to experiment with a long time desire to dye eggs with natural foods. I am not recalling the genesis of my interest, perhaps to merely push the Easter egg coloring envelope.
I researched feverishly, as is my nature when taking on new projects and created a set of dyes from foods and spices. I decided if I was this excited others might be too and shared all the details on my relatively new blog.
Perhaps the most exciting outcome was that Ree Drummond (aka The Pioneer Woman) who was a mega food blogger at the time (this predated her stardom on the Food Network) shared the link on a 'Things I Love' list and I received over 5,000 pageviews.
At the time I probably had about 4 ½ readers so I felt sure that was the pinnacle of my blogging success and I could retire happy and feeling popular. Fortunately I persevered.
The following Easter I just could not go back to the ordinary egg dying (though my family did that as well). I felt the challenge to discover yet another different way to decorate the star of the Easter festivities.
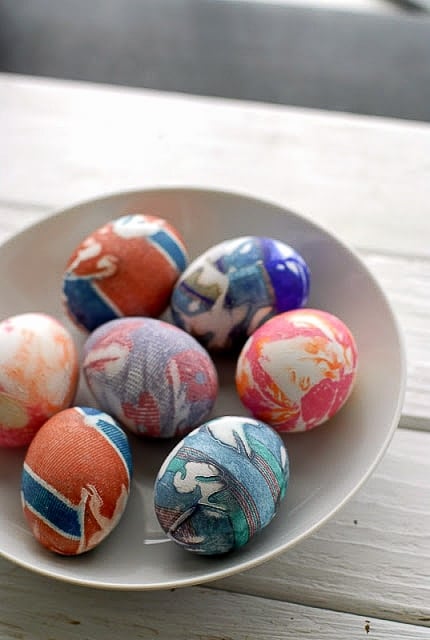
As luck would have it, a beloved Middle School teacher of my daughter's at the time shared a method her mother and grandmother had used for dying eggs with silk neckties. After several thrift store runs and rummaging through my fabric bins I created a number of the silk dyed eggs to the delight of my kids, Mrs. Kapsak (the teacher) and Boulder Locavore readers.
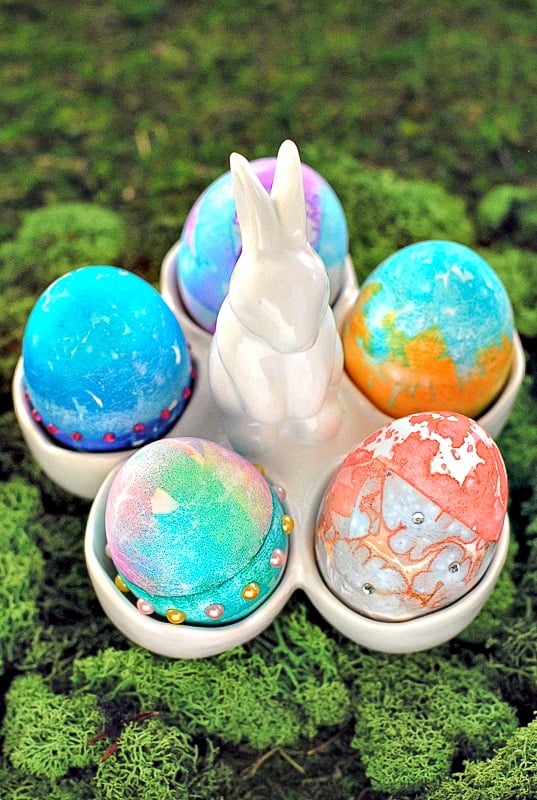
The pressure was then on for Easter 2013 and of course I could not go backwards. This year was big fun dying eggs with bleeding artisan tissue paper to make Stained Glass Easter Eggs.
A very easy and colorful method, the tissue is placed on a moistened hard-boiled egg and then sprayed with water. Once the paper dries it is removed leaving the pigment behind. I opted to also bling mine out with small scrapbook rhinestone stickers…like a Liberace wannabe.
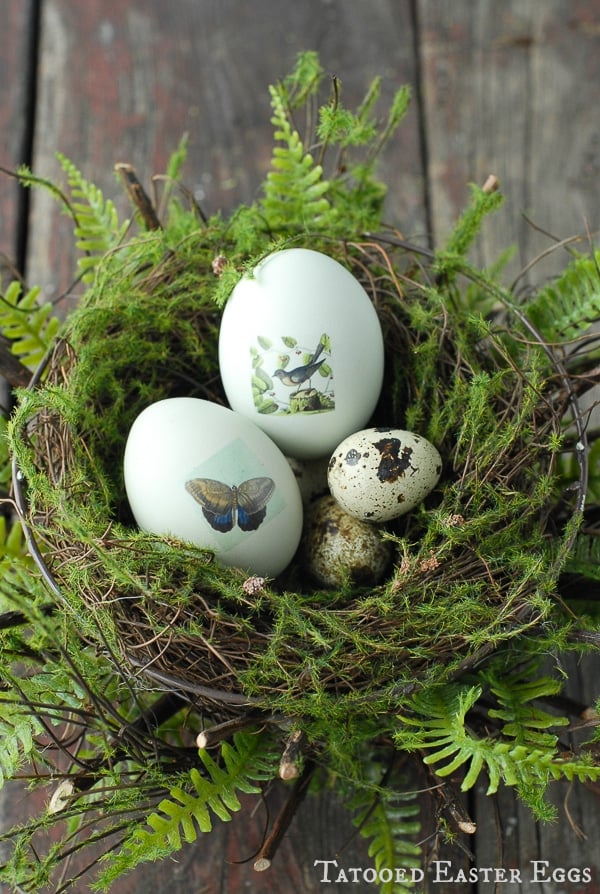
Last year I wanted to create a more organic feeling theme in my Easter eggs and made Tattooed Easter Eggs with homemade tattoos. I found a source on Etsy (multiple sources actually) selling small tattoo sized images for collage art which I promptly snapped up and converted into nature tattoos for egg decorating. I was able to find naturally blue eggs which made them all the more special. They were really sweet looking and I loved them.
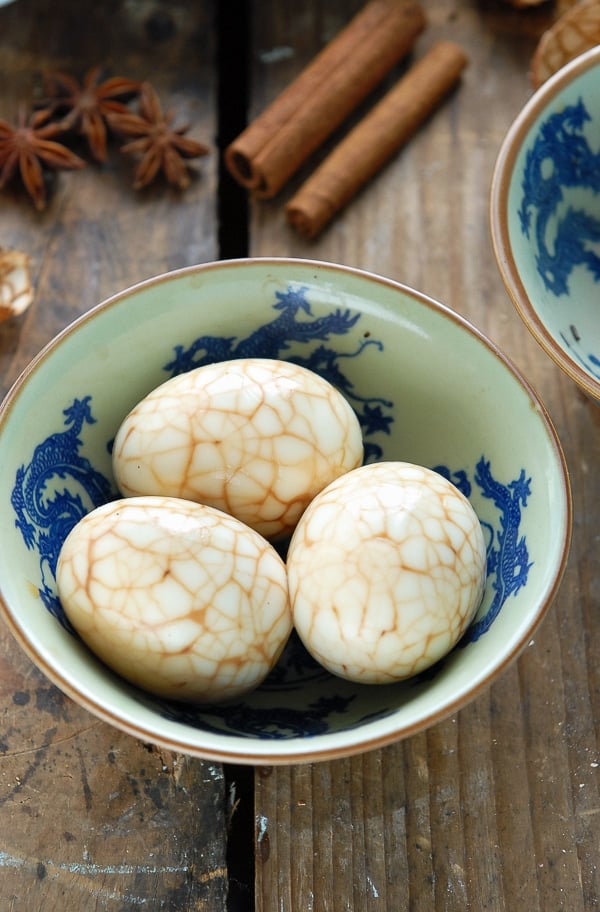
I was sure approaching this Easter I could not think of anything original. I recently shared a Marbled Chinese Tea Egg recipe for Chinese New Year that creates wonderfully marbled patterns on the flesh of the hardboiled egg after soaking.
They certainly could make a wonderful addition to the Easter table and the soaking liquid could be changed to one of the colorful natural eggs dyes to make the marbling colorful. But that technically would not qualify for egg hunting.
How to make DIY Chalkboard Easter Eggs
Much to my own surprise I have two methods to share this year. The first I'm sharing today is for Chalkboard Easter Eggs. Perhaps a vision from a new can of chalkboard spray paint on hand but I had to give this one a go and am so glad I did.
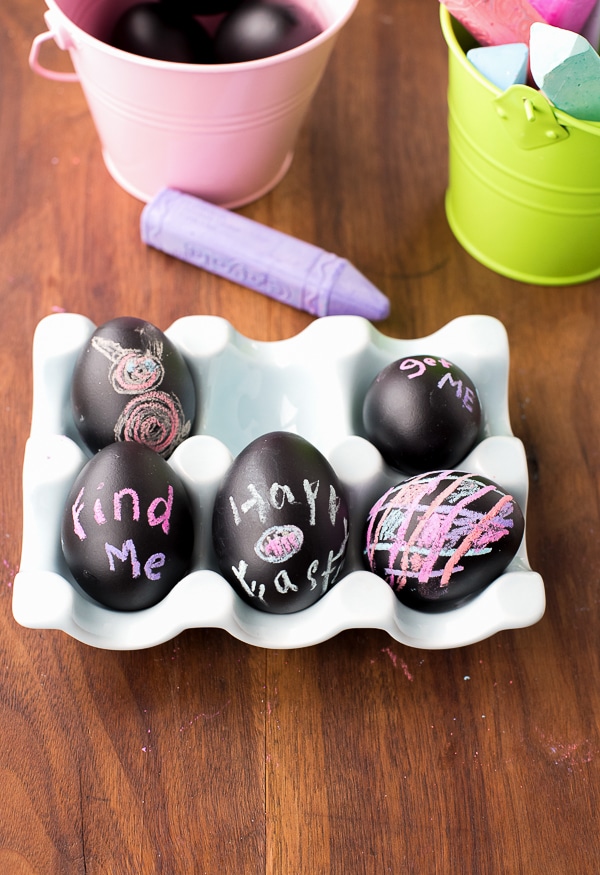
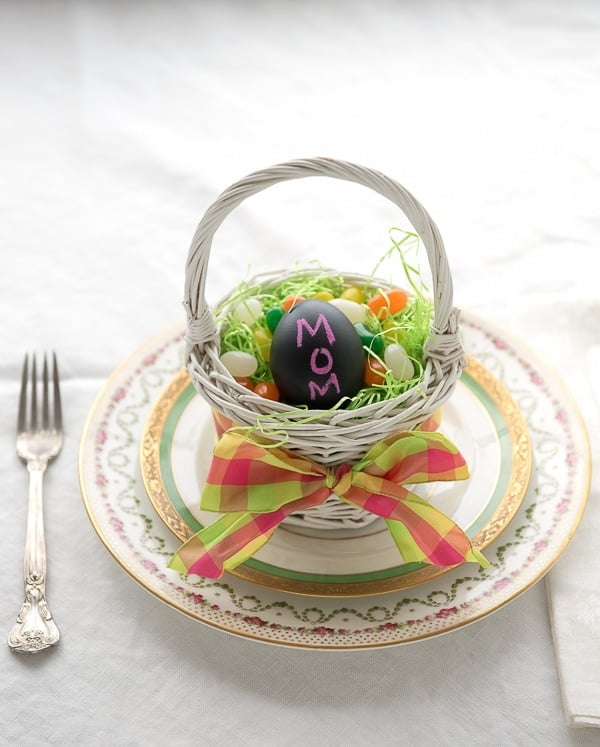
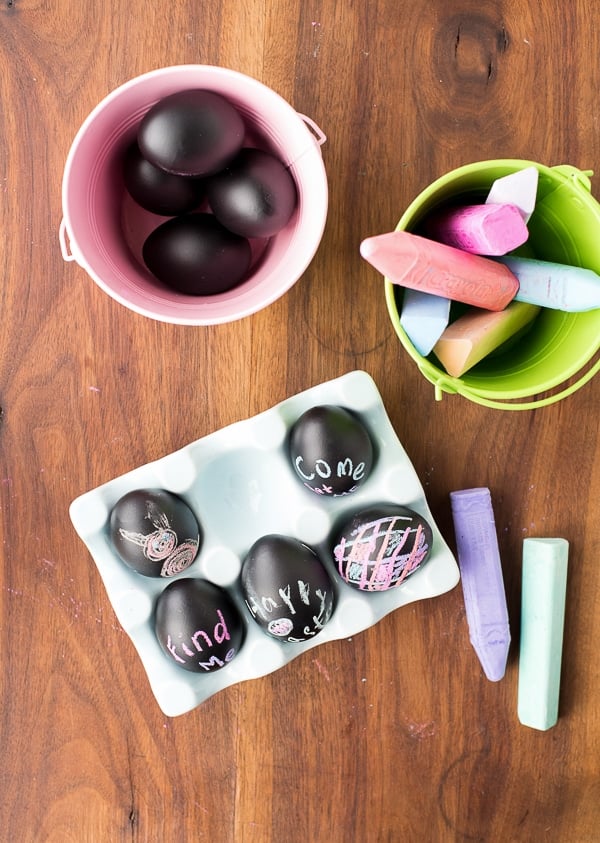
Hardboiled eggs are spray painted with chalkboard paint (with some tips) and once dry can be filled with messages for eggs hunters, or as a place card for an Easter meal. The eggs need to have time to dry between painting layers but can be made in a day with warm weather conditions.
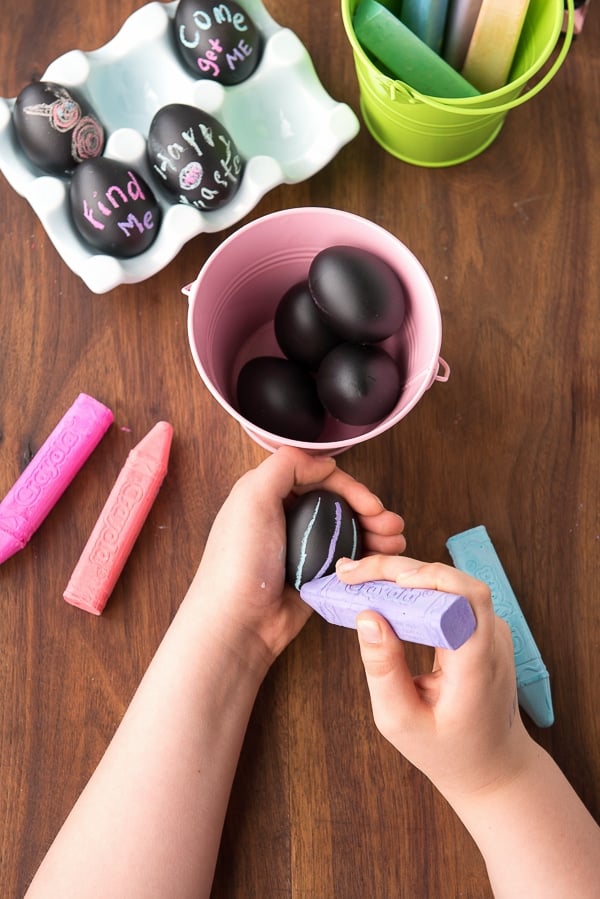
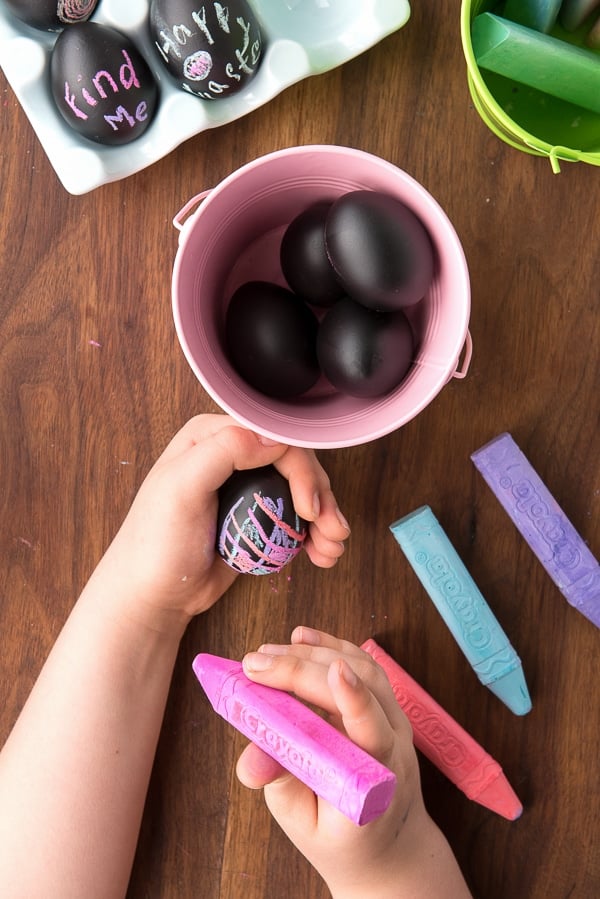
Though adults need to man the main part of DIY Chalkboard Easter Eggs (the actual boiling of the eggs and spray painting them), little hands will love to do the decorating with pretty chalk. I found Crayola sidewalk chalk was perfect with a pointed tip and brilliant colors that showed well on the DIY chalkboard eggs.
A fun option for Easter meal table place holders too!

Chalkboard Easter Eggs
Ingredients
- Hard-boiled Eggs (my favorite method below), cooled to room temperature
- 1 can Chalkboard Spray Paint (I used Krylon Chalkboard Paint purchased from Michael’s Crafts however it can be found wherever paint is sold and online)
- An old shoe box or show box lid
- Box cutter
- A quarter
- Black marker
- Newspaper or tarp to cover painting area
- Chalk to decorate the eggs (we found a type of Crayola chalk in the art section of a craft store that was brilliant in color and with a pointed tip for easy drawing and writing)
Instructions
- Favorite hard-boiled egg method: Add the eggs to a pot and fill with cold water (if the eggs are cold) or room temperature water (if the eggs have been sitting out) to cover the eggs plus 2 inches. There should be room for the eggs to move a bit; they should not been packed in together.
- Bring the water to a boil, and continue to boil for 20 minutes (it does not need to be a rolling boil that might knock the eggs against each other).
- If you plan to eat the hardboiled eggs (I do not recommend eating these eggs not knowing about the paint reaction with the inside of the egg), put the pot in the sink underneath the faucet and run a slow amount of cold water into the pan. Continue to run the water until the hot water has been replaced by cold (but slowly so the eggs won’t crack). Let the eggs sit in the cool water for about 20 minutes to fully cool before decorating. The cold water bath helps make the eggs peel more easily too.
- If you do not plan to eat the eggs, the eggs may be left in the cooking water to cool naturally or removed and left at room temperature to cool.
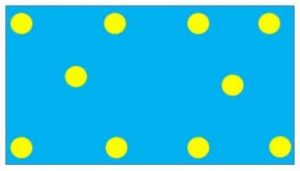
- Preparing the painting box. This method works well as it allows a small amount of the egg to sit in the box to keep it stable during painting but also makes the delineation between the painting unnoticeable when the eggs is flipped and painted on the opposite end. Using the quarter, trace around it with the black marker, starting in the corner of the box or box lid. Allow approximately 4 inches between each circle for plenty of painting room. Here is an example pattern based on a standard 12-inch by 7-inch shoebox; modify as needed for your box or lid size:

- Using the box cutter cut out the circles.
- Put out the newspaper or tarp to protect the area where you’ll be painting and put the prepared box with holes in the center of the area. Place eggs gently on the holes in the box.
- Prime the chalkboard paint as instructed on the canister (usually shaking the can for a recommended period of time). Making short sweeping strokes 6-8 inches away (or the distance suggested on the paint canister) cover the exposed area of the eggs, shaking the can in-between painting bursts. Do not overcoat or there will be drips. The eggs will be coated twice on each side; any missed spots can be painted on an upcoming layer. Allow to dry fully (depending on the weather conditions usually a few hours or consult the paint canister).
- Second coat Prime the paint canister and once again make sweeping burst of paint onto the egg, shaking in between. Look for any spots missed on the first painting, toward the base of the egg for instance. Allow to dry fully.
- Flip the eggs over and paint over the spot left in short bursts, shaking the canister in between. Allow to dry and repeat. It works better to do it in two coats to fully cover the egg rather than one heavy coat which will produce dripping. Allow the eggs to dry fully and then decorate with chalk!
Angela {Mind Over Batter} says
This has to be the cutest method I’ve ever seen!! My Moonbug would love this!
Lauren @ Wicked Spatula says
Too cute! I colored eggs yesterday using leftover vegetable scraps for my Healthy Living Tuesday post next week. I felt like a little kid again! Coloring eggs are fun at any age!
Barrett @dirtylaundrykitchen.com says
I came to look at the chalkboard eggs, but I love so many of the different egg ideas you have here. I love dying eggs and do try to change things up over the years! Great ideas.
Anne-Marie @ This Mama Cooks! On a Diet says
I’m wondering if you could make plaster Easter eggs and then cover them in the paint? Wonder if the paint would dissolve the plaster though. Hmmmm. Maybe after Easter is over, you should hunt up some wooden eggs in the craft stores for a more permanent solution!
Toni Dash says
I actually have another decorating method coming next week for which I used dyeable craft eggs. They are plastic but I think a bit more porous (you cannot see that part). I tried them for this but the force of the spray paint kept knocking them off the platform. I think wood eggs are a great idea. Will have to keep my eyes open for some! Thanks for the idea.
heather @french press says
Oh my! you make me feel like a slacker mom 🙂 your eggs are gorgeous
Joanie @ ZagLeft says
This is such a fun and unique idea and they would make lovely “placecards” at the dinner table. I’ve gotten away from dyeing eggs since my kids have gotten older but this would make it fun again – something my kids would doing along with me.
Marye says
I love the idea of using the eggs as placecards at the table! Now I am going to have to go back and check out ALL of the posts on eggs. I used to be very creative with holidays but I’ve let that slide so much in the past few years. :/ Pinning!
Marjory @ Dinner-Mom says
Such a fun idea! I think my teen girls would love this!