
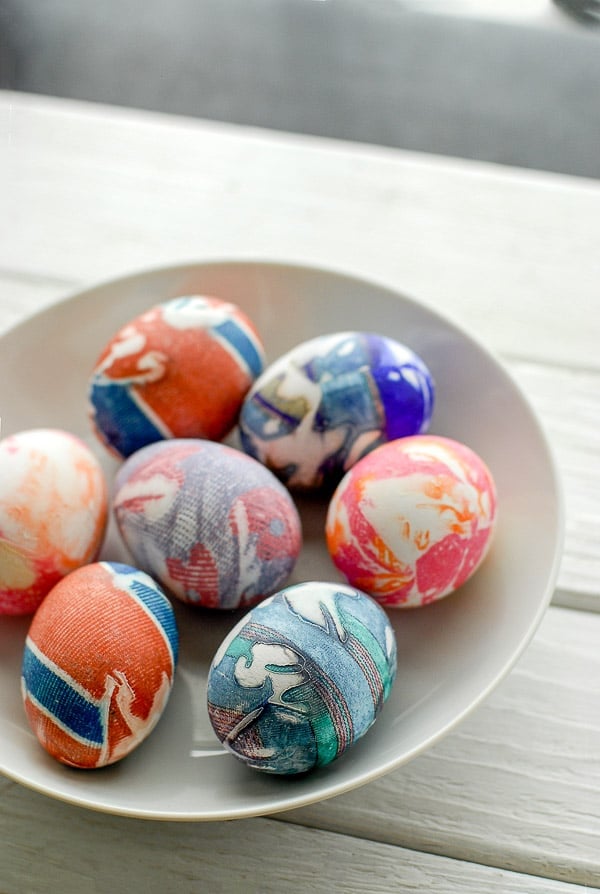
Silk Dyed Eggs are beautiful and fun to make. Perfect for Easter!
Last spring my daughter came home from Middle School brimming with excitement over a special Easter egg recipe her beloved World History teacher had shared.
It was from the teacher's family and the only method she now uses to make her Easter eggs.
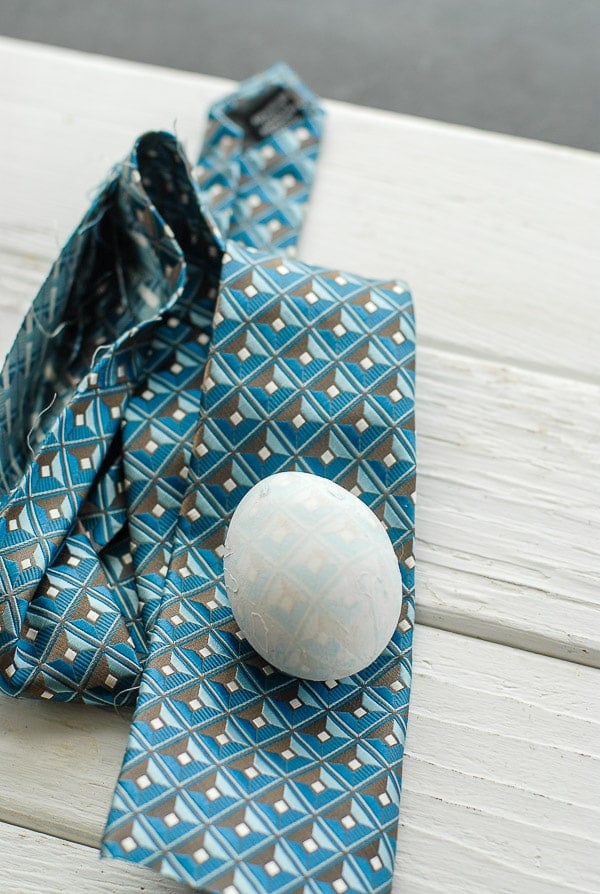
The intriguing part was the source of the dye is silk neck ties.
Having never heard of such a thing I logged it for this year feeling it was a 'must try'.
After making naturally dyed Easter eggs exclusively from food and spices last year, reverting to flimsy egg dying boxed kits seemed out of the question.
The Background of Silk Dyed Eggs
A month ago I contacted the teacher asking if we might try her recipe and if she'd be willing for me to share it on my blog.
I must step back and say this teacher is completely enchanting. To even receive an email from her and be bathed in a few sentences of her prose is like the sun coming out on a dreary day.
I feel sure Cheryle Kapsak is one of those handful of teachers students not only still remember when they are 30 years old but will remember in a way as though it was only the day prior they were in her classroom.
She's the kind of teacher you could imagine teaching at an Ivy League University as well as Hogwarts School (a la Harry Potter) but are grateful daily she teaches your child in Middle School.
Cheryle responded as only she can, enthusiastically, not only agreeing but thanking me on behalf of herself as well as her Grandmother Mary from her dairy farm in St. Ignatius Montana from whom this recipe was originated in her family.
She went on to share "In addition to dying these eggs for Easter, the women in St. Ignatius also took these eggs as baby gifts along with dinners, cookies, etc. to new mothers and to those ill or recovering from farm accidents.
I think that like quilting and tatting the eggs provided a creative outlet in lives filled with 7 day a week hard work just to keep things going."

SILK DYED EGGS
Though Silk Dyed Eggs are usually made with neckties though through some trial and error in my kitchen I discovered other types of silk will work, as well as not all silk transfers equally.
I made what seemed a brilliant move by ordering a lot of 100% silk ties from Hong Kong on eBay (though fortunately had picked some up at Thrift Stores as well) only to realize when making the eggs the ties were not actually silk and transferred no dye to the eggs.
This left me under the gun, pulling out some tie silk fabric as well as other types of silk I had from sewing projects.
Fortunately they worked.
Silk Tips for Silk Dyed Eggs
- I found the more intense the color in the silk the better the result.
- The more textured tie silk also seemed to transfer more color as well as texture.
- Some ties transferred their pattern though very subtly only.
- I don't recommend Thai or raw silk.
- 100% silk neck ties, silk neck tie fabric, blouse silk all work well.
- Also I attempted a few ties that were silk though had been treated for stain resistance and they did not transfer much dye.
- Shop for neckties or blouses at Thrift Stores for inexpensive options to deconstruct for this project.
- Lastly, I noted where I did not ensure the silk was snugly wrapped on the egg a white spot was left which I actually liked. I felt the eggs looked very primitive and batiked. I'm sure if you wrap the egg oh-so-snugly and then wrap the muslin you would have more overall coverage.
Silk Dyed Eggs – SUPPLIES/INGREDIENTS
- White raw eggs at room temperature (in the quantity you desire to dye)
- White vinegar (see instructions to determine the amount you will need)
- Enamel or glass saucepan or stock pot (only slightly larger than the number of eggs you will dye)
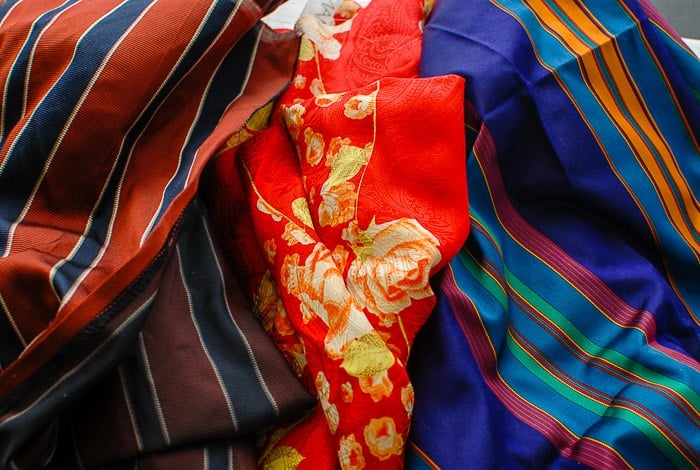
- 100% brightly or vividly colored silk neck ties (or silk blouse fabric)
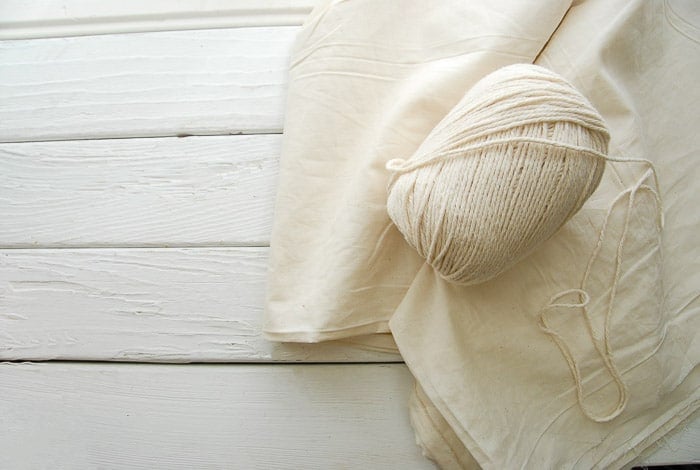
- Muslin or tight weave cheesecloth in the same amount of tie fabric you'll use
- Cotton string
- Large baking pan
- Old towel (or paper towels)
- Tongs
- Scissors
- Egg carton
How to Make Silk Dyed Eggs – Step by Step
Instructions can be printed out via the recipe card below.
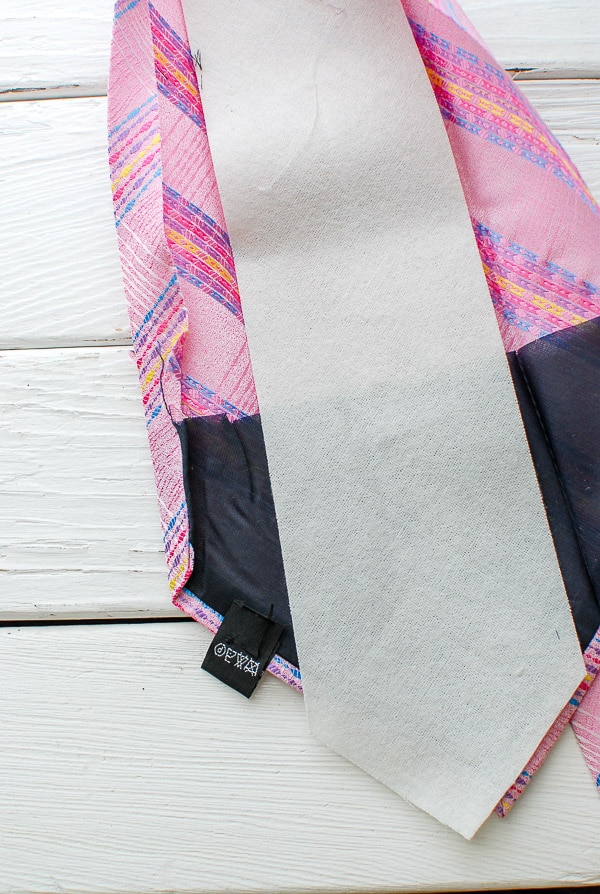
- STEP 1: Cut open neckties at the inside seam. Remove all lining and discard. Iron open the tie from the wrong (inside) of the fabric.
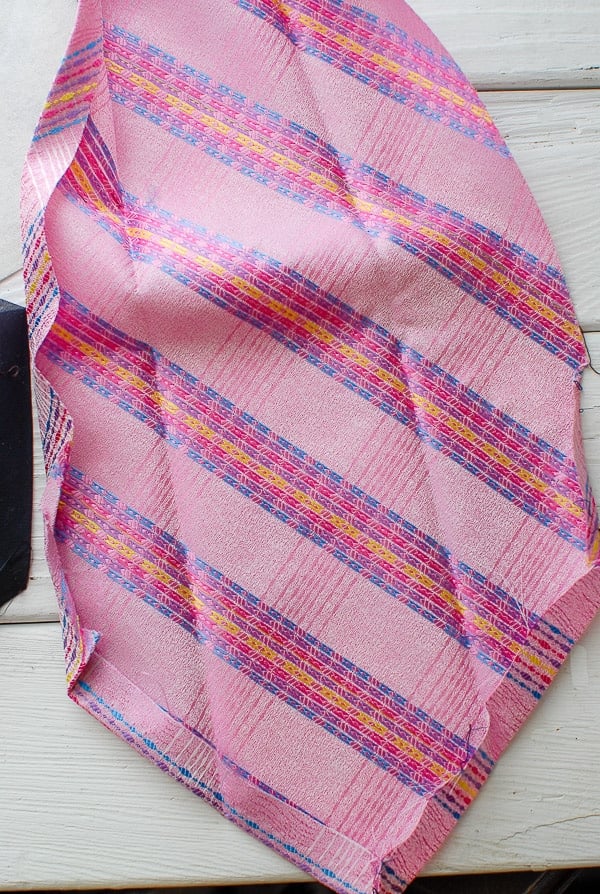
STEP 2: Cut out squares of silk fabric and muslin enough to fully cover the egg and be able to be tie closed on top. My squares were between 5-6" and were by no means 'perfect'. I eye-balled the size needed.
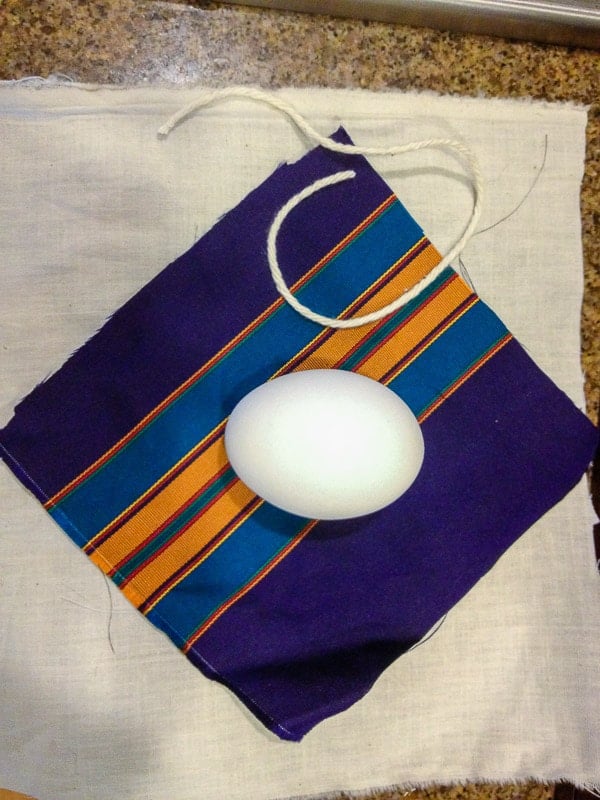
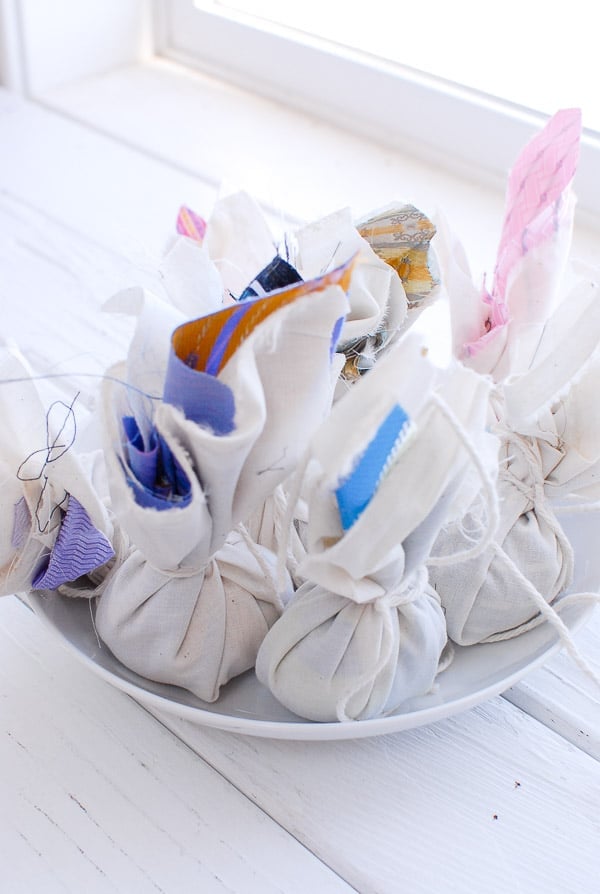
STEP 3: Place a square of muslin onto a countertop or table. Lay on top of that a square of silk with the right said facing up. On the right side of the silk square place one raw egg. Carefully wrap the egg in the silk, trying to keep the silk as smooth to the egg as possible, and then muslin, tying the top snugly closed with a length of cotton string.
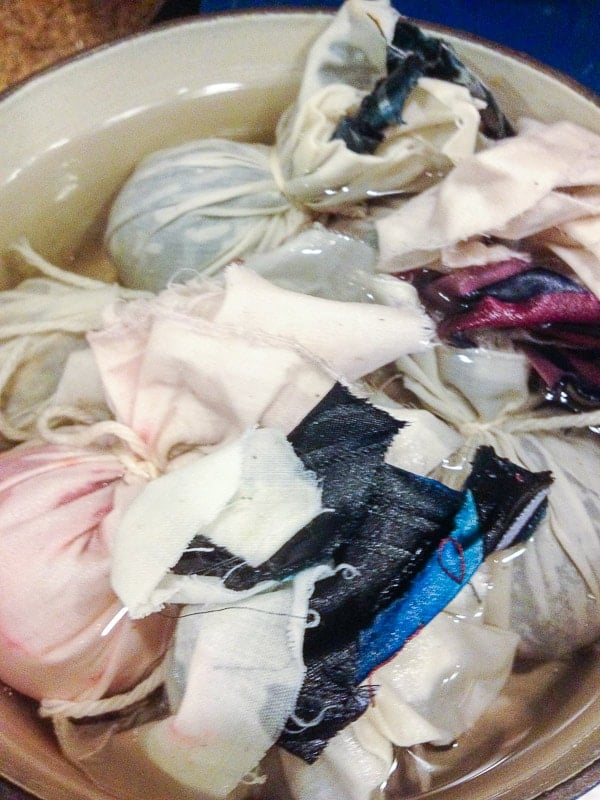
STEP 4: Select an enamel or glass pot tall enough to allow eggs to be covered with liquid as well as large enough in diameter that the eggs will rest close to each other but not be smashed in.
STEP 5: Place the eggs in the pan and add 50% white vinegar and 50% warm water enough to cover the eggs but not much more so the eggs do not float.
STEP 6: Boil the eggs gently for 45 minutes with the pot partially covered. In a second sauce pan warm an additional amount 50% white vinegar/50% water to replenish the egg pot if evaporation reduces the water volume during boiling (just add it to the egg pot if needed).
STEP 7: While the eggs are boiling, line a large baking pan with an old towel or several layers of paper towels. Also ensure the tongs, scissors and egg carton are nearby
STEP 8: Once the eggs have completed boiling, remove each one by one with the tongs and place in the towel-lined baking dish to cool fully. When cooled, cut the string with the scissors, carefully peel off the muslin and silk. Allow the egg to dry fully in the egg carton, being careful not to smear the transferred dye when the egg is still wet. Discard the used silk and string; the muslin can be reused for another dying.
STEP 9: Once cooled you can rub the egg gently with cooking oil for a bit of a shine or leave it as is. Refrigerate until using them for egg hunting. Note: some of my eggs emerged with slight indentations though were still fine for egg hunting. As a precaution the dyed eggs should be used for decorative purposes only (do not eat them).

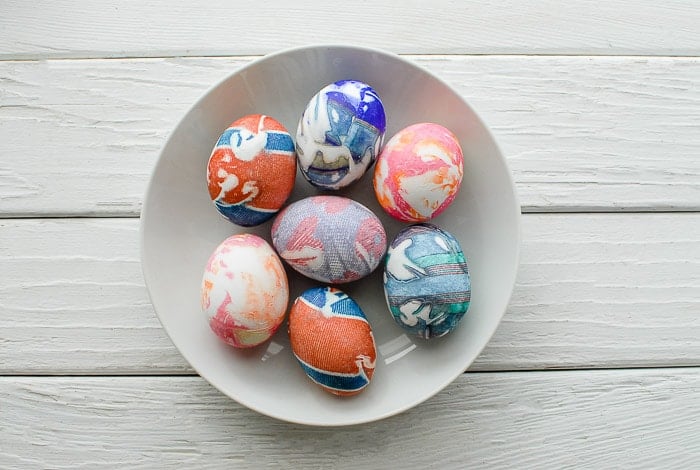
Silk Dyed Eggs
Ingredients
- White raw eggs (room temperature) in the quantity you desire to dye
- White vinegar see instructions to determine the amount you will need
- Enamel or glass saucepan or stock pot only slightly larger than the number of eggs you will dye
- 100% brightly or vividly colored silk neck ties or silk blouse fabric
- Muslin or tight weave cheesecloth in the same amount of tie fabric you’ll use
- Cotton string
- Large baking pan
- Old towel or paper towels
- Tongs
- Scissors
- Egg carton
Instructions
- Cut open neckties at the inside seam. Remove all lining and discard. Iron open the tie from the wrong (inside) of the fabric.
- Cut out squares of silk fabric and muslin enough to fully cover the egg and be able to be tie closed on top. NOTE: My squares were between 5-6” and were by no means ‘perfect’. I eye-balled the size needed.
- Place a square of muslin onto a counter top or table. Lay on top of that a square of silk with the right said facing up. On the right side of the silk square place one raw egg. Carefully wrap the egg in the silk, trying to keep the silk as smooth to the egg as possible, and then muslin, tying the top snugly closed with a length of cotton string.
- Select an enamel or glass pot tall enough to allow eggs to be covered with liquid as well as large enough in diameter that the eggs will rest close to each other but not be smashed in.
- Place the eggs in the pan and add 50% white vinegar and 50% warm water enough to cover the eggs but not much more so the eggs do not float.
- Boil the eggs gently for 45 minutes with the pot partially covered. In a second sauce pan warm an additional amount 50% white vinegar/50% water to replenish the egg pot if evaporation reduces the water volume during boiling (just add it to the egg pot if needed).
- While the eggs are boiling, line a large baking pan with an old towel or several layers of paper towels. Also ensure the tongs, scissors and egg carton are nearby
- Once the eggs have completed boiling, remove each one by one with the tongs and place in the towel-lined baking dish to cool fully. When cooled, cut the string with the scissors, carefully peel off the muslin and silk. Allow the egg to dry fully in the egg carton, being careful not to smear the transferred dye when the egg is still wet. Discard the used silk and string; the muslin can be reused for another dying.
- Once cooled you can rub the egg gently with cooking oil for a bit of a shine or leave it as is. Refrigerate until using them for egg hunting. Note: some of my eggs emerged with slight indentations though were still fine for egg hunting. As a precaution the dyed eggs should be used for decorative purposes only (do not eat them).

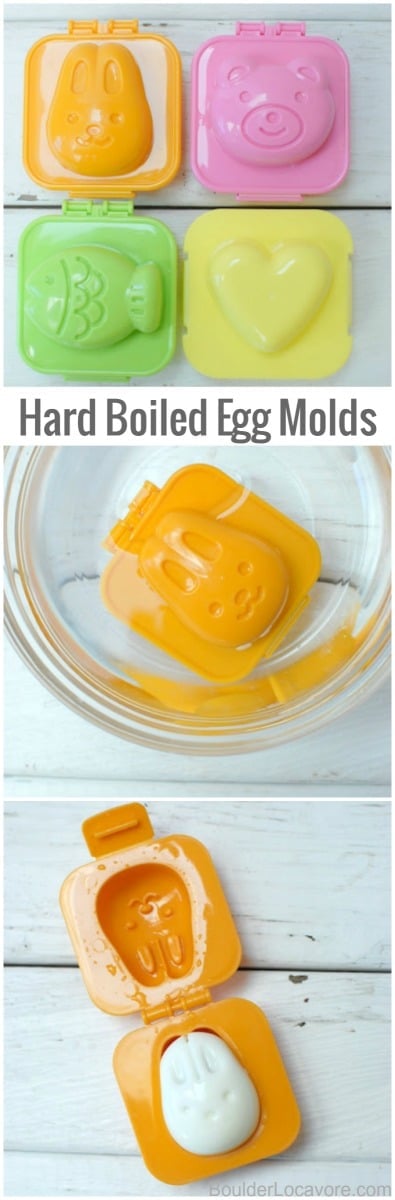
WHAT TO DO WITH ALL THOSE HARD BOILED EGGS?
I for one love the egg aftermath of Easter really indulging in Egg Salad sandwiches for the only time during the year I do. I recently ran across a series of hard boiled egg molds by Kotobuki intended for Bento lunches and bought them all feeling what could be more happy-making than having an egg bunny in your lunch?
The molds are very easy to use. A hard boiled egg is placed inside a mold (the mold package will instruct visually on the direction to place the egg), the mold is closed and placed in cold water for 10-15 minutes and out pops the bunny. A fun and different way to use up the hard boiled Easter Eggs.


lulu says
cool
kita says
These beautiful eggs blow my little dollar store kit out of the water. The patterns and colors transfer beautifully. Also, I love how you spoke of the teacher. Teachers that inspire such enthusiasm from both the parent and the child are so hard to come by (at least where I went to school) and I smile whenever I hear of one doing an exceptional job.
Erika says
These are lovely, but I have to wonder if they are safe to eat? If you buy your materials second-hand, who knows what kind of chemicals (as in dry-cleaning chemicals) they might contain. I would worry they might leach into the eggs.
Boulder Locavore says
Hi Erika. Grandmother Mary's granddaughter who supplied me the instructions indicated they are safe to eat but must be refridgerated. Having said that I think one always needs to abide by their own personal cautions and if you are concerned as you describe make a choice of what is right for you. I did share some of the eggs I made emerged with small inward dimples where the egg shell had caved in and I recommend any eggs with punctures through the shell not be eaten and only be used for decorative purposes.
Rebecca Subbiah says
these are so much fun, have a great Easter Toni
Boulder Locavore says
Thank you and you too have a great holiday Rebecca!
The Cozy Herbivore says
Wow, these are so cool! What a neat technique, and such a wonderful departure from the artificial color egg dyes! And I love the cute shapes of the hard boiled eggs!
Boulder Locavore says
I agree! Somehow after these wonderful experiments going back to a box mix would be hard to face!