Perfect All Butter Pie Crust is will become your favorite pie crust recipe! It’s easy, reliable, makes perfectly flaky crust and is great for both sweet and savory pies. If you’ve ever struggled with pie crust recipes, you’ll fall in love with this one.
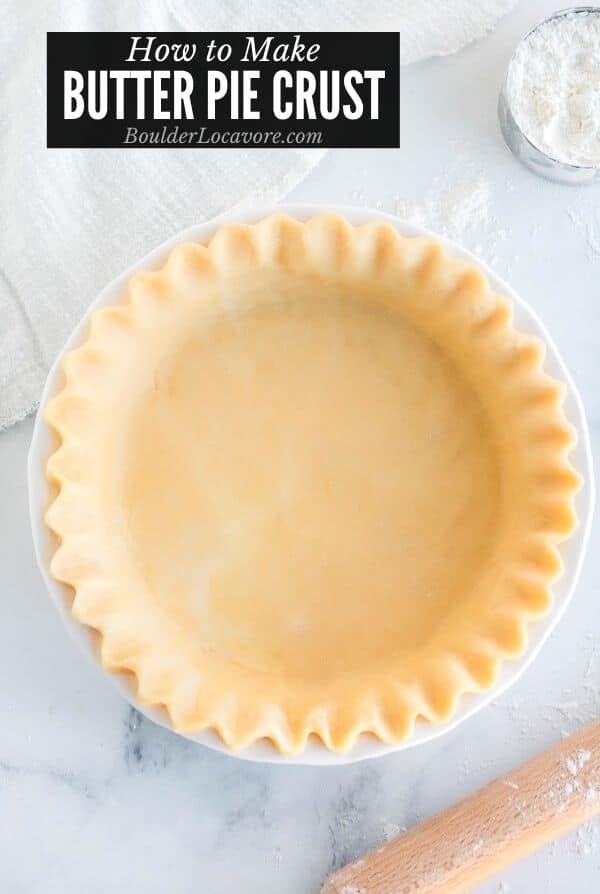
This pie crust recipe is seriously a life changing recipe.
It converted me from a pie crust buyer to a pie crust maker.
If you’ve ever toiled with making homemade pie crust and couldn’t get it right, this recipe will change everything for you!
This recipe is the best friend you can ALWAYS count on; it delivers a flaky, buttery crust every time.
All Butter Pie Crust recipe is flexible, reliable and no wrestling with the dough. SUPER easy!
Every friend I’ve shared the recipe with has come back to say it’s ‘hand’s down’ the best recipe they’ve made.
Jump to:
- Why I Love THIS Pie Crust recipe….and You Will Too
- Recipe Ingredients
- The STAR Ingredient: Irish Butter
- Can you Use Margarine instead of Butter for Pie Crust?
- Pro Tips for A Perfect Pie Crust Every Time
- How Much Pie Crust Does the Recipe Make?
- How Do You Make a Butter Pie Crust from Scratch?
- How to Make it – Step-by-Step
- How to Store it
- How to Line a Pie Pan
- Crimping a Pie Crust rim
- How to Blind Bake a Pie Crust
- What is Docking a Pie Crust?
- My Favorite Pie Crust Supplies
- Recipes to Use the All Butter Pie Crust
- Recipe
Tried and Tested Recipe
This recipe has been tested with regular flour, gluten-free measure-for-measure flour, at altitude and sea level with fantastic results every time.
Why I Love THIS Pie Crust recipe….and You Will Too
I think pie crust can be difficult to make.
Either it dries out while assembling it or the crust is fragile and doesn’t transfer to the pie pan well.
Whatever the reason I maintain it can be one of the more challening things to make. Until now.
This pie crust recipe is forgiving.
It makes enough for two deep dish pies with an ample amount so you aren’t scrimping to save every scrap of the dough to make two crusts possible.
It’s easy to roll out. It holds its shape. It bakes like a dream.
It’s as good with regular all purpose flour as it is with gluten-free measure-for-measure flour.
It seriously has converted me from a store-bought pie crust buyer into a can’t-wait-to-make-a-pie-from-scratch person.
My family is over the moon about it too.
Once you make it you’ll see what I mean.
It’s also great for non pie recipes. I can’t wait to try it with these empanadas!
Recipe Ingredients
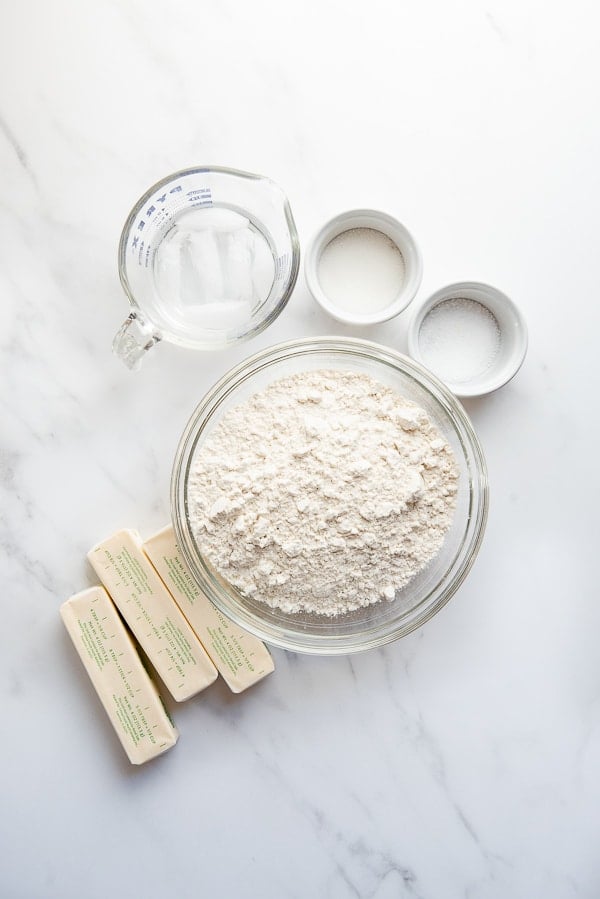
- Salted Irish Butter
- All Purpose Flour – regular or gluten-free measure-for-measure flour blend
- Kosher Salt
- Granulated Sugar
- Ice Water
The STAR Ingredient: Irish Butter
You might not imagine that the type of butter makes a big difference but it does.
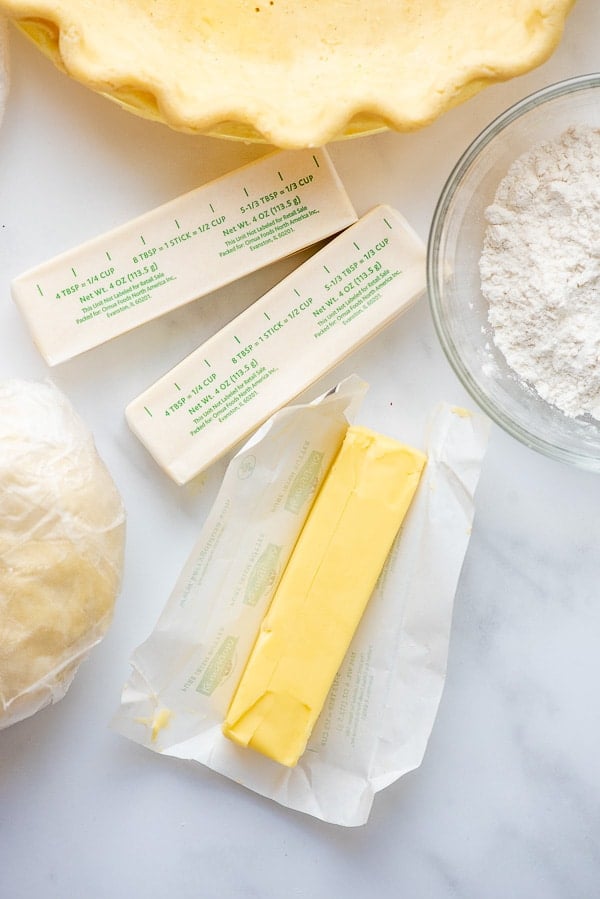
Irish Butter has more fat than regular butter. This makes the dough forgiving and easy to work with.
It bakes like a dream and is flaky and light for sweet or savory recipes.
Kerrygold is a popular Irish butter brand in the United States. It comes in sticks or blocks.
Can you Use Margarine instead of Butter for Pie Crust?
This pie crust specifically used Irish Butter and that is why it works every time.
Pro Tips for A Perfect Pie Crust Every Time
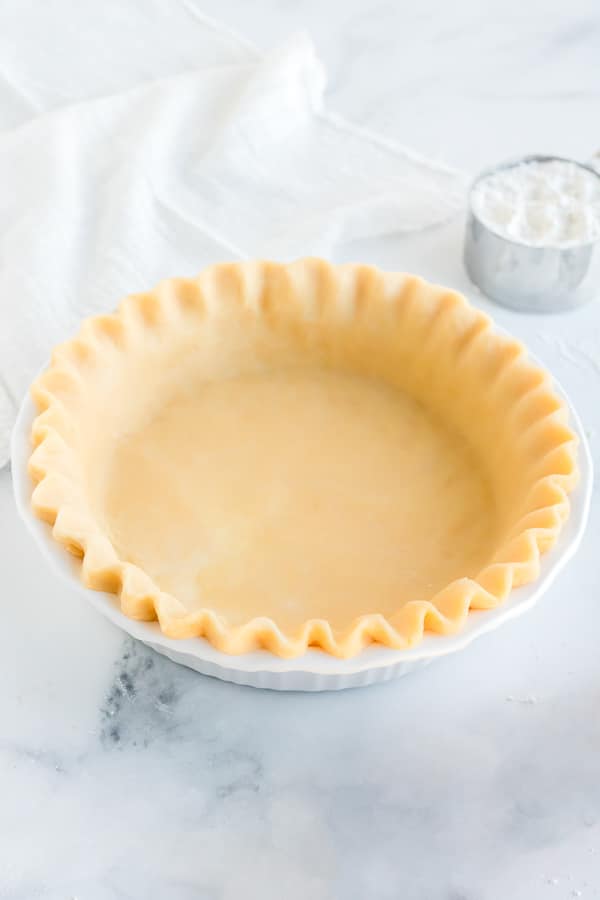
Use Salted Irish Butter
The extra fat makes all the difference. Why use salted butter? Using salted butter makes a flavor-balanced crust.
Tip for Cutting Butter into Perfect Pieces
Cut the butter into 1/2-inch cubes. Cut into tablespoon sections; then cut each tablespoon into quarters.
This size ensures best incorporation of the butter into the dough.
Keep Everything Cold
When working with butter keeping it and the work surface bold gets the best results.
Follow the steps exactly, especially putting the cut butter AND the finished dough ball in the freezer as described.
A Tip for Making Ice Water
The temperature of the water makes a difference in the pie crust recipe success.
Before beginning pour a half cup cold water in a liquid measuring cup with ice.
Before adding the water to the crust recipe remove the ice, verify a half cup water.
Flatten Pie Crust Ball (slightly)
Flattening the pie crust ball (or balls if dividing the dough) before putting it in the freezer makes easy work of rolling it out.
How Much Pie Crust Does the Recipe Make?
This recipe makes enough for two deep dish crusts.
How Do You Make a Butter Pie Crust from Scratch?
With this step-by-step guide it’s easy!
How to Make it – Step-by-Step
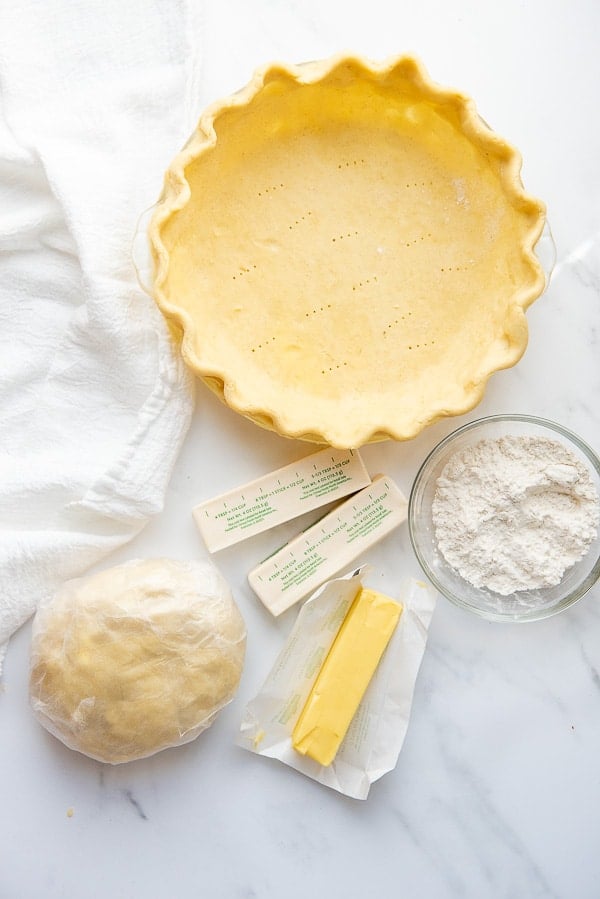
STEP 1: Place the cut butter in the freezer (photo 1).
STEP 2: Combine the flour, salt and sugar in the bowl of a standing mixer equipped with the paddle attachment (far easier than using a pastry cutter!).
Run on low a few rotations to fully combine.
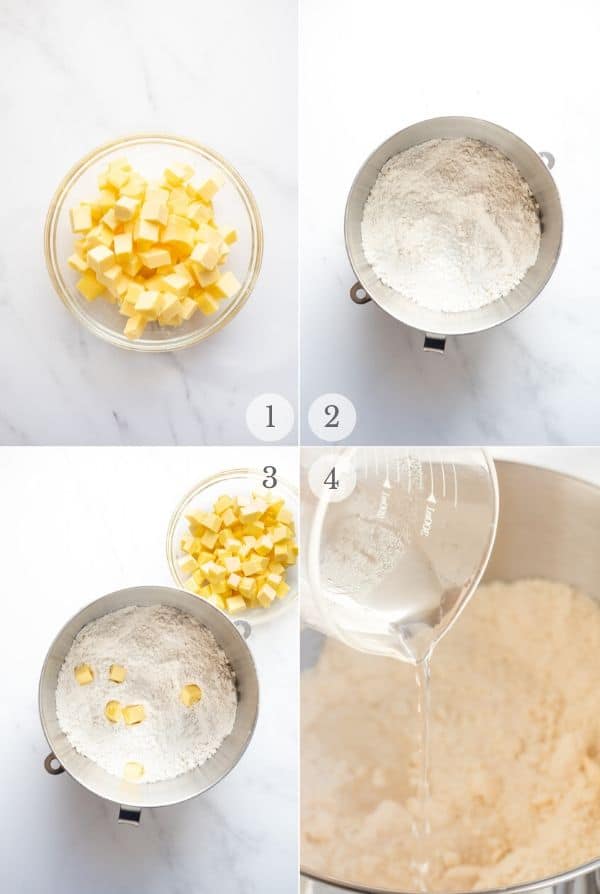
STEP 3: Add the butter a few pieces at a time. Run mixer on low to mix in (photo 3). NOTE: the butter will not be fully incorporated; it will be mashed (see photo below).
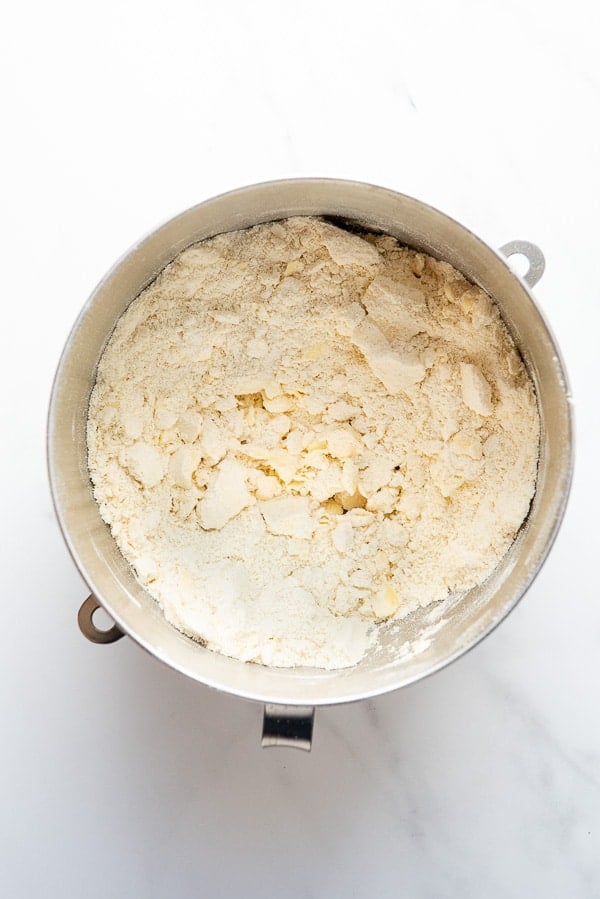
STEP 4: With the mixer running on low, slowly pour in the icy water (photo 4). Mix until a dough is formed. NOTE: it will ball around the paddle attachment (photo 5-6).
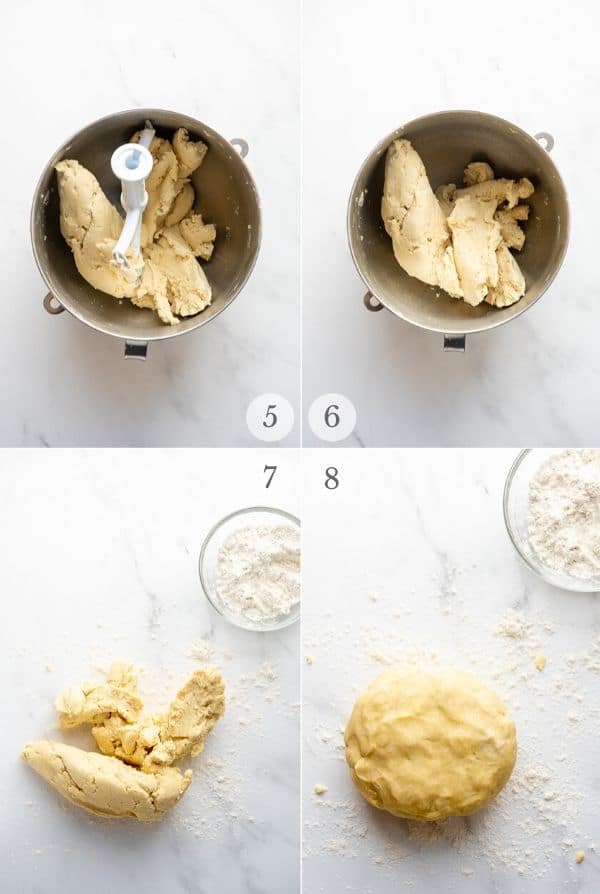
STEP 5: Turn dough out onto a lightly floured surface (photo 7). Form into two balls and flatten each slightly on the top and bottom (photo 8). Wrap each tightly with two pieces of plastic wrap (photo 9-10). NOTE: if using the dough for a recipe other than pie crust, and using the entire batch of dough, one ball can be formed instead.
STEP 6: Place dough in the freezer for 45-60 minutes. Remove and allow to sit at room temperature for 15 minutes before rolling out.
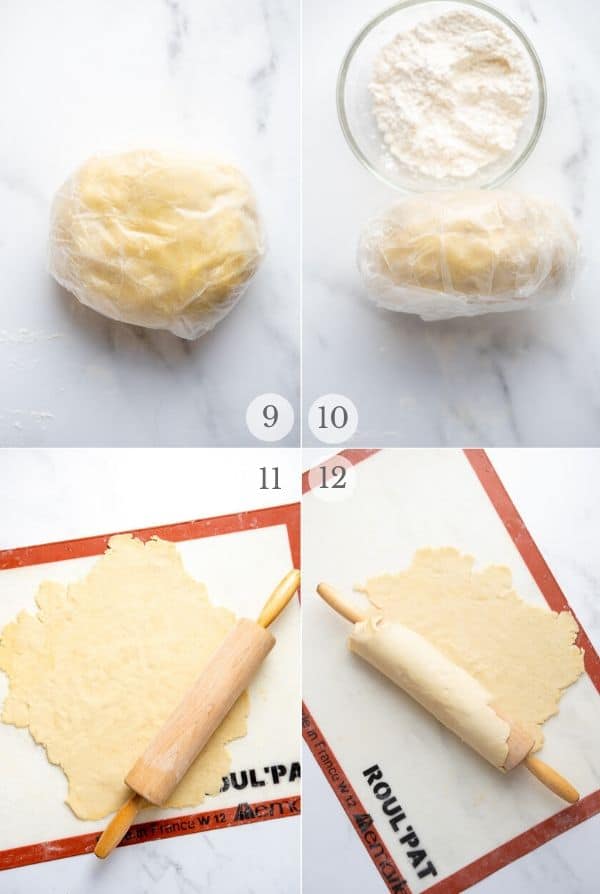
STEP 7: Roll dough out to be 1/4-inch thick. NOTE: when you work the dough if it becomes sticky at all lightly flour the rolling pin and the surface of the pie crust dough.
Rolling PRO TIP: think of the dough circle like a clock face. Begin in the middle and roll up to 12-o’clock, then from the middle to 1-o’clock. Repeat going around the whole ‘clock face’ for an even circle.
PRO TIP For Moving the Pie Crust to the Pie Pan
After rolling out the pie crust, gently roll it back onto the rolling pin (photo 12 above).
Unroll it onto the pie plate to make the crust.
NOTE: this will only work if the crust is COLD. Otherwise it will become sticky and stick to itself on the rolling pin.
How to Store it
In the Refrigerator
Store the pie crust ball or the prepared pie crust in the pan for up to 3 days in the refrigerator.
Keep it tightly sealed.
In the Freezer
- Put the double-wrapped pie crust balls into a freezer-safe plastic bag.
- Squeeze the air out of the bag and seal.
- Store for up to 3 months.
- Thaw in the refrigerator, roll out and use.
How to Line a Pie Pan
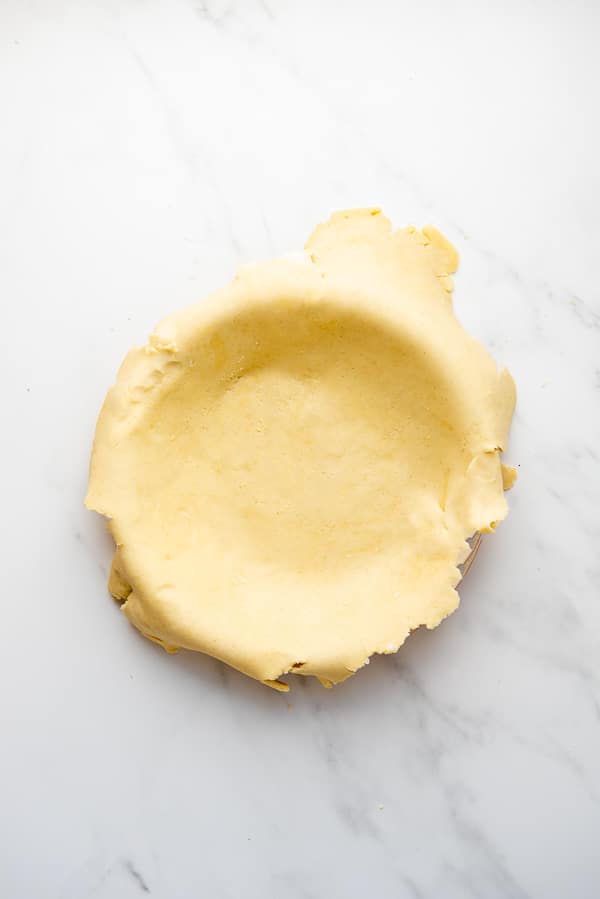
STEP 1: Lay your prepared pie crust onto the pie pan.
STEP 2: Gently press the crust into the plate to line the bottom and sides of the pie plate.
STEP 3: Trim any overhanging crust to about 1/2-inch to 1-inch from the outer edge of the pie plate.
STEP 4: Fold the edge of the crust back under itself to make a thicker edge.
Next is crimp the crust edge!
This video will show how to roll out the pie dough, lay it in the pan and a classic crimping technique.
PRO TIP: If you place the crust on the pie pan and the crust is not overlapping in all spots, any trimmed crust can be pressed into spots that need more coverage.
Crimping a Pie Crust rim
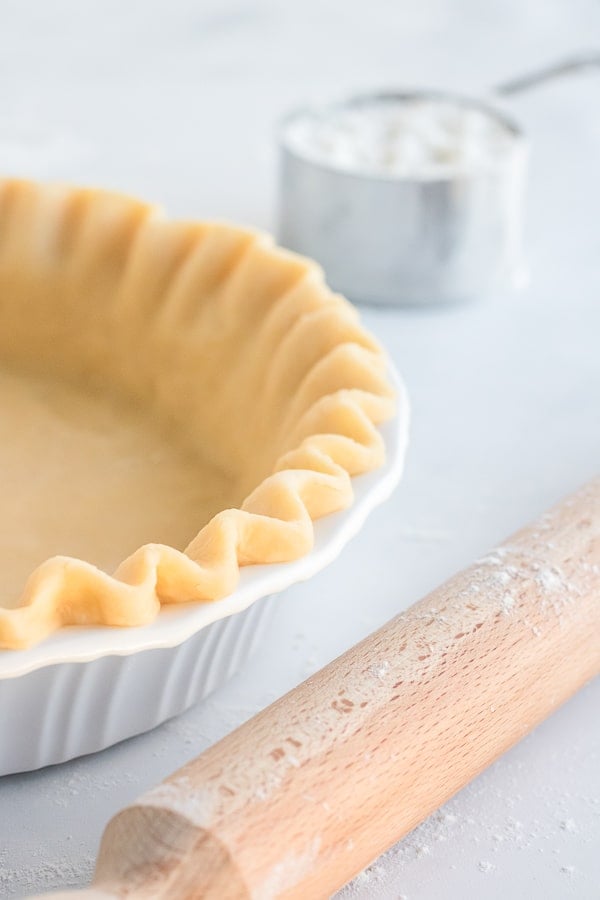
This is the fun part; making the crust edges look pretty.
‘Crimping’ is the term for making the design on the edge of the pie crust.
It’s easier than you’d think to make a beautiful crust edge, with some help.
It can be as easy as pressing the tines of a fork into the crust edge or making a classic fluted crust.
This tutorial shows some easy ways to create a beautiful crust edge.
PRO TIP: save any pieces of pie crust when rolling out the crust. Use a small cookie cutter to cut out shapes to press on the crust edge before baking.
How to Blind Bake a Pie Crust
What is Blind Baking?
Blind Baking is the same as pre-baking the crust.
This makes sure the crust is done and flaky on the bottom when the pie is done baking.
When to Blind Bake
When making a no bake filling pie (French Silk pie) using a butter crust, custard pie (lemon pie), quiche or fresh fruit pie.
How to Blind Bake a Pie Crust
Some recipes will need a fully blind baked crust; for instance a pie with no-bake filling.
Others will have a partially pre-baked crust then will fully bake after the filling is added.
Each recipe should include how to bake the crust as part of the pie.
There are multiple methods for blind baking a crust.
I recommend following the instructions for the pie recipe you are making.
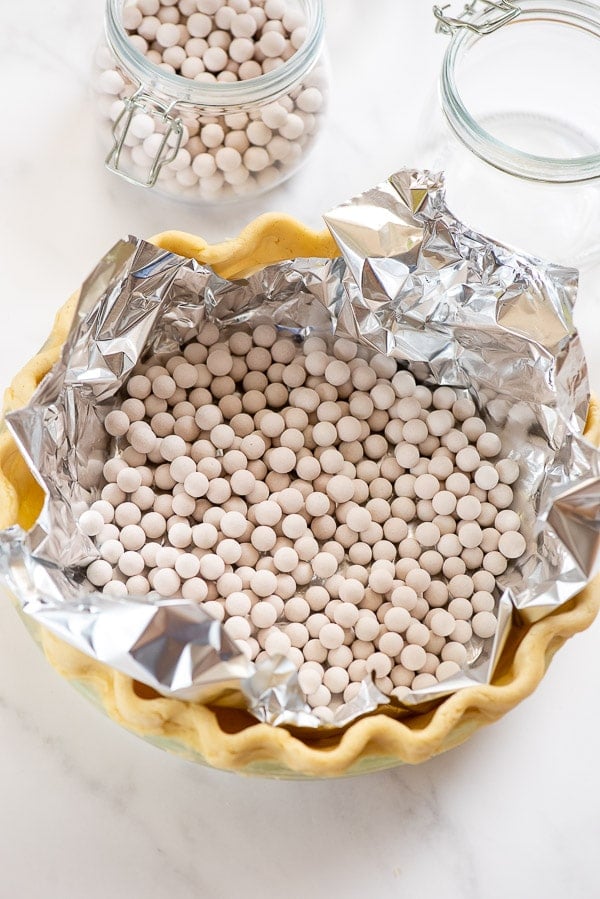
However if you are blind baking a crust without instructions, here are general instructions:
General Blind Baking Instructions
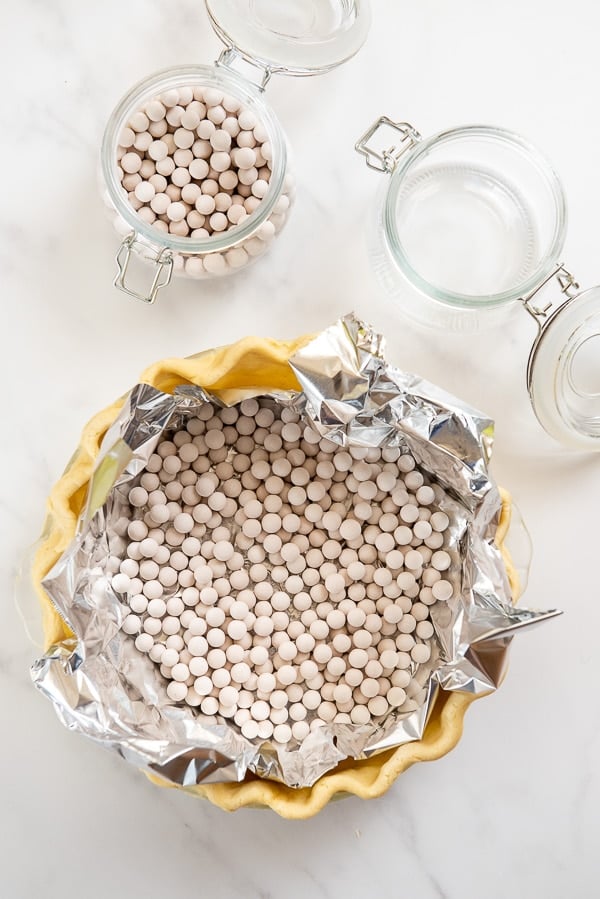
STEP 1: Line the prepared well-chilled pie crust with foil (shiny side up). Parchment paper may also be used.
Leave some overhanging the edge of the pie crust. This allows easier removal of the weights after baking.
It also can be folded over the crust edge to prevent browning if needed.
STEP 2: Add pie weights or dried beans inside the foil covering to fill the crust at least 2/3’s full.
This prevents the crust from forming bubbles and it holds the pie crust shape as the crust bakespastr.
STEP 3: Place an oven rack in the middle of the oven. Preheat to 375 degrees.
STEP 4: Bake until the crust no longer looks damp under the foil and the crust edge is golden in color; 20-30 minutes aproximately.
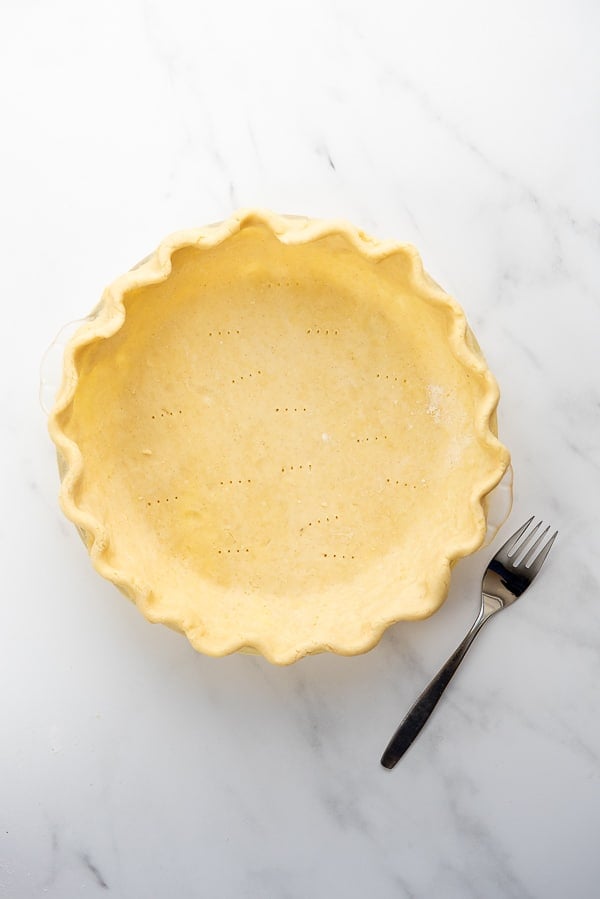
After baking, carefully lift the foil with the weight out of the crust and allow them to cool.
What is Docking a Pie Crust?
Docking is piercing the pie crust with a fork.
This allows steam to escape when the pie crust blind bakes. It prevents bubbling of the crust.
Docking does the same thing using pie weights does in blind baking.
The two methods can be used interchangeably.
Some recipes will use both methods, blind baking first then docking next.
My Favorite Pie Crust Supplies
I have a handful of pie crust supplies that I use and love.
Pie Crust Protector Shield
This is a handy device that covers only the pie crust rim.
When baking if the rim is getting too brown, place this over it. The pie keeps baking and the crust stays golden.
It’s easier to use than foil, which is another option to cover a baking crust rim.
Silicon Rolling Mat
Rolling pie crust out onto parchment paper, a pastry cloth or a marble surface is a must.
The mat I’ve used forever is a Roulpat, a silicon mat.
It stays in place when rolling and is easy to transfer the crust into the pie pan by turning it over and peeling it off the back of the crust.
They are available with pie crust dimensions too taking out the guess work of sizing the crust.
Pie Circle cutter
This pie crust cutter is newer for me but makes cutting the crust into a perfect circle fast and easy.
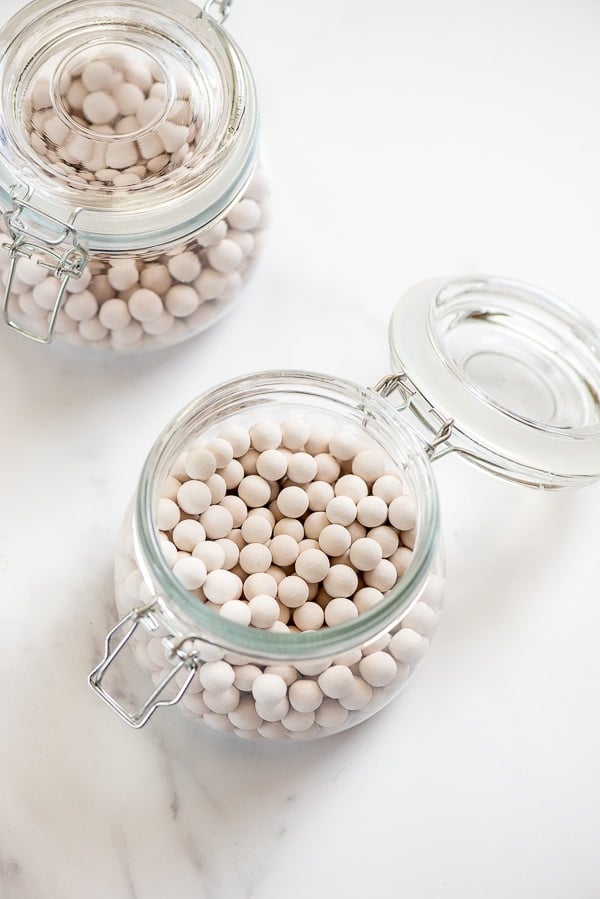
Pie Weights
Ceramic pie weights are believed to be the best choice for blind baking a crust in terms of evenly distributing heat and stopping the crust from bubbling.
They are a one time purchase and can be used over and over again indefinitely.
I have also used pie weight chains and dried beans in a pinch.
Pie Cutter
If you can’t ever cut a pie in even slices you might love this gadget I bought a few years ago. Slice an entire pie at once or mark the slices so you can cut them all evenly!
Press-n-Seal
I love using Press-n-Seal plastic wrap for wrapping pie dough. I find myself wrestling (usually unsuccessfully) with traditional plastic wrap and this works fast and seals well.
Recipes to Use the All Butter Pie Crust
- Quiche Lorraine
- Ginger Pear Pie Recipe
- Fresh Strawberry Pie
- Great Grandma Jean's Apple Pie
- Fresh Savory Tomato Pie
- Sour Cream Raisin Pie
- Grilled Pumpkin Pie
- Mixed Stone Fruit Slab Pie
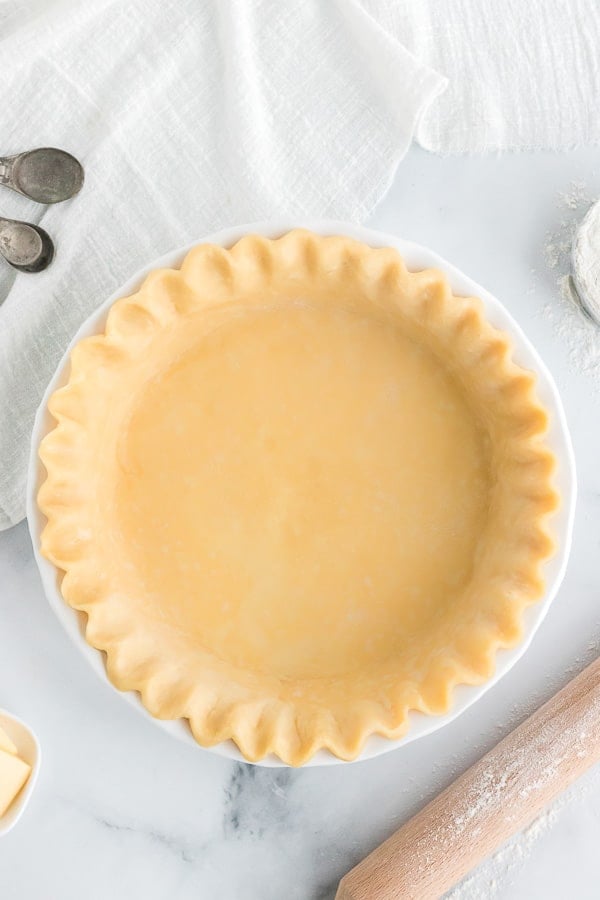
Recipe
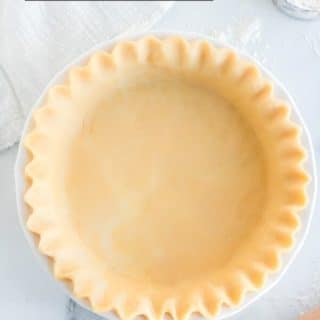
BUTTER PIE CRUST
Equipment
Ingredients
- 1 cup + 6 tablespoons (2 sticks plus 6 tablespoons) COLD salted Irish butter I've used Kerrygold
- 3 cups All-purpose flour regular or gluten-free measure-for-measure blend
- 1/2 teaspoon Kosher salt
- 2 teaspoons Granulated sugar
- ½ cup ICY COLD water my tip in the Notes section below
Instructions
- Cut the butter into ½-inch cubes. Place in the freezer*. TIP: I cut the sticks into tablespoons then quarter each tablespoon.
- In the bowl of a standing mixer equipped with the paddle attachment, combine the 3 cups flour, 1/2 teaspoon salt and 2 teaspoons sugar. Run the mixer paddle on low a few times just to combine them.
- With the mixer running on low speed, add a few pieces of the chilled butter at a time until it is all in the mixing bowl and coated with flour. NOTE: It will not have broken down completely; it will be mashed.
- With the mixer running on slow speed, slowly pour in the ice water until the mixture forms a dough. It will begin to ball up around the mixer paddle.
- Turn dough out onto a lightly floured surface, and form a tight ball. Flatten the ball slightly (this will make it easier to roll out and being in a circle shape helps the shape stay round when rolling the crust out) and tightly wrap with two layers of plastic wrap. NOTE: the dough can be divided and rolled into two balls, each wrapped separately if not making a double crust pie or two individual pies. Place in the freezer for 45-60 minutes*.
- After the 45 to 60 minutes remove the dough from the freezer and let it rest on the counter for about 15 minutes or until it becomes workable. NOTE: It should still be very firm when you start to roll it. Do not allow the dough to warm up too much or you'll encounter the same butter seepage concerns.
- To roll the dough out: Divide the dough ball. Roll out one half on a lightly floured surface. NOTE: Lightly flour the rolling pin too if needed to prevent sticking. Pie crust should be ¼-inch thick.
- Fit to pie pan and proceed with your pie recipe.
Julie says
This pie crust is excellent. I have made it several times and it turns out tender and flacky every time.
Shelly says
I’ve tried many all butter pie crust with no luck. This was so easy and delicious.
Thank you my new favorite.
Shelly
Toni Dash says
So glad you enjoyed it! I was a pie crust drop out before this recipe and now I look forward to making it every time!
Tamara says
Best pie crust I have ever made, tender yet crispy, buttery, flakey…. think I was always over-processing it in the food processor. Thank you!
Toni Dash says
So delighted for you Tamara! It has been a game changer for me too!
Joyce says
Love this recipe, this will be my new go to pie crust!!! Thanks