• Skip to primary navigation
  • Skip to main content
  • Skip to primary sidebar
  • Home
  • Recipes
  • Free Bonus
  • About

Boulder Locavore logo

menu icon
go to homepage
  • Home
  • Recipes
  • Free Bonus
  • About
    • Email
    • Facebook
    • Instagram
    • Pinterest
    • RSS
    • Twitter
  • subscribe
    search icon
    Homepage link
    • Home
    • Recipes
    • Free Bonus
    • About
    • Email
    • Facebook
    • Instagram
    • Pinterest
    • RSS
    • Twitter
  • ร—
    Home ยป Recipes ยป Holiday ยป Halloween ยป Mummy Cherry Hand Pies recipe

    PUBLISHED: September 30, 2020 โ€ข By Toni Dash 30 Comments

    Mummy Cherry Hand Pies recipe

    Jump to Recipe

    This post may include affiliate links. As an Amazon Associate I earn from qualifying purchases.

    Mummy Cherry Hand Pies title image

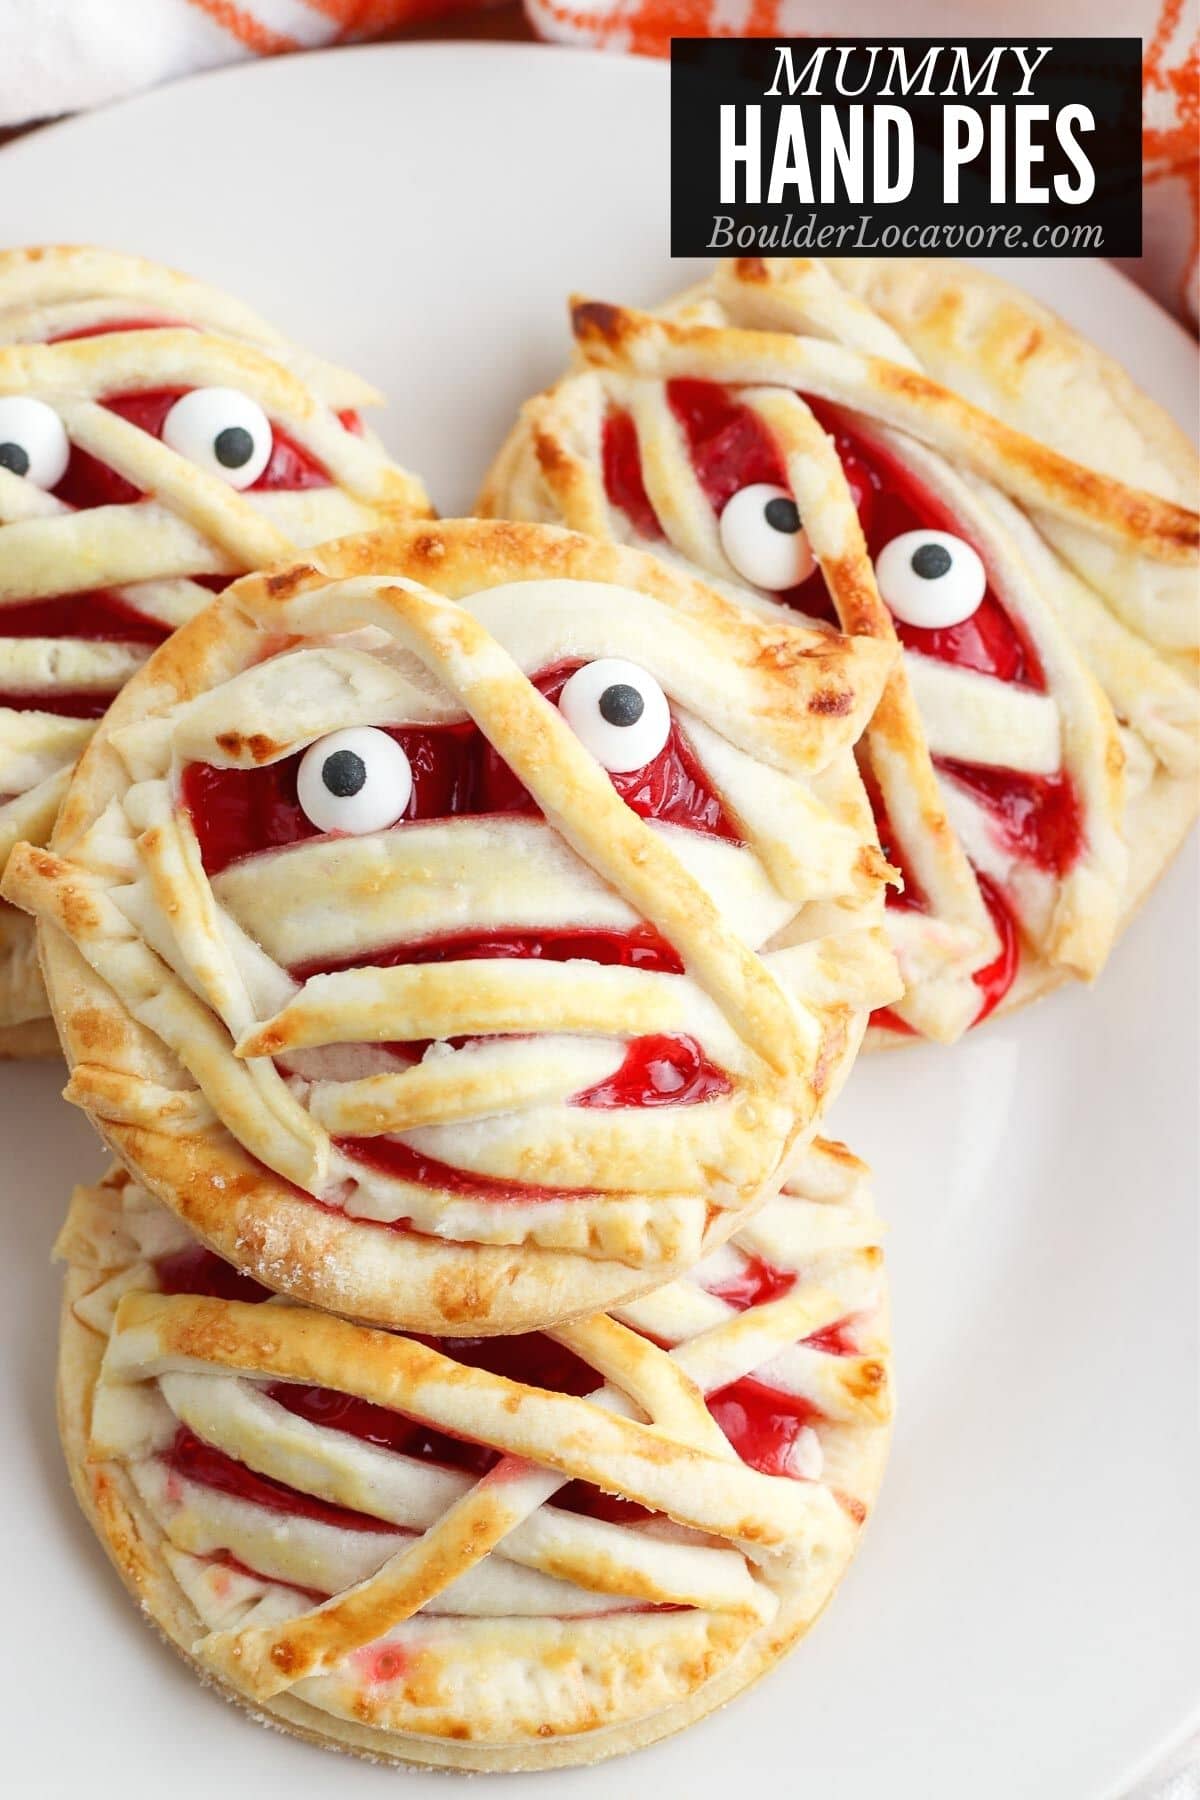
    Mummy Cherry Hand Pies are a fun and easy spooky Halloween treat! This Halloween dessert idea uses some prepared ingredients to make the fun in putting them together without being difficult or time consuming.

    Mummy Cherry Hand Pies title image
    WANT TO SAVE THIS RECIPE?
    Enter your email below and we’ll send the recipe straight to your inbox (and more recipes every week)!
    Please enable JavaScript in your browser to complete this form.
    Loading

    Mummy Cherry Hand Pies title image

    Calling all cherry pie lovers and Halloween recipe fans!

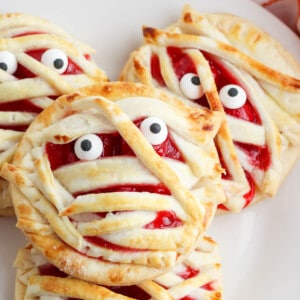
    These cute Halloween treats are so quirky, fun AND delicious! 

    A fun family project to celebrate the holiday.

    Add some Mummy Halloween cookies, Mummy Oreo Cookie Pops and a Trick-or-Treat wreath and you’ll be holiday ready!

    What is a Hand Pie?

    As the name sounds, a hand pie is a mini ‘personal’ pie that is able to be held and eaten by hand. 

    They often have a solid crust on both sides like a turnover. 

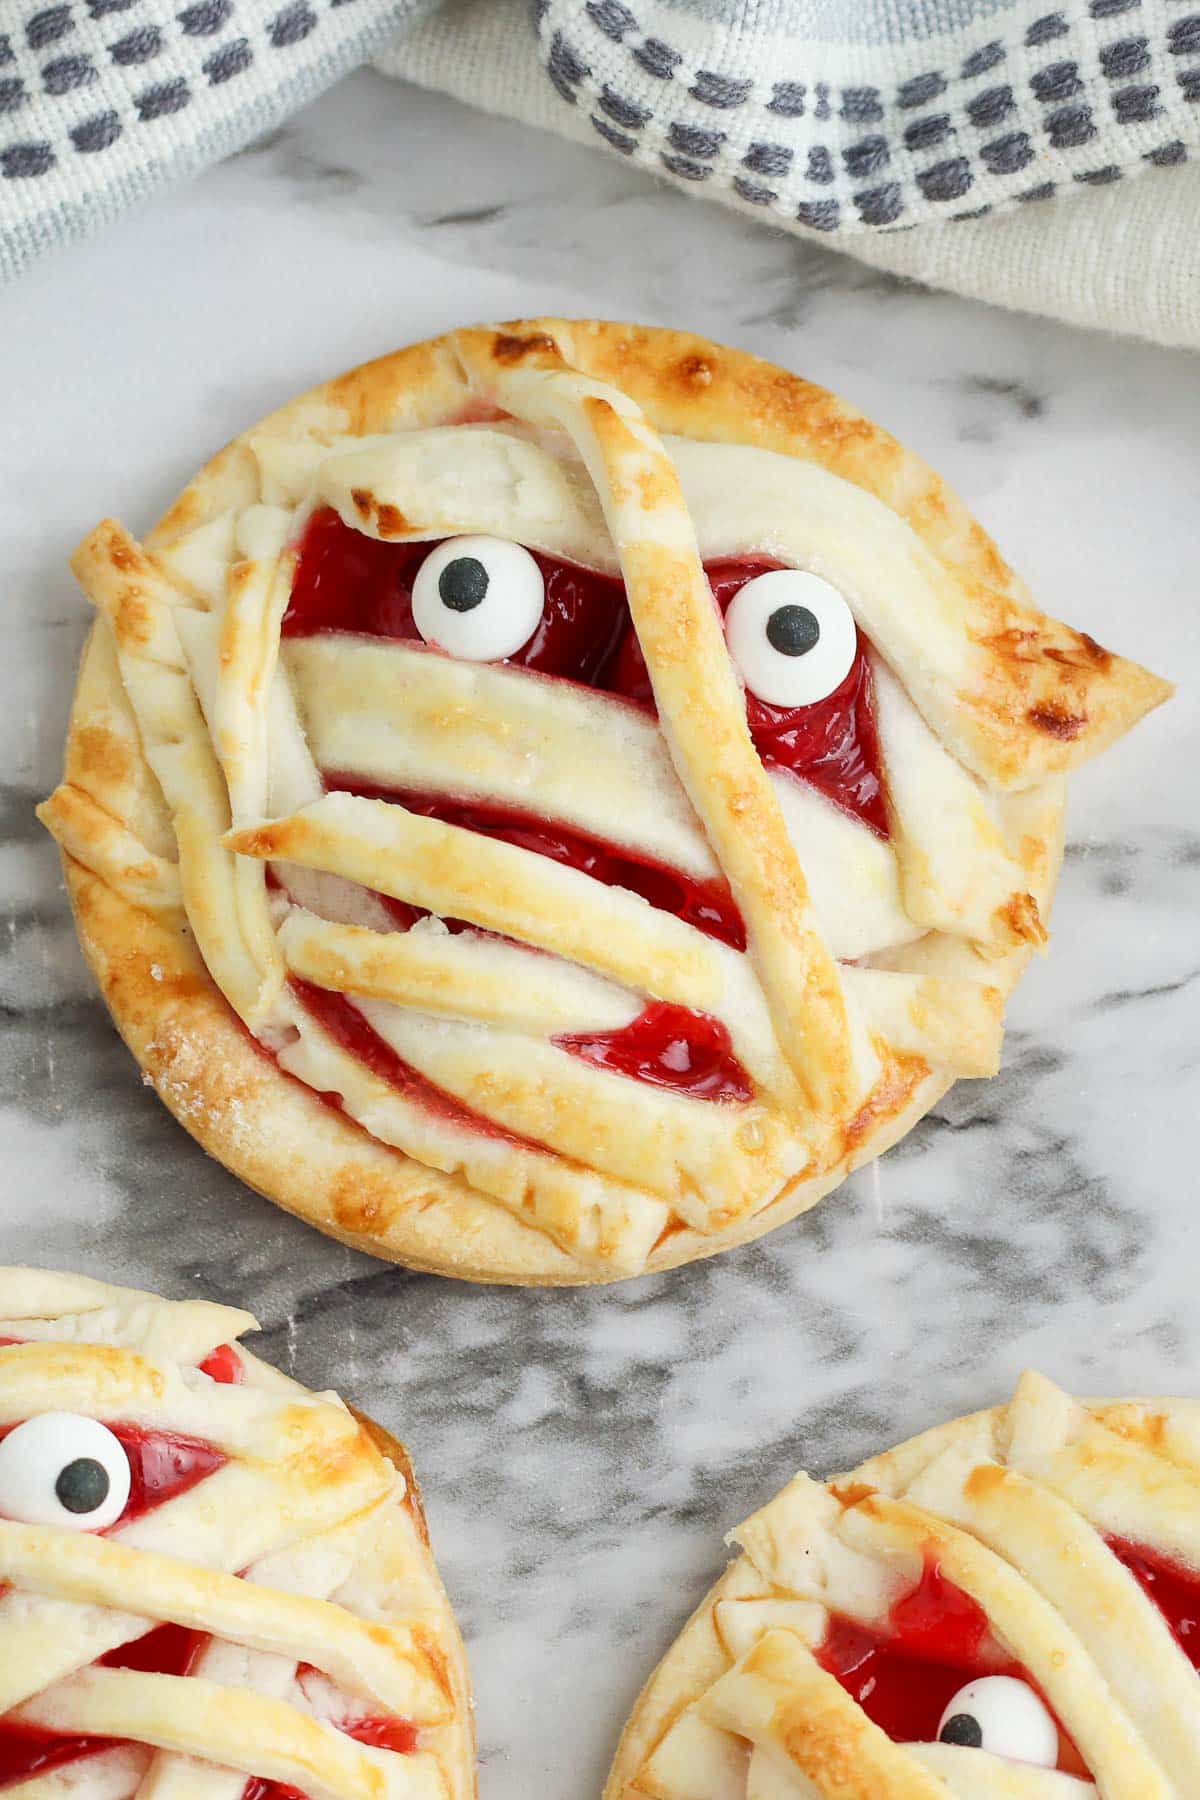
    These spooky Halloween treats have one solid 3-inch circle crust on bottom and the top is made with strips of crust for mummy wrappings.

    mummy hand pies close up

    Recipe Ingredients + Notes

    This recipe takes advantage of premade ingredients to make the recipe process more construction and baking, rather than lots of ingredient preparation.

    Premade Pie Dough (sheets) – starting with pie dough sheets allows you to get right down to making these cute Halloween treats! 

    If you’d rather make your own pie dough or are gluten-free and need other options, I’ve included some below.

    NOTE: all the suggested substitutions listed under the gluten-free section are available in regular (gluten) form too. You can use one of those if you prefer.

    Cherry Pie Filling – using canned cherry pie filling gives a spooky Halloween treat appearance and is easy! If you prefer you can use homemade cherry pie filling.

    Egg – the egg is beaten and brushed on the ‘mummy wrappings’ on top of the hand pie for a slightly shiny look after they are baked.

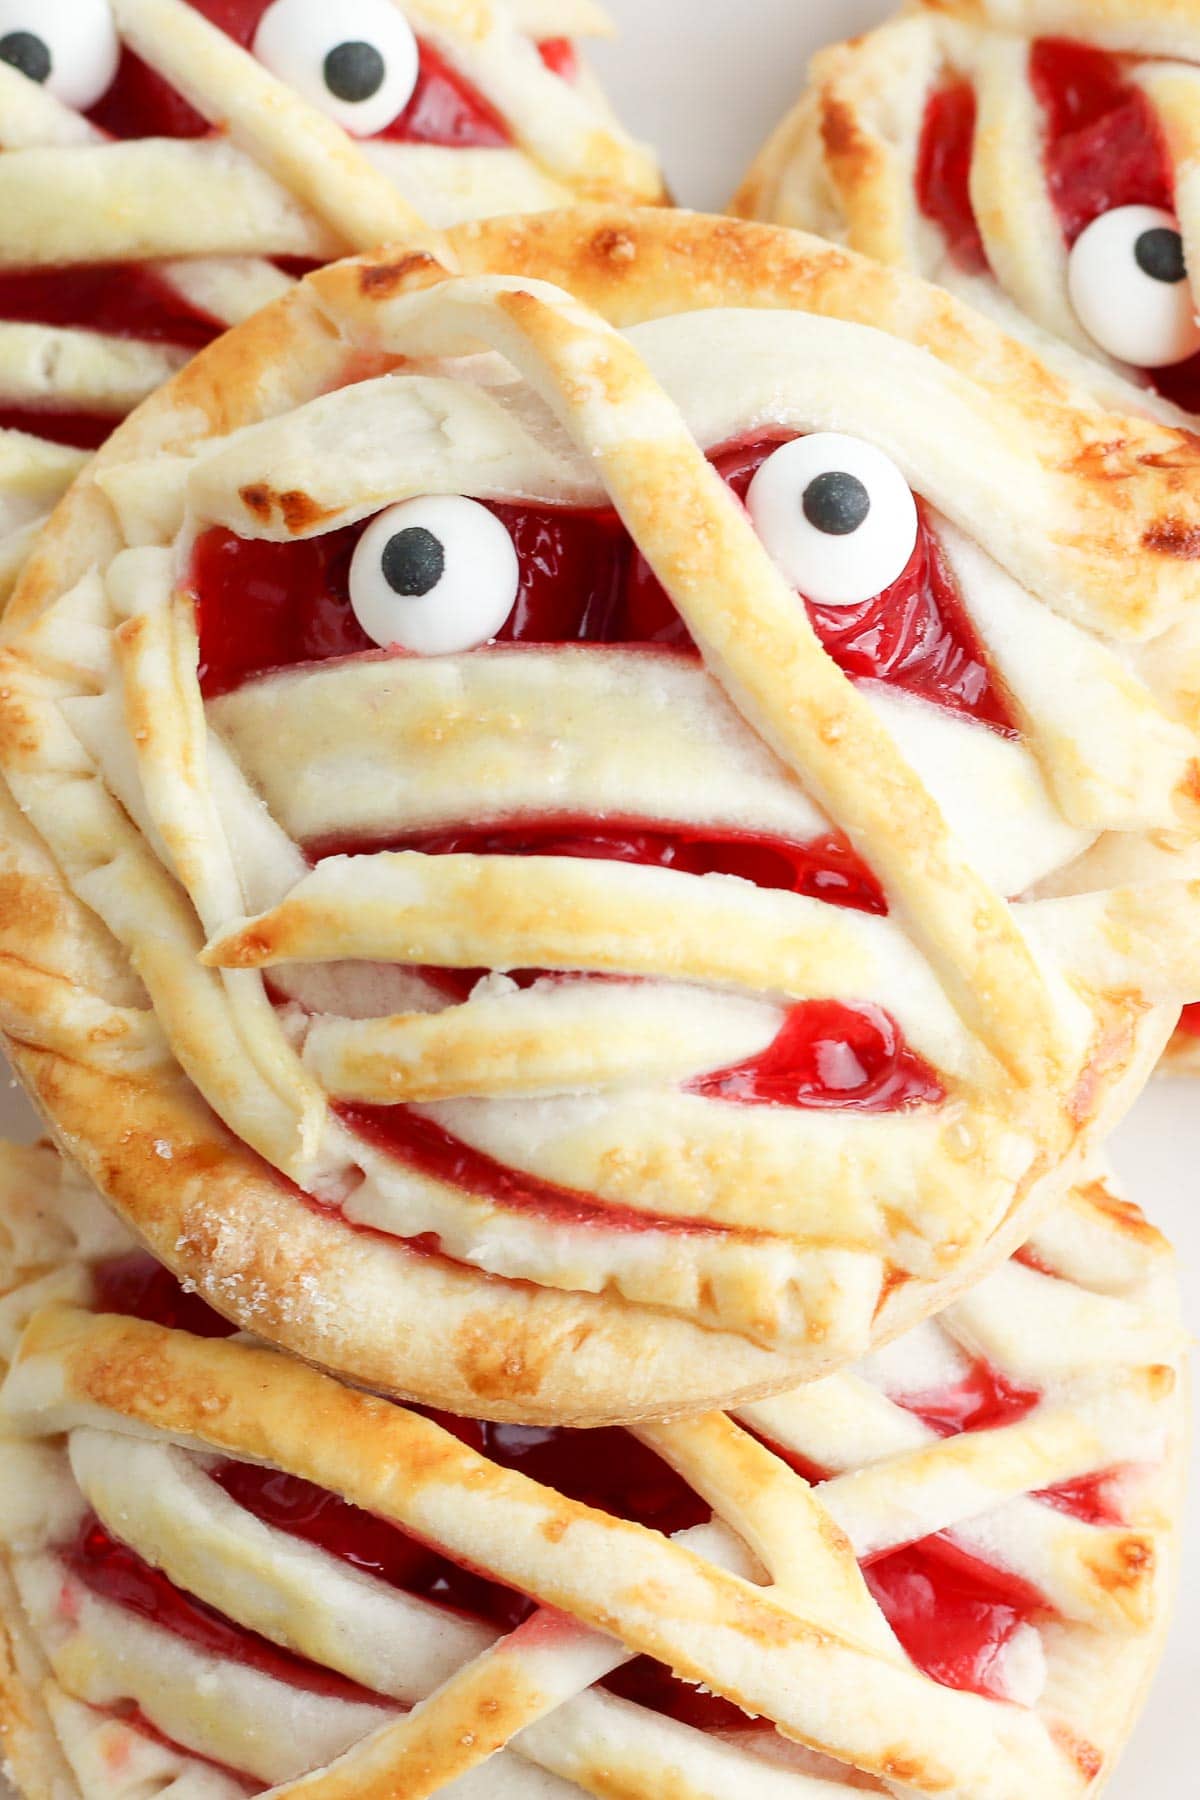
    Candy Eyes – these bring the mummies to life (if mummies could come back to life)! They are set in the filling between wrappings once the desserts are baked.

    Supplies You’ll Need

    3-inch round Cookie Cutter

    Pastry brush (to brush on the egg wash)

    Using Homemade Pie Crust

    If you’d rather use homemade pie crust my favorite is this All Butter Pie Crust recipe. 

    It can be made regular or gluten-free. It’s very forgiving and easy to work with.

    Roll it out to a thin sheet (1/8-inch to 1/4-inch thick) to cut out the circles.

    Making Gluten-Free Hand Pies

    Sheets of gluten-free pie crust is not as available as are frozen gluten-free pie crust in the pie pan. 

    There are four options for gluten-free pie crust:

    Buy frozen crust in the pie pan. Allow it to thaw. Remove from the pan and roll out into a sheet.

    Use a gluten-free pie crust mix. To make it fast and easy use a mix, roll it out and cut the circles from that.

    Use the Butter Pie Crust recipe above made with gluten-free flour. I recommend Bob’s Red Mill 1-to-1 Flour Blend for great results.

    Buy premade gluten-free Pie Dough that hasn’t been rolled out. Many stores that carry gluten-free products carry balls of pie dough. You will need to roll it out at home.

    How to Make it – Step-by-Step

    STEP 1: Preheat the oven to 375 degrees. Line a rimmed baking sheet with parchment paper.

    STEP 2: Using a 3-inch circle cookie cutter cut out 16 circles of pie dough (photo 1). Place 8 on the prepared baking sheet.

    STEP 3: Cut the other 8 into small (aproximately 1/4-inch) strips for the mummy wrapping (photo 2). TIP: a pizza cutter makes this fast and easy!

    mummy hand pies recipes steps 1-4

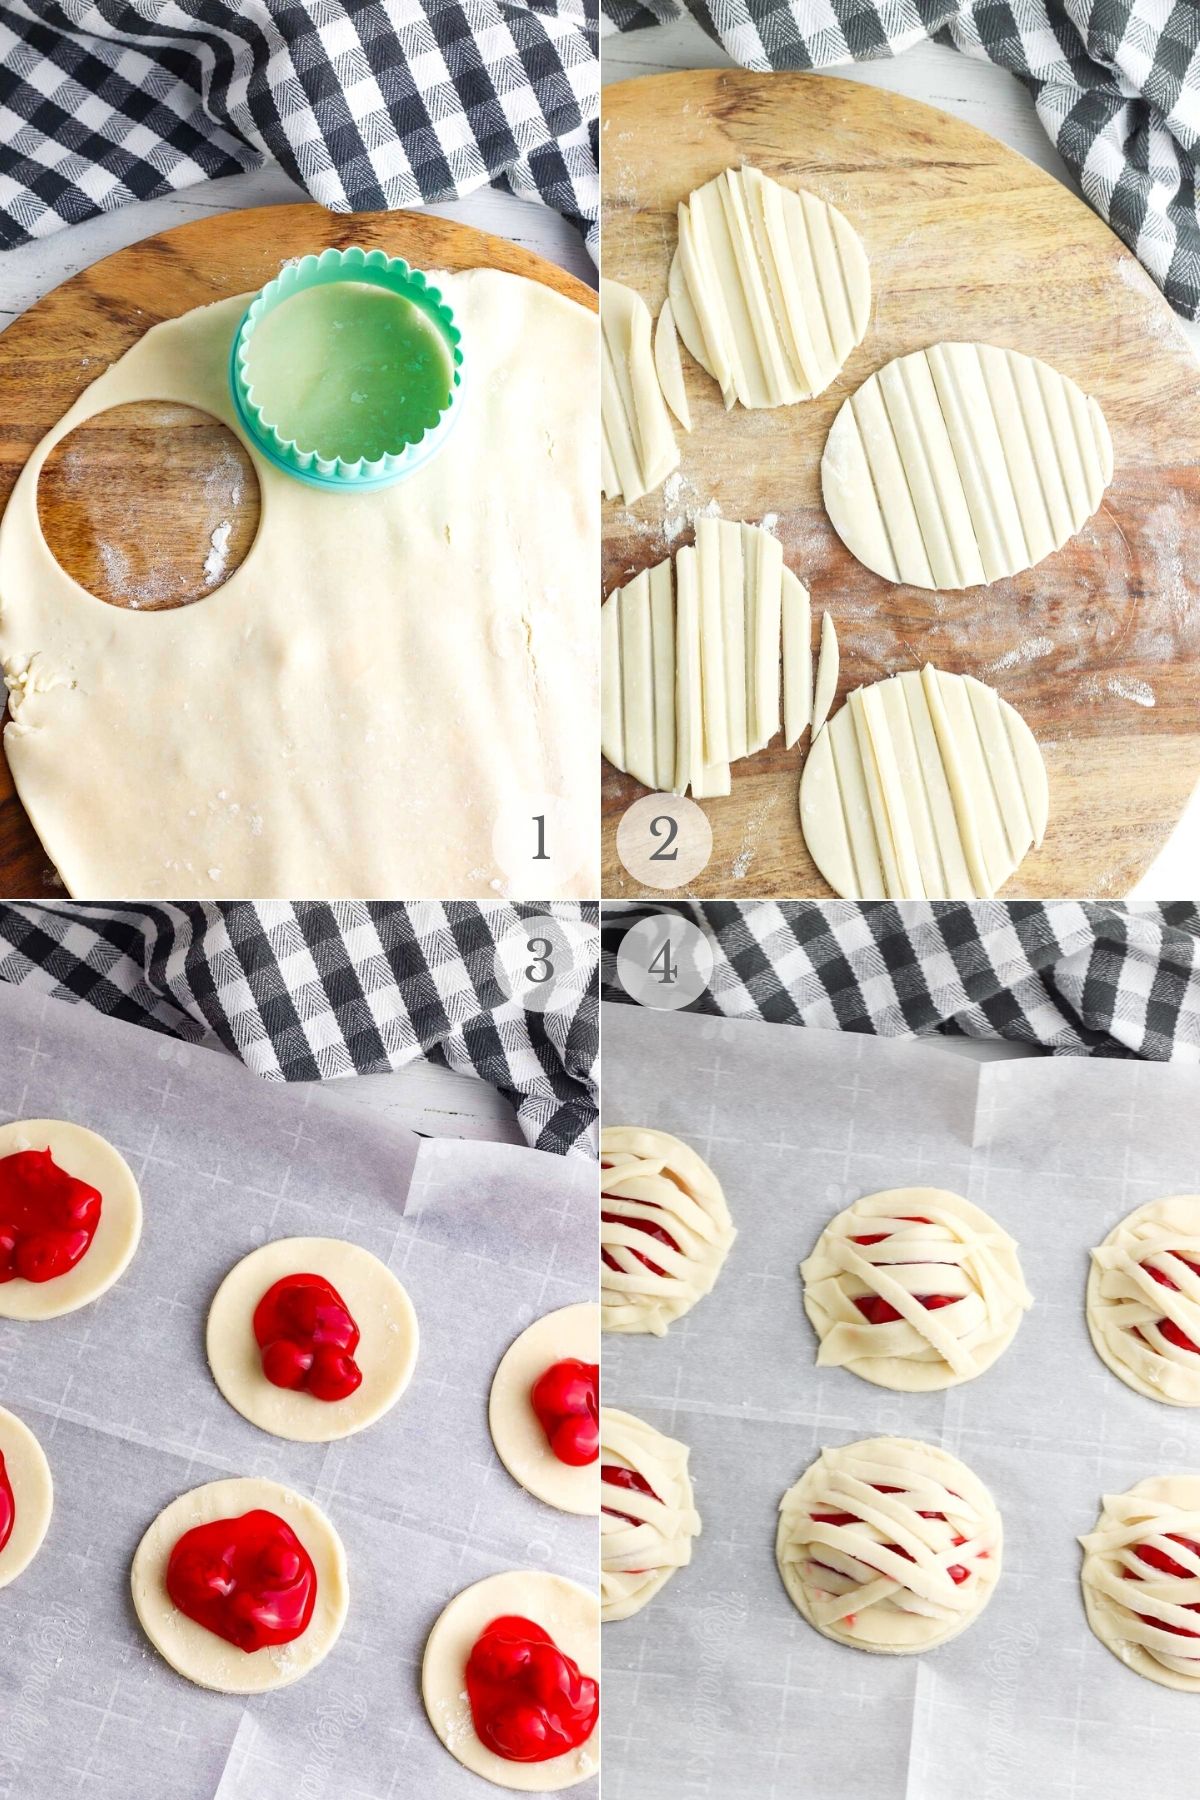
    STEP 4: Add a small spoonful of cherry pie filling to the middle of the bottom dough circle on the baking sheet (photo 3).

    STEP 5: Place the strips of dough over the filling (photo 4) and gently press the ends into the bottom dough circle.

    Press the end of a dining fork into the the edges of the dough strips to secure them into the lower dough and make a slight pattern (photo 5 shows the pattern of the fork marks).

    mummy hand pies recipe steps 5-6

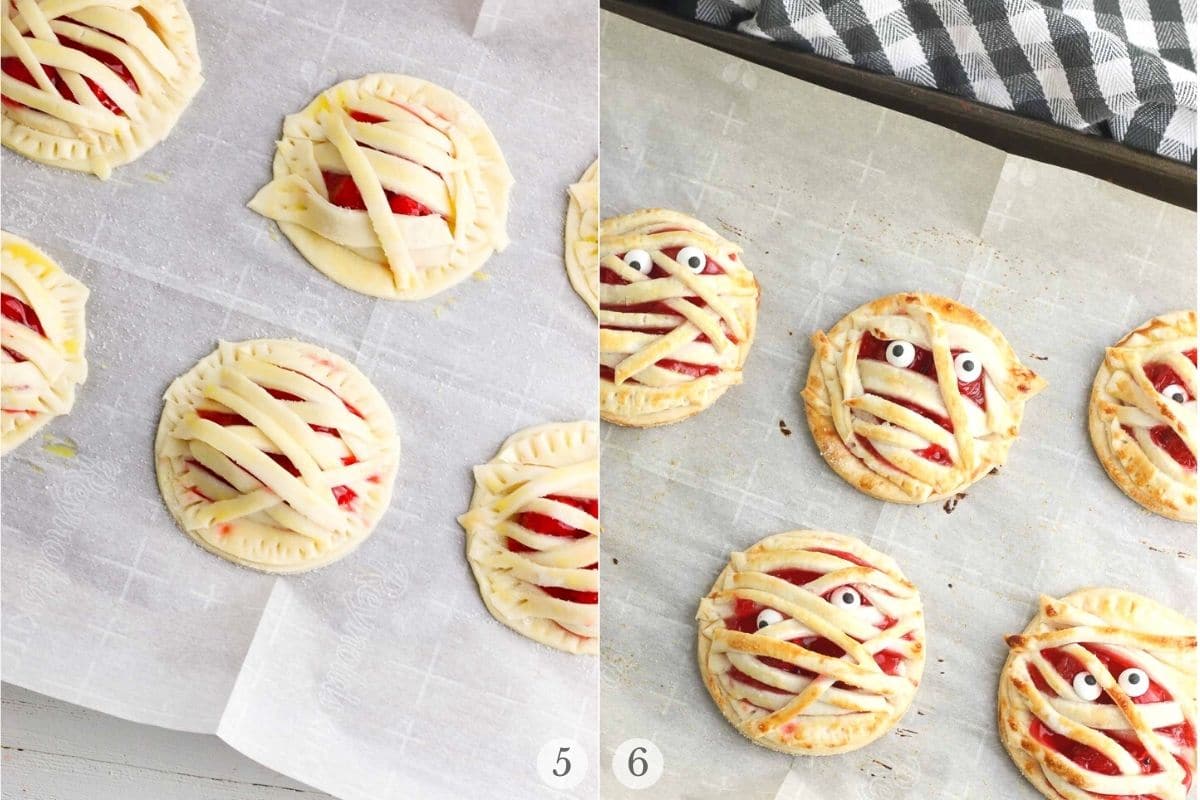
    STEP 6: Brush the top with the beaten egg (photo 5).

    STEP 7: Bake for 8-10 minutes until the crust is golden. Remove from oven and allow the hand pies to cool on the baking sheet slightly before moving them to a wire rack to cool fully.

    As they are cooling put the candy eyes on in the filling pushing gently to get them to adhere (photo 6). 

    NOTE: if using a different type of pie dough the baking time may need to be adjusted.

    Pro Tips

    Plan Eye Placement when adding the Mummy Strips. The eyes will be placed in the pie filling of the baked hand pies. When adding the mummy wrapping strips on the top of the little pie, leave some space between the strips for the eyes.

    mummy hand pies close up

    More Recipes You’ll Love!

    Fresh Savory Tomato Pie

    Mini Beef Pot Pies

    Spicy Crust Bourbon Pecan Pies

    Did you make it? Please RATE THE RECIPE below!
    Please SUBSCRIBE and FOLLOW ME on FACEBOOK , TWITTER , INSTAGRAM and PINTEREST !

    Recipe

    mummy cherry hand pies close up

    Mummy Cherry Pies

    These adorable Mummy cherry hand pies are perfect for Halloween. Easy to make and ghoulishly great. Remove the googly candy eyes and they are perfect any other time of the year too!
    5 from 62 votes
    Print Save Recipe Recipe Saved! Pin Rate
    Course: Dessert
    Cuisine: American
    Prep Time: 15 minutes minutes
    Cook Time: 10 minutes minutes
    Total Time: 25 minutes minutes
    Servings: 8 pies
    Calories: 293kcal
    Author: Toni Dash
    Prevent your screen from going dark

    Ingredients

    • 1 package premade pie dough
    • 1 cup cherry pie filling
    • 1 egg beaten
    • 16 candy eyes

    Instructions

    • Preheat oven to 375 degrees. Line a baking sheet with parchment paper.
    • Use a 3-inch circle cookie cutter to cut out 16 circles from the pie dough. Place eight of the circles on the lined baking sheet.
    • Use a pizza cutter or knife to cut the remaining 8 circles into small strips.
    • Place a small spoonful of cherry pie filling in the center of each pie circle.
    • Top the pie filling with the pie strips to create mummy bandages.
    • Brush the beaten egg over the top of each pie.
    • Place the pies in the preheated oven and bake for 8 to 10 minutes, until the crust is golden brown.
    • Remove from oven and allow to cool, then add two candy eyes to the top of each pie.

    Notes

    Using pie crust sheets makes this easy!
    If substituting a different pie crust option the cooking time may need to be adjusted. The pies should be golden when cooked.

    Nutrition

    Calories: 293kcal | Carbohydrates: 35g | Protein: 4g | Fat: 15g | Saturated Fat: 5g | Cholesterol: 20mg | Sodium: 238mg | Potassium: 92mg | Fiber: 2g | Sugar: 1g | Vitamin A: 90IU | Vitamin C: 1mg | Calcium: 17mg | Iron: 2mg
    Mummy Cherry Hand Pies title image
    WANT TO SAVE THIS RECIPE?
    Enter your email below and we’ll send the recipe straight to your inbox (and more recipes every week)!
    Please enable JavaScript in your browser to complete this form.
    Loading
    Did you make this recipe?Mention @boulderlocavore or tag #boulderlocavore!
    « Homemade Apple Cider recipe in the Instant Pot
    Apple Pancakes recipe – Easy Pancakes from Scratch! »

    Reader Interactions

    Comments

    1. Melanie says

      October 15, 2020 at 9:01 pm

      5 stars
      My 12 year old daughter made these and they were so cute and delicious! She made her own cherry pie filling and used pre-made pie crust.

      Reply
    2. Sara Welch says

      October 03, 2020 at 11:33 am

      5 stars
      What a fun and tasty treat for Halloween! My kids are going to love to make these!

      Reply
    3. Katie says

      October 01, 2020 at 11:29 am

      5 stars
      These are so cute, and perfect for the season! I might try this with pumpkin!

      Reply
    4. Wilhelmina says

      October 01, 2020 at 8:14 am

      5 stars
      These are not only super adorable but super delicious! They are perfect for Halloween!

      Reply
    5. Catalina says

      October 01, 2020 at 7:42 am

      5 stars
      This cherry hand pies are so perfect with my afternoon tea!

      Reply
    6. Beth says

      October 01, 2020 at 7:32 am

      5 stars
      These look so delicious and so adorable! My kids are going to love this recipe! Can’t wait to make this!

      Reply
    7. All That I'm Eating says

      October 01, 2020 at 4:48 am

      Toni these look brilliant! What a great idea for Halloween and I bet they taste delicious.

      Reply
    8. Susan says

      October 01, 2020 at 2:54 am

      5 stars
      I love that these are Halloween treats that are tasty for everyone in the family. They look so awesome and are easy enough to make quickly.

      Reply
    9. Ryan Escat says

      October 01, 2020 at 2:36 am

      5 stars
      This is a fun and creative idea this coming Halloween kids will surely love it.

      Reply
    10. Sherry says

      October 01, 2020 at 12:42 am

      These are the cutest mummies I ever did see. What a yummy treat for Halloween!

      Reply
    « Older Comments
    5 from 62 votes (42 ratings without comment)

    Leave a Reply Cancel reply

    Your email address will not be published. Required fields are marked *

    Recipe Rating


    Primary Sidebar

    Picture of Toni

    Welcome! Iโ€™m Toni Dash. Iโ€™m a Certified Nutrition Coach and the professional writer/blogger, photographer, recipe developer and creator of Boulder Locavoreยฎ. Iโ€™m so glad you are here!

    More about me โ†’

    Featured on....

    BoulderLocavore.com Featured By Press

    Grilling Recipes

    • Ultimate Burger Grill Guide title photo with burgers on a charcoal grill Ultimate Burger Grill Guide: How to Grill the Perfect Burger
    • steak on grill with flames How to Grill Steak Perfectly: Everything You Need to Grill Like a Pro
    • grilled porterhouse steak title Perfect Porterhouse Steak on the Grill
    • Grilled Kabob Recipes on grate (titled image) Grilled Kabob Recipes: 20 Must Make Recipes for Summer
    • bruschetta chicken title image Bruschetta Chicken recipe โ€“ Baked, Grilled or Stove Top
    • Chicken Shish Kabobs title Easy Grilled Chicken Shish Kabobs

    TRENDING RIGHT NOW

    • Ultimate Burger Grill Guide title photo with burgers on a charcoal grill Ultimate Burger Grill Guide: How to Grill the Perfect Burger
    • How to Make Moist Homemade Shredded Chicken Breast title How to Make Moist Homemade Shredded Chicken Breast Recipe
    • Instant Pot Jambalaya Instant Pot Jambalaya Recipe: Quick & Easy Comfort Food
    • Sparkling Cranberry Vodka Punch Sparkling Cranberry Vodka Punch Recipe
    • homemade ketchup title image The Best Homemade Ketchup โ€“ Made with Fresh Tomatoes!
    • Instant Pot Smoked Paprika & Garlic Chicken Legs with lime wedges on a pewter platter Instant Pot Smoked Paprika & Garlic Chicken Legs

    Footer

    • Facebook
    • Twitter
    • Pinterest
    • Instagram

    Contact | About | Privacy Policy | Disclosure Policy | Accessibility Statement | Cookie Policy


    SIGN ME UP to get FREE recipes directly to my inbox!

    Don't miss our TRAVEL SECTION!


    Copyright ยฉ 2010-2025 All Rights Reserved

    Boulder Locavore is a participant in the Amazon Services LLC associates program, an affiliate advertising program designed to provide a means for sites to earn advertising fees by advertising and linking to amazon.com.

    Rate This Recipe

    Your vote:


    A rating is required
    A name is required
    An email is required

    Recipe Ratings without Comment

    Something went wrong. Please try again.