
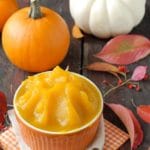
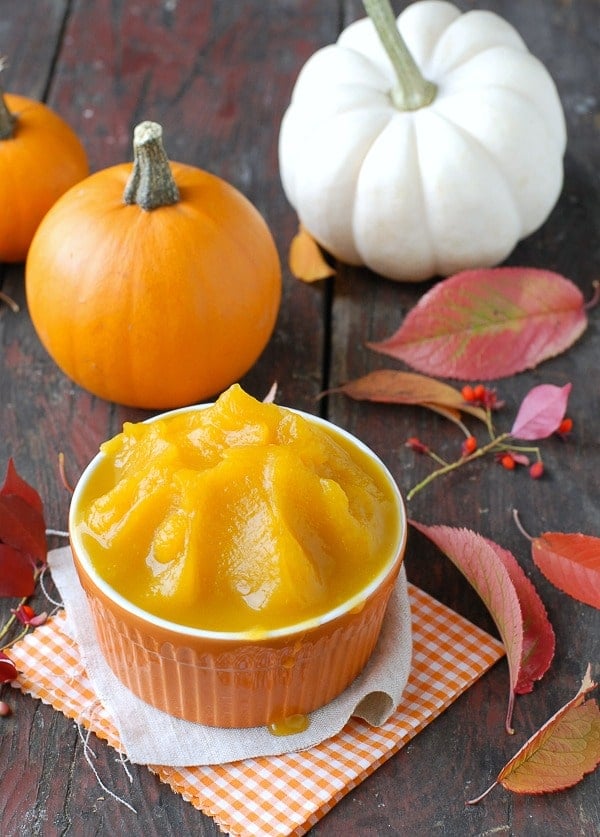
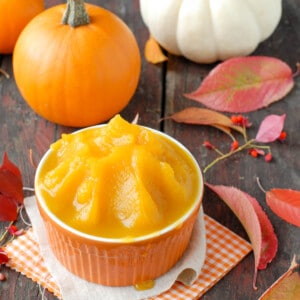
Pumpkin Puree is the star ingredient in all your favorite fall recipes, savory recipes and sweet recipes! It’s so easy and delicious to make your own homemade pumpkin puree it at home with these step-by-step instructions. No need to by the canned stuff anymore!

Whether you love Pumpkin Spice Lattes, pumpkin bread, pumpkin oatmeal or a steaming cup of pumpkin chowder by a roaring fire, it all screams fall.
All these favorite pumpkin recipes you love have something in common. They use pumpkin puree. It’s the what gives all those recipes their delicious flavor.
Sure, you can use it from a can but it’s SO EASY and delicious to make it at home!
The method is simple and easy, as well as the puree freezes wonderfully for later use.
Pumpkins are an anti-oxidant, anti-inflammatory food. This makes them a great addition to one's diet to keep a body healthy. They also have a high amount of Vitamin C.
The seeds are high in protein so when carving Jack o Lantern pumpkins save them!
Use our best roasted pumpkin seeds method to avoid wrestling with the squash goop (use this method with butternut squash seeds too).
Jump to:
What is Pumpkin Puree?
It is the cooked flesh of a pumpkin that has been pureed into a smooth consistency. It's what you’d purchase in cans that becomes a key seasonal ingredient in many dishes.
The star ingredient in the classic Thanksgiving pie filling, that give that well-loved pumpkin flavor, along with all your other favorite fall recipes.
It’s easy and satisfying to make your own pumpkin puree.
What you’ll need
To make this pumpkin puree recipe you’ll only need a few things.
Pumpkins. Depending on how much you want to make one or two small pumpkins is probably all you’ll need. You can find them at the local grocery store, the farmer’s market or your favorite pumpkin patch in the fall. See our recommendations for best pumpkins below.
Supplies Needed
- Large sharp kitchen knife (serrated knives work well)
- Large Baking Pan (I use a 15-inch by 10-inch by 2-inch Pyrex pan)
- Sharp-edged large spoon or special scooper
- Food Processor or Blender
- Ice cube trays and freezer bags or containers if freezing the puree
- OPTIONAL: a baking sheet lined with parchment paper for the seeds
Best Pumpkins to Use for Making Puree
The type of pumpkin I use is Sugar Pumpkin or Pie Pumpkins. They are a smaller pumpkins with sweeter flesh. Though small, sugar pumpkins yield a large amount of puree.
Fresh pumpkins are abundant in the fall in grocery stores and the Farmer’s Market. It’s easy to find these varieties.
They are superior to most Jack o Lantern giant pumpkins for this recipe.
How to Make it
Though it takes some time to cook, making the fresh pumpkin puree at home is very easy with these simple steps!
For a detailed printable recipe refer to the recipe card at the end of the blog post.
STEP 1. Preparation.
Preheat the oven to 375 degrees f.
Slice the pumpkin in half (I suggest using a long sturdy serrated knife; it needs to be sharp knife) (photo 1).
Scoop out the seeds and membrane (use a large kitchen spoon OR a special scooper for this task); (photo 2).
Reserve the seeds for making Roasted Pumpkin Seeds.
NOTE: don't worry about removing all the membrane. After it’s cooked it will be very easy to remove before scooping out the flesh to puree.
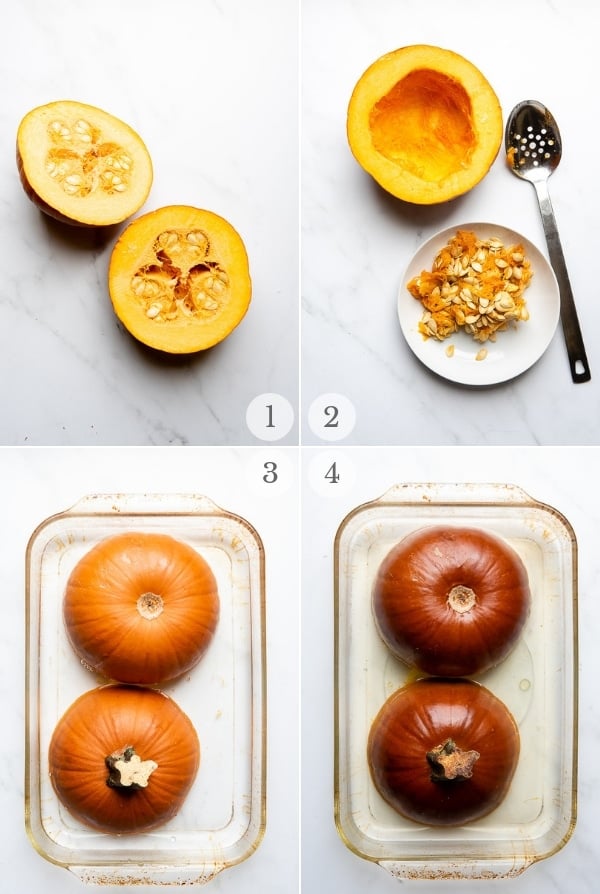
STEP 2. Cook the pumpkin.
Place the pumpkin halves cut-side down in a large baking dish filled with 1-inch of water (photo 3).
Bake in the preheated oven for 45-90 minutes (photo 4) depending on the size of the pumpkin.
Example: a 3-pound size will cook for about 45 minutes, a 4-pound size 60-70 minutes.
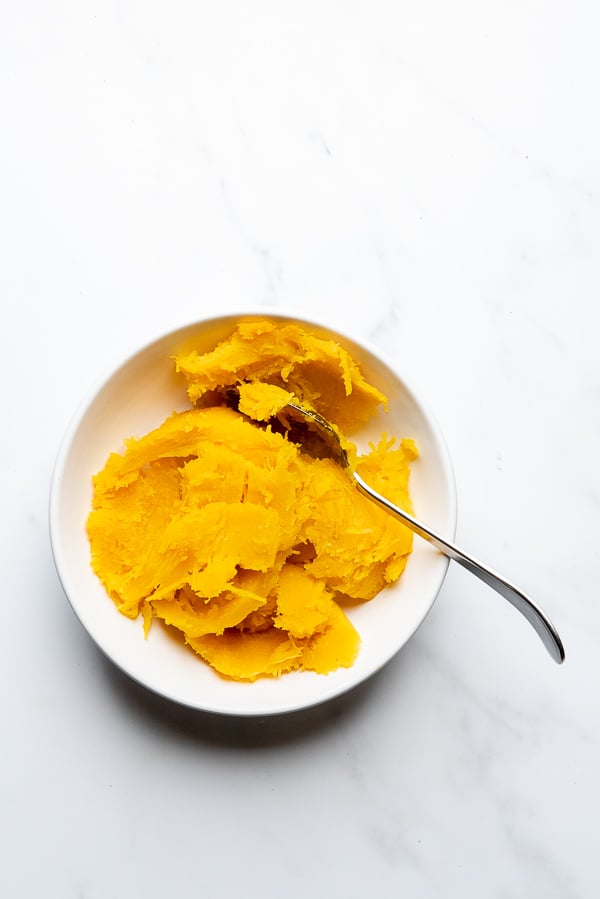
STEP 3. Make the Puree.
When the cooking is done (the flesh of the pumpkin will be soft, easily separated from the pumpkin skin and be fork tender), remove from the oven.
Allow to cool until it can be handled comfortably. Scoop out the flesh and process into a smooth puree in a food processor or blender. A potato masher can also be used.
How to Use it
It adds a creamy texture to soups and stews, is wonderful in breads without lending an overpowering flavor.
And of course stars in many desserts recipes at this time of year.
Some Favorite Recipes to Use it
- Pumpkin muffins
- Rice Pudding
- Dessert Bars
- Pumpkin butter
- Tamale Pie
- Mini Cheesecakes in Mason Jars
- Try this sweet & savory pumpkin recipe collection for more ideas (all gluten-free too)
Frequently Asked Questions
Keep in a sealed container and will last 5-7 days in the refrigerator.
The yield is highly dependent on its size and its meatiness. I recently made puree using a seven-inch diameter pumpkin with flesh walls about 3/4-inch thick. The yield was 3 cups of puree.
EXAMPLE: The pumpkin shown in the recipe process photos below was in a 15-inch by 10-inch baking pan. It had a yield of 4+ cups of 'meat' before pureeing.
As a rule of thumb one 3-pound size should yield the same volume as one can of store bought puree.
How to Freeze it
Freeze the puree for future recipes or to use in the off season rather than buying it canned.
Step-by-Step
- Pour the puree into an ice cube tray
- Freeze fully
- Then transfer the frozen puree cubes to a larger freezer container or bag
It is a very easy way to use small amounts and to get ahead on your Thanksgiving ingredients!
When frozen in an airtight container, the puree will last 6-8 months.

More recipes you’ll love!


Recipe
DIY Homemade Pumpkin Puree
Ingredients
- 1 Sugar Pumpkin (or other variety designated best for eating); select a size when halved would fit into a large baking dish
- Water
Instructions
- Preheat the oven to 375 degrees. Cut pumpkin in half, scoop out all seeds and membrane. Save the seeds for roasting!
- Place pumpkin halves cut side down in a large baking dish. Fill dish with 1 inch of water. Place into oven and bake for 45-90 minutes; until inside of pumpkin is soft (dependent on the pumpkin size and thickness).
- Remove from oven. Let cool to handle. Scoop out inside into a food processor or blender and pulse until pureed.
Video
Notes
- Pour the puree into an ice cube tray
- Freeze fully
- Then transfer the frozen puree cubes to a larger freezer container or bag
Nutrition
Originally published October 2014
veenaazmanov says
This is so informative. Thanks for all the detailing. Perfect way to stock some for all Pumpkin lovers.
Claudia Lamascolo says
What an easy recipe, delicious and easy I will definitely make this again!
Nikki says
Homemade is always best. Love how easy this is to make and how versatile it is. Perfect for the Holiday season.
Beth says
Great guide. I love making my own pumpkin puree. It’s so delicious in so many different recipes.
sly (Canada) says
glad i came across your website before roasting the pumpkin seeds the boiling prior to roasting saves so much time cleaning them and produces bigger seeds.. now do you have a trick to stop eating them? so so good! thks for sharing and Happy Thanksgiving!
Katie says
It’s true what they say- that homemade is always better. This is no different- I love being able to make my own pumpkin puree! Thanks for the recipe- and it’s perfect timing as well!