

Last week I shared a cool method for decorating Easter Eggs which can be used as table placeholders as well: DIY Chalkboard Easter Eggs. I love how they turned out and the option to erase and redo the art of messages on them.
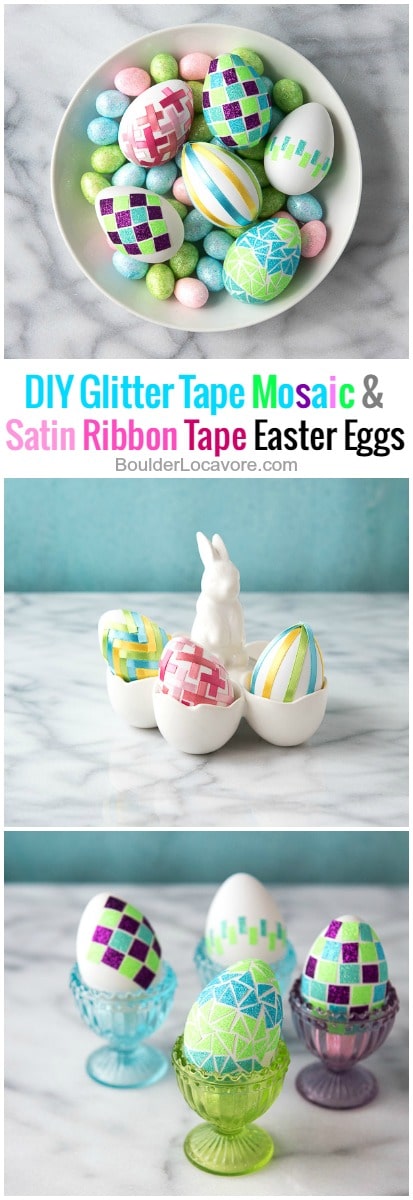
With the goal of creating a new method annually for decorating Easter eggs I thought that would be the solo method for this year. However as luck would have it my muse was working overtime and I had another idea which was to make with Glitter Tape Mosaic and Satin Ribbon Tape Easter Eggs. Another dye-free method that are so fun to make and look so unique when the eggs are done.
Washi tape and duct tape have been all the rage in the past few years to create not only art but decorative and functional items as well.
My son has been way into duct tape, creating everything from wallets to locker wallpaper in really fun designs. I personally love washi tape (a colorful, paper-thin tearable tape from Japan) and have made some pendants for a special fall cake and cocktail stirring sticks using it.
I recently went on a buying rampage procuring all sorts of thin decorative tape sure it would make Easter eggs dazzle.
In working with the tape I was reminded basic patterns such as making horizontal stripes is not possible due to the ever changing shape of an egg. I'm sure washi tape could be used to go free form either with small pieces or short lengths to overlap and wrap the eggs.
Why Glitter Tape is Perfect for Easter Egg Decorating
However being the magpie that I am, once I laid eyes on the glitter tape I was a goner. It's a beautiful sparkly tape that comes in a large assortment of colors. It is a medium weight and very pliable making it a great choice for this type of project. It has a clear backing so once pieces are cut, that peels off to ensure stickiness when you are ready for it.
It also is available in a 3/8 inch width which works better for covering the ever curving egg than wider tape. To be clear my goal was no folds or wrinkles in the tape, hence using the thinner varieties more successfully.
Soft Satin Ribbon Tape – Great for Easter Egg Decorating
I also love working with thin Satin Ribbon Tape. It comes in three colors all on the same spool so strips may be peeled from the adhesive and placed on the desired surface easily. I had not ever seen it before and love the vibrant colors and shiny finish.
In the middle of creating the chalkboard eggs I made an exciting discovery at my local craft store: Dyeable Craft Eggs. They are plastic eggs but of a different consistency than smooth, colored eggs to stash candy in. They look exactly like an egg though have a slightly porous surface to better absorb dye. They come in a package of twelve (in a half egg carton) and are slightly chalky when they come out of the package. A package of 12 retail for less than $2.
I tried using them for the chalkboard Easter eggs however they are too light to withstand the blast from the aerosol spray paint can and went tumbling when I tried. They are what I used for the ribbon eggs however which works well so they can be kept for Easter decoration or egg hunts in years to come. Of course traditional hard boiled eggs may also be used but need to be refrigerated.
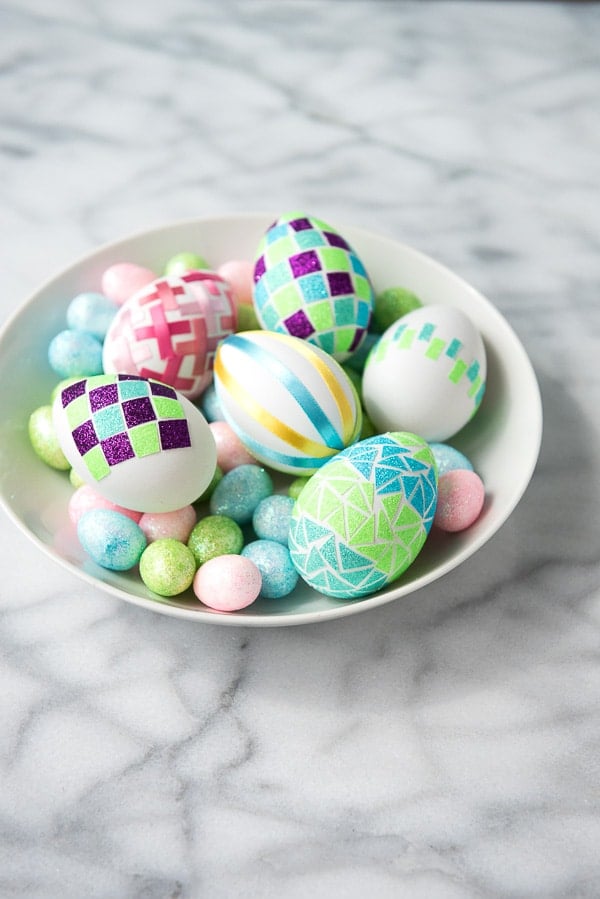
There is no end to the decorating options using these fun tapes. I've shared a few ideas here from the simplest to more intricate designs.
Tips for making Satin Ribbon and Glitter Tape Easter Eggs
- If using dyeable craft eggs, be sure to wipe them off fully before adhering the tape to remove the chalky outer surface.
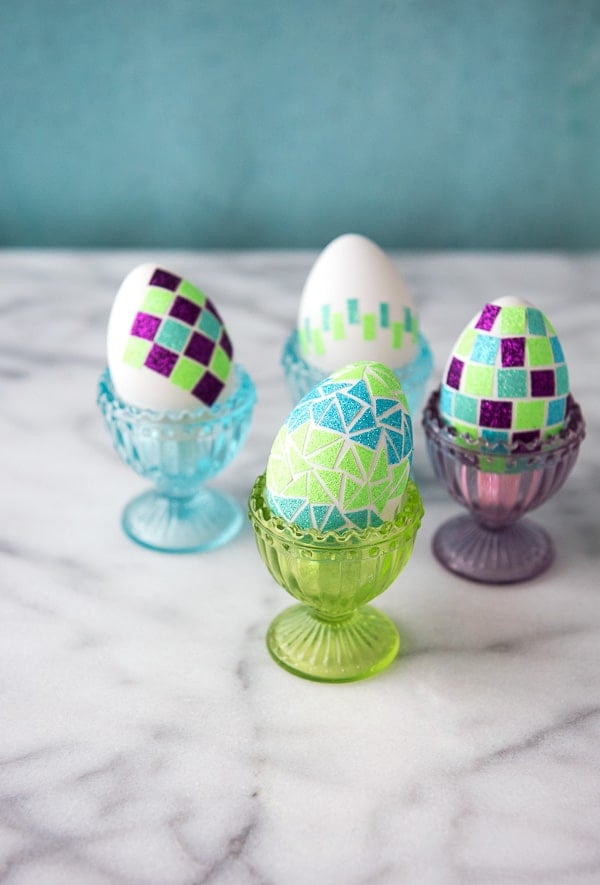
- Mosaic eggs look best with a uniform spacing is maintained between each piece of tape. See the photos for examples.
- The egg may be covered fully or merely decorated in one area. When covering the entire egg, the shape of the tape pieces being used may need to be adjusted when reaching the ends of the egg.
How to Make Glitter Tape Mosaic Eggs
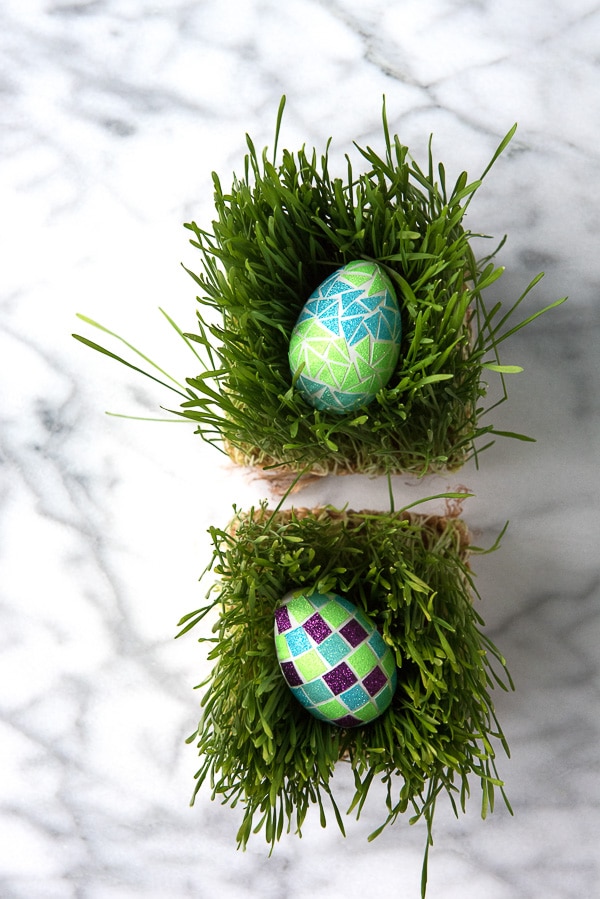
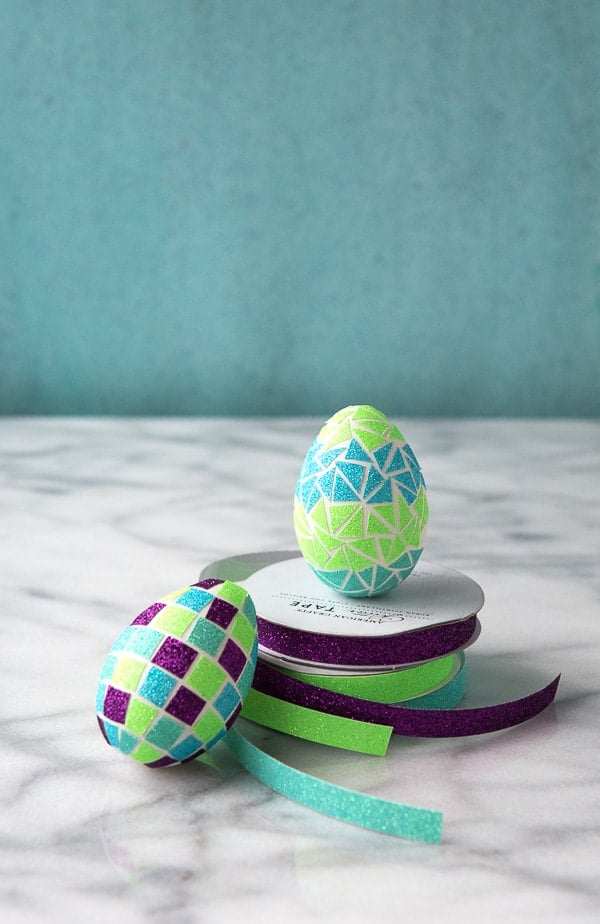
- Triangle Mosaic: This egg is my favorite; it takes more time but it's worth it. Select the number of colors you desire. The egg in the photo is made with two similar colors of blue, as well as green. I made color stripes with bands of the triangle mosaic. Any triangle shape will work however I made Right Triangles which have one 90 degree angle. By cutting the tape to include a 90 degree angle, and varying the remaining triangle side's width, there is always an angle to match up to for your pattern. Determine the pattern you want to make (e.g. stripes, free form, etc) and begin to place the triangles on the egg, ensuring even spacing between the edges of the triangles next to each other. Continue to piece the triangle pieces together to cover the desired area.
- Square mosaic: Cut uniform size squares (all sides the same length) of desired tape colors; affix them to the egg with even spacing. Squares may be aligned next to each other or placed in an offset pattern (make a line of squares next to each other, then start the next row with the space between squares aligning with the middle of the squares in the first row). The size of the squares may been to be altered toward either end of the egg.
- Diamond Mosaic: this is a bit of an optical illusion; the ‘diamonds’ are actually just uniformly sized square pieces of tape turned on a diagonal!
- Rectangle Mosaic: Cut rectangles in varying widths and alternate their placement using uniform spacing in between them. I chose to make an egg with one rectangle mosaic stripe in two colors.
How to make Satin Ribbon Tape Eggs
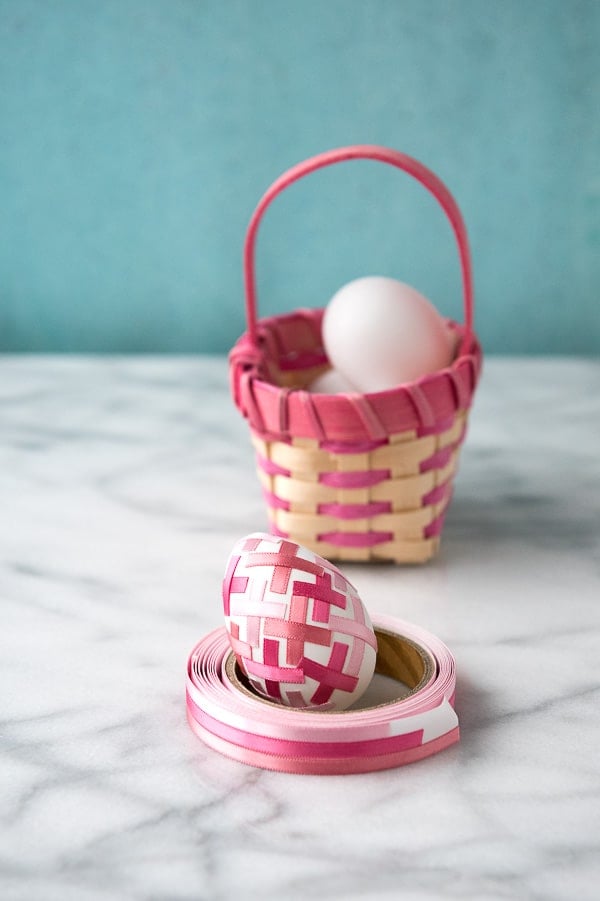
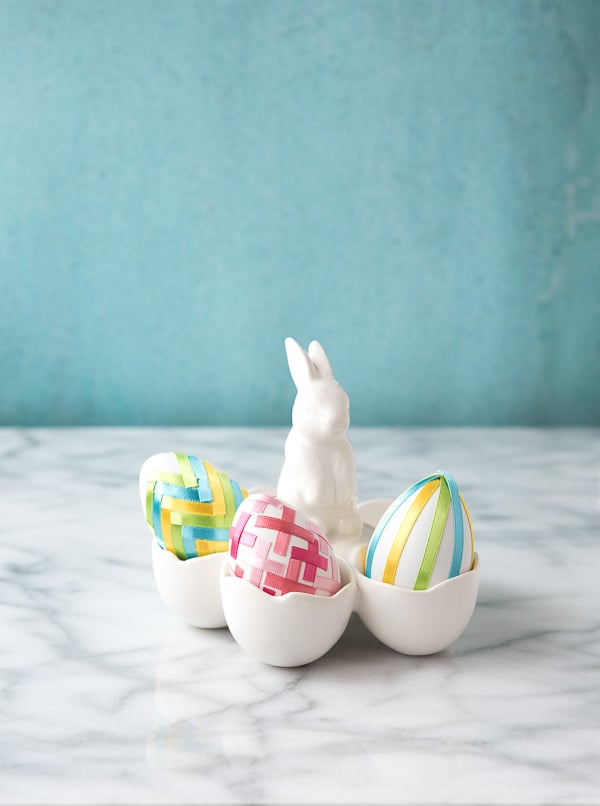
- 'Kisses' Egg: cover the egg with X's in varying sizes and colors, interweaving them. I used three colors of pink ribbon for the egg shown here.
- Herringbone: cut uniform length strips of ribbon to form a zig zag pattern. Once the first color is laid down, follow the pattern by applying a second color directly underneath the first. Ribbon will need to be trimmed as you go; the required length of ribbon will change with the width and curve of the egg. This design is more difficult.
- Vertical Stripe Egg: Adhere pieces of ribbon from one end of the egg, around the opposite end and back to the top; forming a full circle around the egg. Repeat placing the ribbon ½ inch away from the first ribbon. Continue until the egg is covered at your desired density.
SUPPLY SOURCES:
Dyeable Craft Eggs (brand: Celebrate It): Amazon, Michael's Crafts (I believe they are sold at Walmart also)
3/8 inch Glitter Tape (American Craft brand). Colors used on the eggs shown here: Cricket, Aqua, Powder Blue and Grape.
5mm 'Citrus' Satin Ribbon Tape (includes blue, green and yellow): CuteTape.com
5mm 'Pink' Satin Ribbon Tape (three shades of pink): CuteTape.com
Richard Hicks says
They are very pretty and will try next year
Kate @ Diethood says
GORGEOUS GORGEOUS GORGEOUS!! Obviously, you’ve left me speechless! 😀
Toni Dash says
Thank you Kate! I love them too.
Nutmeg Nanny says
I LOVE these eggs! They are so pretty 🙂
Toni Dash says
I’m so glad you do! Thank you for saying so.
pam (Sidewalk Shoes) says
such a clever idea!
Toni Dash says
Thanks Pam! They are really fun to make.
Denise E. says
These are beautiful! This post is definitely going to be pinned to my craft board! Thanks!