

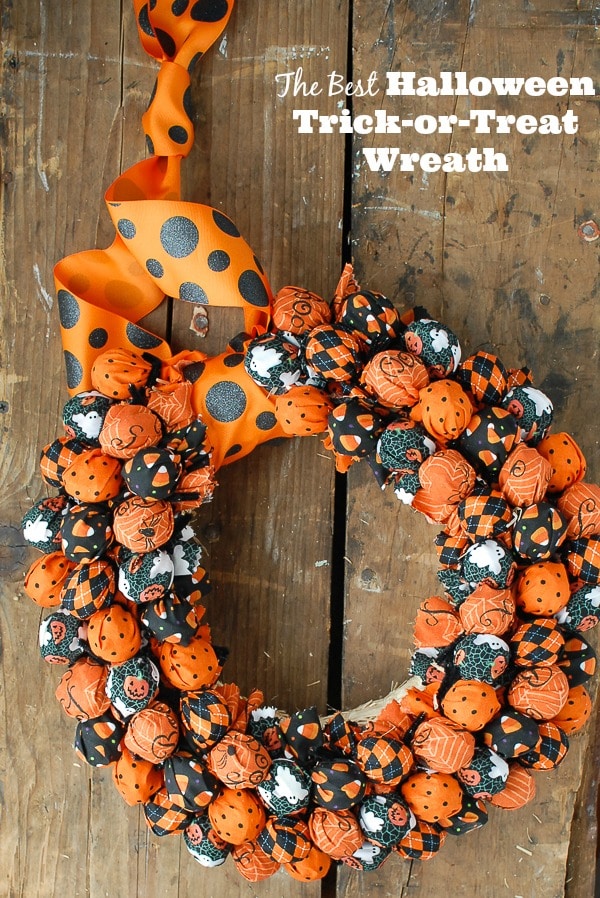
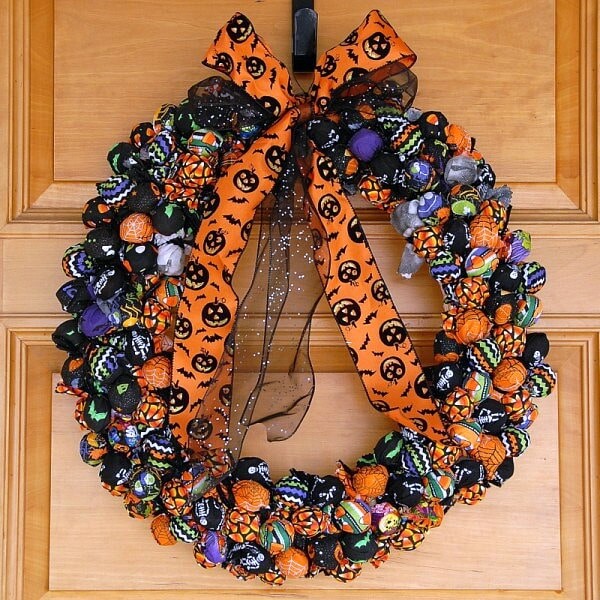
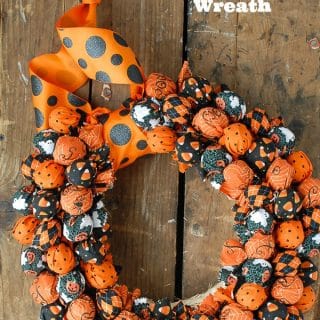
This Halloween Wreath will thrill Trick-or-Treaters! Looks like a decoration but is really a treat. Kids come back every year hoping I made it again!
Making a Halloween Wreath is a fun way to celebrate the season but that’s not all!
It’s a festive door decoration AND a trick-or-treat surprise.
Kids and adults love it!
Halloween Wreath for Trick or Treaters
This Halloween wreath is easy to make and to customize to your preferences. It's a beautiful door decoration.
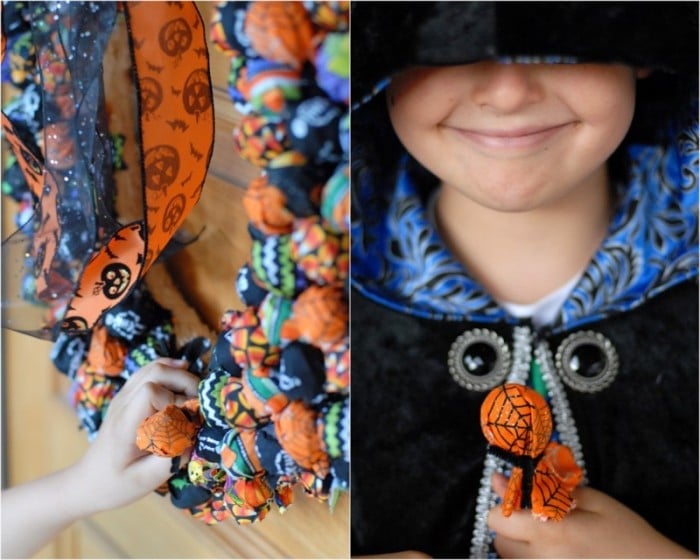
It's also perfect for Trick-or-Treaters! I've made it now annually for over 15 years and kids comment on it every year mentioning how excited they are I made it again.
It's cute but the surprise that it's not just a Halloween decoration delights kids (and adults) of all ages.
Halloween Wreath Making Tips
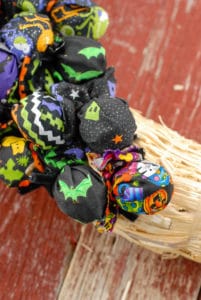
The wreath is basically a collection of Tootsie Pops covered in Halloween fabric and inserted into a straw wreath.
Over the years I've made it I've refined the process to make it easier and have some time and money-saving tips!
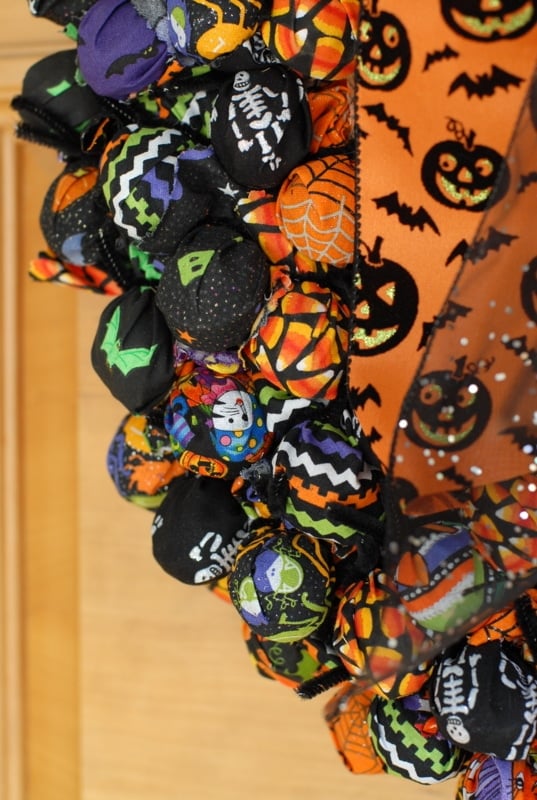
- Use at least 5 different Halloween fabric patterns to give the wreath dimension.
- Choose fabric with a smaller pattern. It works best to show the pattern on the wrapped Tootsie Pop.
- Money saving tip: Buy Halloween fabric out of season. It's often on sale and is a less expensive time to pick new fabrics at less cost and with more options.
- The straw wreath (unstuffed with pops) can be used for more than one year. I typically use the same wreath for 3-4 years.
- When the straw begins to fall apart and wont' hold the pop sticks it's time for a new one.
- I store Halloween wreath supplies in a 2-gallon zipper close bag with my Halloween decorations. I include:
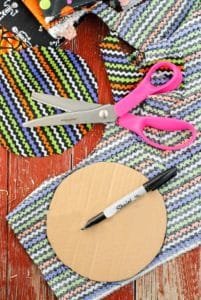
- a cardboard circle to trace onto the fabric
- a sharpie, unused fabrics
- unused fabric circles
- a pair of pinking shears
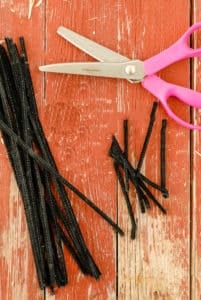
- pipe cleaners I can quickly grab and begin on the new wreath easily.
- The Halloween wreath can be made with any size straw wreath form as well as packed densely with pops or loosely.
- If made with loosely spaced pops, they look like ghosts if the fabric ends are pulled out to show on the wreath.
How to Make a Halloween Wreath – Step by Step
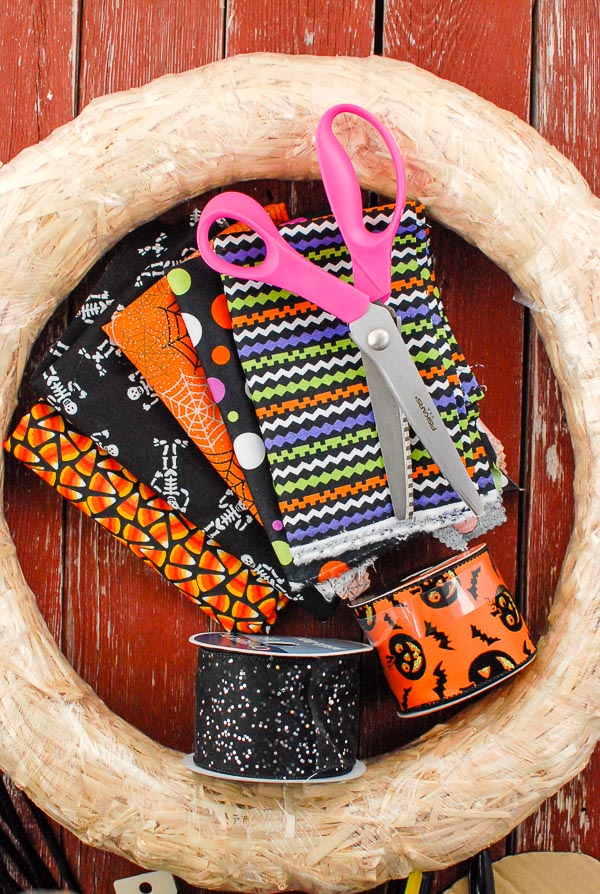
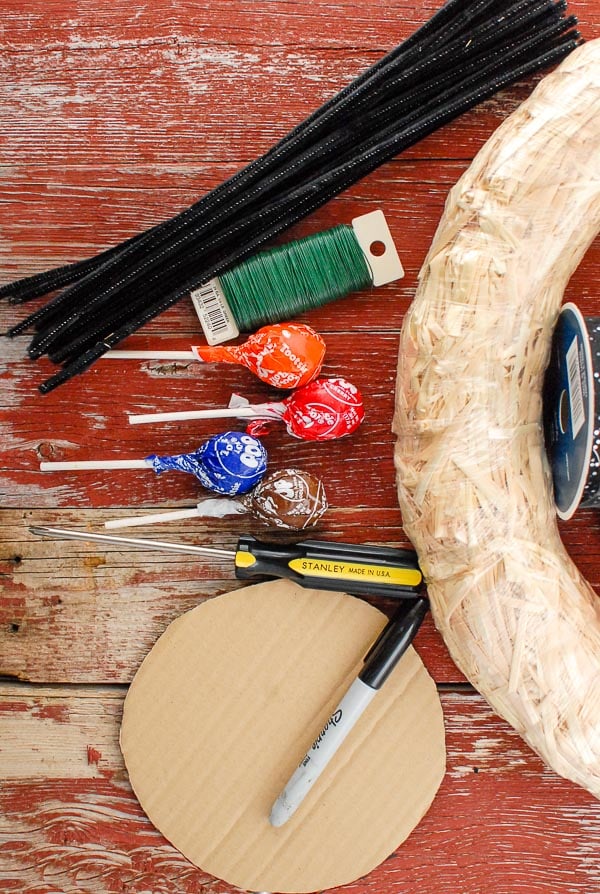
Halloween Wreath Supplies
- 18 inch diameter straw wreath (available from craft and hobby stores)
- Approximately 150 lollipops (I use Tootsie Pops)
- 5 yards of 45 inch wide Halloween fabric in varying patterns (I use at least 5 varied patterns; as a guide 30 circles of fabric can be cut from 1-45 inch wide yard. Tip: Generally smaller patterns work better in my view. Adding some metallic fabric catches light and looks sparkly. Glow in the dark patterns are fun too!)
- 6 ¼ inch diameter circle cut from cardboard for the tracing stencil (I used an appetizer size plate turned upside down to make the circle)
- Sharpie pen
- 50 – 12 inch black pipe cleaners (will be cut into thirds)
- Pinking shears
- Floral wire
- Roll (s) of 2 ½ inch Halloween ribbon for bow, preferably with wired edges (can use more than one pattern for a double bow). Shortcut Tip: you canbuy a premade bow too!
- Phillips screw driver
- Floral wreath hanger (black; available at craft and hobby stores)
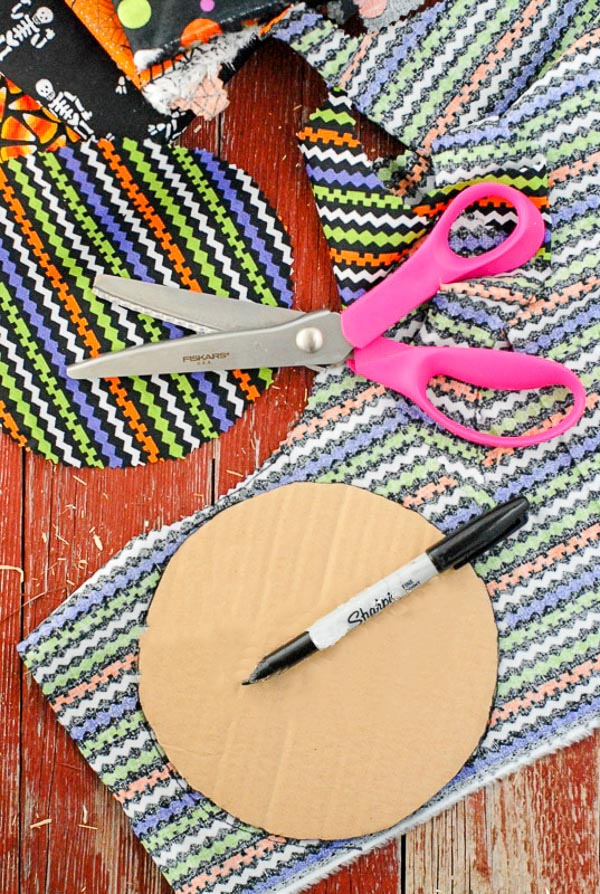
STEP 1: Cutting out Fabric Circles
Cut out a 6 1/4-inch diameter fabric circles using a homemade cardboard guide.
TIP: I made one by outlining a small plate of the same diameter onto a piece of cardboard and cutting it out); trace and cut out fabric circles.
Time Saving Tip: fold the fabric over into aproximately 4 layers thick, trace a circle on top and cut through all layers at once. This really speeds up the process.
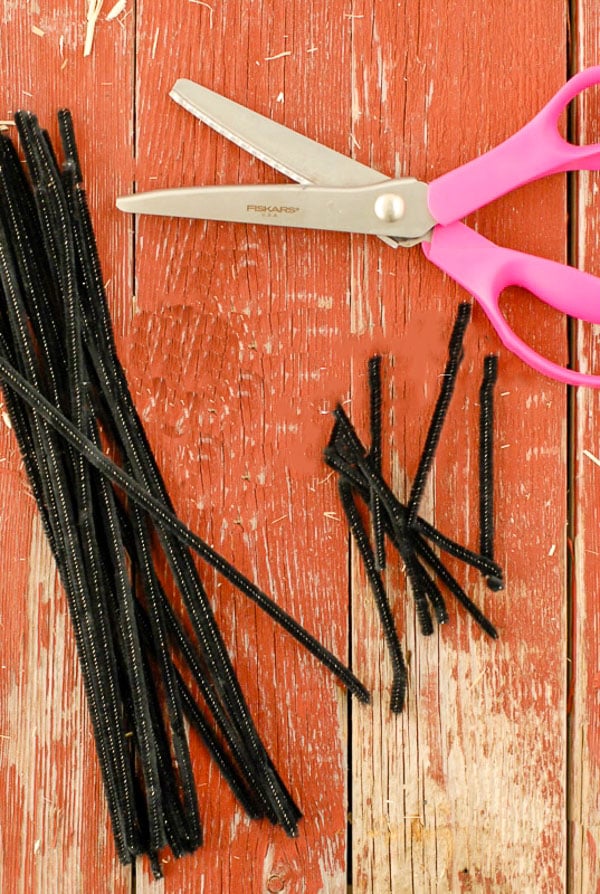
STEP 2: Cutting Pipe Cleaners
Cut 12-inch pipe cleaners in thirds, making 4-inch lengths.
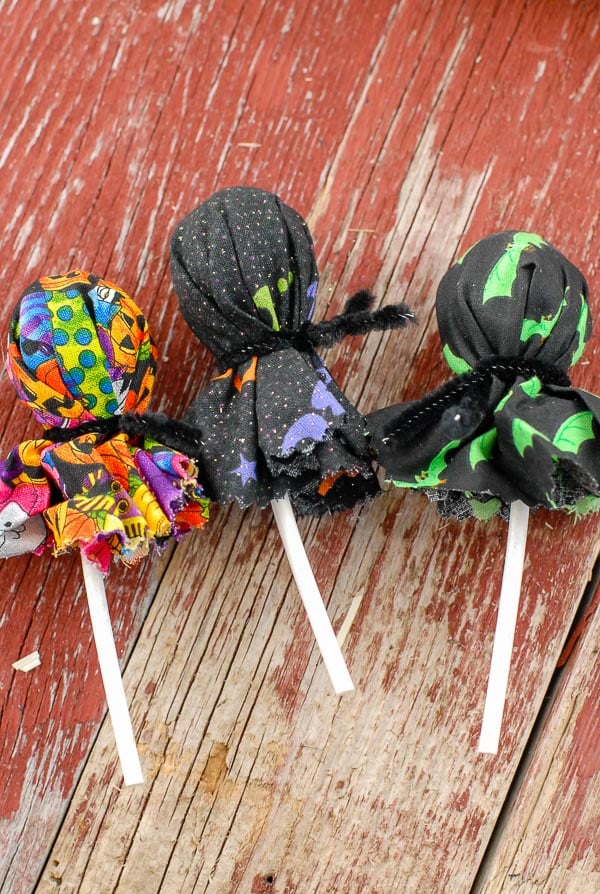
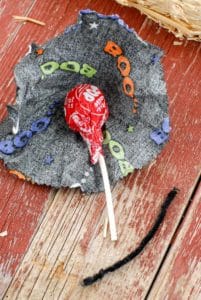
STEP 3: Wrapping Lollipops
Place the pop in the middle of a fabric circle.
Pull fabric tightly around the head of the pop and hold underneath the pop.
Twist a pipe cleaner snugly underneath the pop to secure the fabric.
Make 1-2 more twists to hold securely.

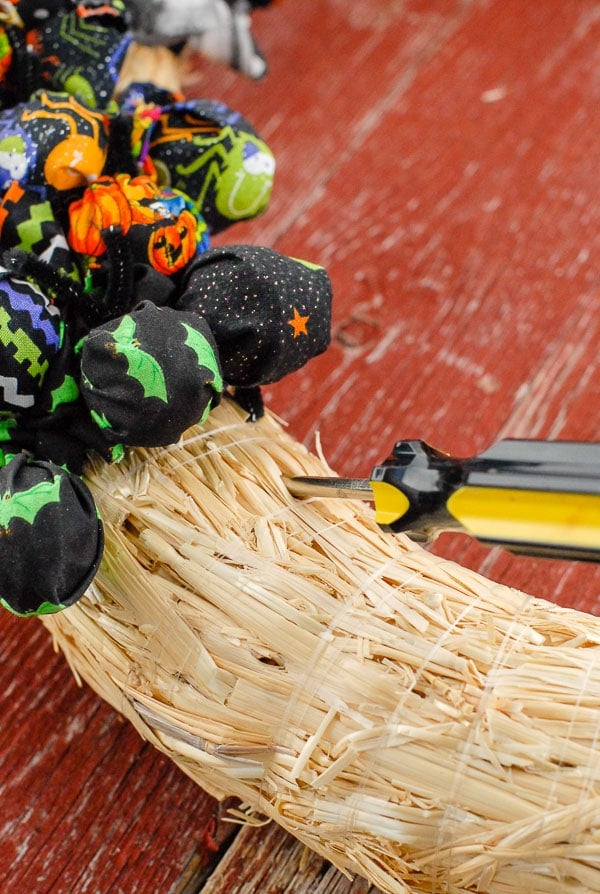
STEP 4: Making holes in the wreath
Remove the plastic over-wrap from straw wreath being careful NOT to cut the nylon thread that holds the wreath intact!
NOTE: The nylon thread is see through so do this step in good light.
WARNING: Trying to stick lollipops in a new wreath often bends and breaks the sticks! Follow the method below instead.
Holding the Phillips head screwdriver at a 45 degree angle poke holes into the wreath but not through to the underside.
Making the hole on an angle is so the stick of the pop will not protrude through the backside (which happens if they are stuck straight in). The sticks will be concealed within wreath.
Leave approximately 4 inches at the top of the wreath without holes which is where the hanger and bow will be.
Tips for Making Halloween Wreath Holes
- There will be some resistance when inserting the screwdriver.
- Keep hands out of the path of the screwdriver (this is an adult activity)!
- You can interleave this with the next step of inserting the lollipops so you find the spacing you desire.
SPACING TIP: I like the pops snug together so the wreath looks like a mass of Halloween balls. Some like to leave space between, and fluff out the bottom of the fabric so they look like little ghosts.
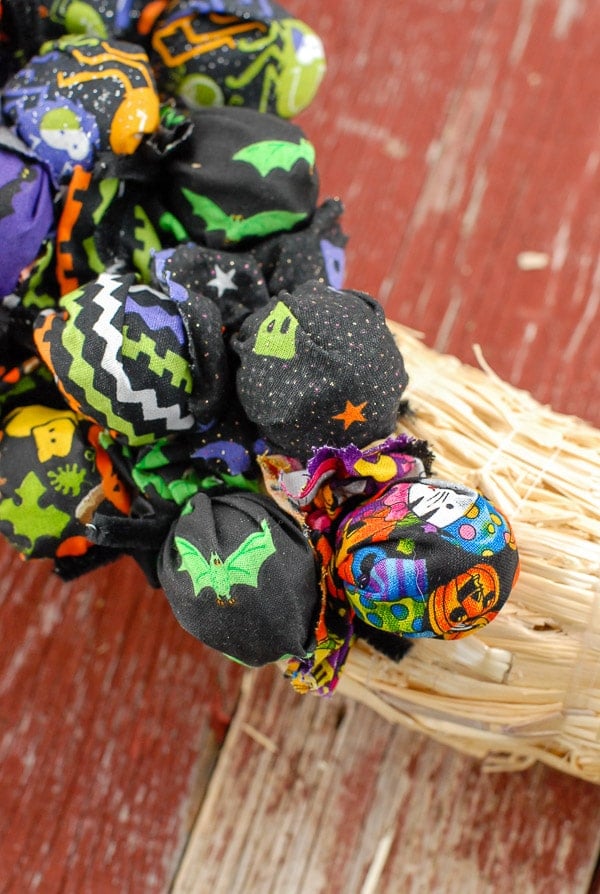
STEP 5: Insert the lollipops into the Halloween wreath
Follow the angle of the holes and insert the lollipops to cover the front of the wreath.
Wrap the pops in toward the center and out toward the back to cover the wreath.
None of the straw will be showing from the front with this amount of lollipops.
More covered pops can be added to completely cover the sides and middle if you choose.
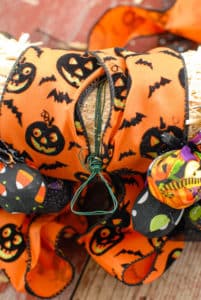
STEP 6: Making floral wire hanger
Using floral wire, wrap a length around the top of the wreath multiple times and form a hanger from a few strands of the wire on the back.
Hanger Tips
The wreath will be heavy with all the lollipops inserted so this will need to be sturdy.
Once you've made the hanger, test it by hanging it on the wreath hanger to ensure the wire will stay secure before making the decorative bow.

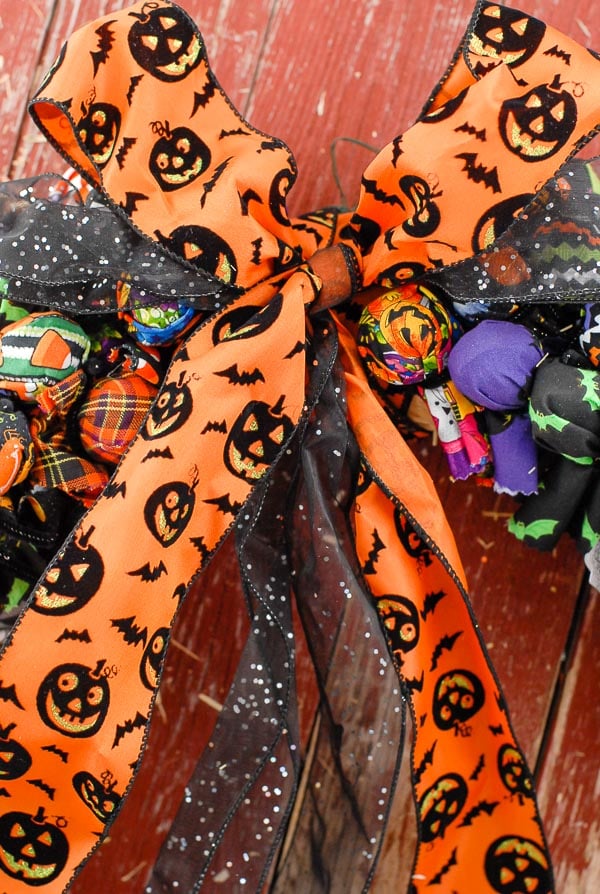
STEP 7: Making the bow
Consider how large a bow you would prefer and how long you would like the tails of the bow.
Allow for at least 1 ½ times that length, cut one-two lengths or ribbon (depending on whether you will make a single or double ribbon bow).
Find the middle of the length of ribbon and place that at the back of the hanger.
Wrap the ribbon around the wreath on either side of the hanger, allowing ends of ribbon to end in the front.
Tie a bow and fluff the ribbon as you choose.
NOTE: You can also construct a floral bow and attach it to the front of the wreath if you prefer. OR buy a bow and attach it.
Using the Halloween Wreath
Hang it for decoration (using a wreath hanger) for the season and then hand the lollipops out for Halloween!
The wreath can be reused the following year and until it begins to break down.
Fun Halloween Recipes for your Celebration
- Fast Easy Popcorn Balls for Halloween
- Creepy Spider Egg Pudding
- Drink If You Dare Shooters
- Bloody Maria Shots
- Witch Hat Halloween Cookies
Please SUBSCRIBE and FOLLOW ME on FACEBOOK , TWITTER , INSTAGRAM and PINTEREST!
Trick or Treat Halloween Wreath
Equipment
Ingredients
- 8 inch diameter straw wreath available from craft and hobby stores
- 150 lollipops (aproximately) I use Tootsie Pops
- 5 yards 45-inch wide Halloween fabric in varying patterns see notes for some tips
- 6 ¼ inch diameter circle cut from cardboard for the tracing stencil
- Sharpie pen
- 50 12-inch black pipe cleaners will be cut into thirds
- Pinking shears
- Floral wire
- 1-2 rolls 2 ½ inch Halloween ribbon for bow preferably with wired edges (can use more than one pattern for a double bow)
- Phillips screw driver
- Floral wreath hanger black; available at craft and hobby stores
Instructions
Cutting out Fabric Circles
- Using the cardboard circle guide, cut out the fabric circles (the same number as the number of lollipops being used). TIP: You can generally fold the fabric and cut through about 4 layers at once which saves a bit of time over cutting each circle separately.

- Cutting Pipe cleaners: Cut 12 inch pipe cleaners in thirds, making 4 inch lengths.
- Wrapping Lollipops: Place the pop in the middle of a fabric circle. Pull fabric tightly around the head of the pop and hold underneath the pop. Twist a pipe cleaner snugly underneath the pop to secure the fabric. Make 1-2 more twists to hold securely.
Making holes in the wreath
- Remove the plastic overwrap from straw wreath being careful NOT to cut the nylon thread that holds the wreath intact (it is see through so doing this in good light will help).
- Trying to stick lollipops in a new wreath often bends and breaks the sticks. Holding the screwdriver at a 45 degree angle (so the stick of the pop will not protrude through the backside which happens if they are stuck straight in) poke holes into the wreath but not through to the underside (sticks will be concealed within wreath).
- Leave approximately 4 inches at the top of the wreath without holes which is where the hanger and bow will be.
- NOTE: You will experience some resistance so be careful to keep hands out of the path of the screwdriver (this is an adult activity)!
- You can interleave this with the next step of inserting the lollipops so you find the spacing you desire. I like the pops snug together so the wreath looks like a mass of Halloween balls.
- You can also leave space between, and fluff out the bottom of the fabric so they look like little ghosts.

Inserting the lollipops into the wreath
- Follow the angle of the holes and insert the lollipops to cover the front of the wreath, wrapping in toward the center and out toward the back.
- None of the straw will be showing from the front with this amount of lollipops. You can add more to completely cover the sides and middle if you choose.
Making floral wire hanger
- Using floral wire, wrap a length around the top of the wreath multiple times and form a hanger from a few strands of the wire on the back. The wreath will be heavy with all the lollipops inserted so this will need to be sturdy.
- Once you’ve made the hanger, test it by hanging it on the wreath hanger to ensure the wire will stay secure before making the decorative bow.
Making the bow
- Consider how large a bow you would prefer and how long you would like the tails of the bow. Allowing for at least 1 ½ times that length, cut one-two lengths or ribbon (depending on whether you will make a single or double ribbon bow).
- Find the middle of the length of ribbon and place that at the back of the hanger.
- Wrap the ribbon around the wreath on either side of the hanger, allowing ends of ribbon to end in the front. Tie a bow and fluff the ribbon as you choose. NOTE: You can also construct a floral bow and attach it to the front of the wreath if you prefer.

Using the Wreath
- Hang it for decoration for the season and then hand the lollipops out for Halloween! The wreath can be reused the following year and until it begins to break down. If reusing wreath again skip step 7 and just insert the lollipops into the holes from the prior year.


Notes
Originally published: September 29, 2012
Helen J Roberts says
What a great idea! Can also be used with other candies, if you place them in small bags and add sticks to bags. Thank you for sharing.