

For years I was more than satisfied to dye hard-boiled eggs for Easter with the traditional kit. Mixing water and vinegar and wondering which pellet was really which color until immersing them in liquid to watch the miraculous foaming of what looked to be brown into lemon yellow.
Two years ago I got a wild hair to try naturally dyed eggs. Using produce I experimented with creating vegetable dyes to fabulously earth results. I was hooked and could not face another kit. Last year I made Silk Tie Dyed Eggs with a traditional method used by one of my children's teachers. It was unique and exciting, never knowing how things would exactly end up.

This year I needed to think of something new, never liking a repeat. I liked the idea of making eggs with a bit of a stained glass look and somewhere from the vestiges of my childhood art experiences I remembered using Bleeding Tissue Paper. It sounds gruesome but essentially unlike the tissue paper sold for gift wrap purposes; this tissue paper is embedded with pigment which imparts to paper when wet. It's sold for art projects and I decided to experiment with using it to dye eggs with great success!
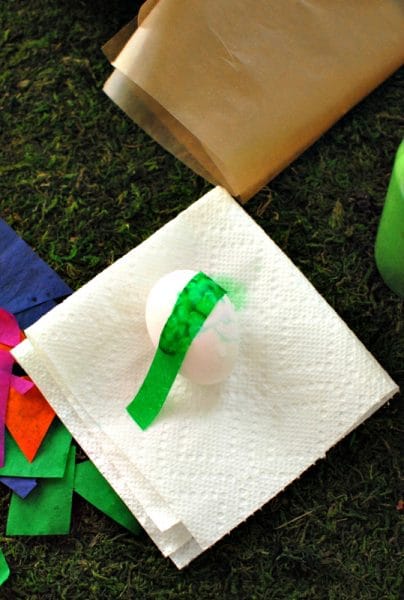
It's a very simple process of placing strips of paper on a hard-boiled egg, wetting it which allows the paper to stick to the egg and the dye to transfer. Once the tissue dries it falls off the egg and the dye is transferred.
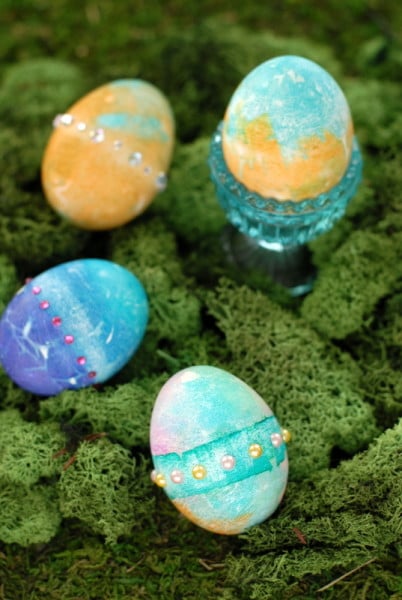
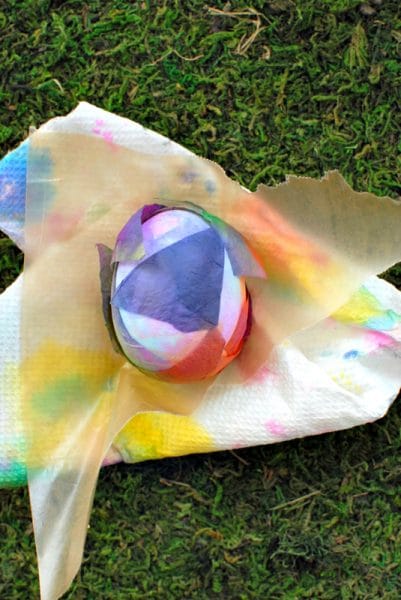
I experimented with applying multiple layers of paper; once a layer dried, I added other pieces to deepen a color or create more dimension. Also wrapping an egg in one sheet of a specific color which created almost a batik effect where the paper crinkles. The possibilities are endless. The length of time for making an egg is short; 5-10 minutes to cover the egg (depending on your level of artistry) and a bit less than an hour for it to dry completely (note: paper can be removed earlier as the color transfers immediately though I left it on to maximize the color transfer). I also chose to embellish some of the eggs using scrapbook rhinestone stickers in a small size so they would conform to the eggs curvature yielding 'poor girl's Faberge eggs'! It's a very easy and fun method suited to all ages.
Some tidbits:
- The dye will also transfer to your hands (and anything else that could possibly stain!). You can use vinyl gloves or wash your hands frequently (which is what I did). Smocks for little egg artists might be a good choice too!
- Be sure to purchase 'bleeding tissue paper'; regular tissue paper is colorfast and will not work. Art or craft stores will sell it and I purchased a pack with several different colors in one. Here is a link to Amazon.com for online ordering options (click here).
- The adornments are found in the scrapbook aisle of any craft store. They are rhinestone stickers which adhere once placed onto the eggs. There are many choices but I suggest keeping them small so they will fully sit on the egg.
- Be sure to cover your work area with both waterproof and absorbent materials. The water spraying of the eggs will drop onto the surface below and need to be dabbed up (paper towels are great).
STAINED GLASS {Bleeding Tissue} EASTER EGGS
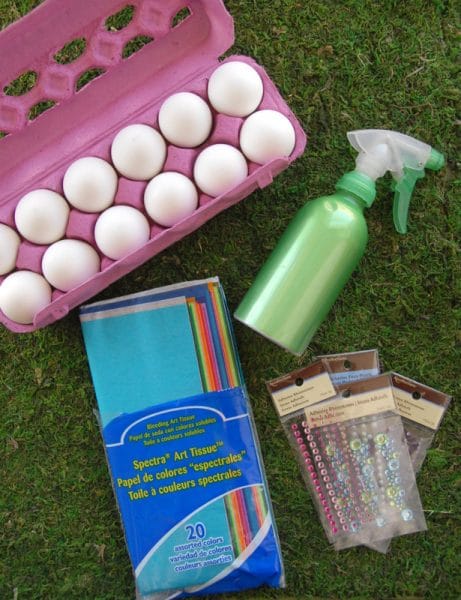
Supplies:
- Hard-boiled eggs
- Bleeding tissue paper
- Spray bottle of water or a small bowl of water and a sponge-brush
- Sticker embellishments
- Paper towels
- Wax paper or plastic wrap
Instructions:
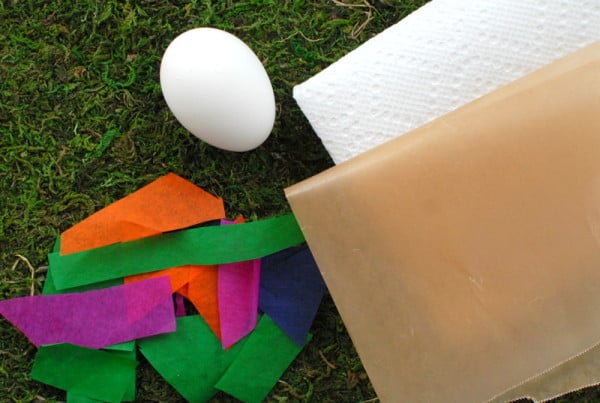
1. Prepare tissue paper for first egg by cutting out strips or shapes, or by tearing it. Place a piece of tissue on the egg and spray it with a bit of water to fully wet the tissue (the paper soaks in the water so only a little is needed). Alternatively the paper can be dabbed with a sponge-brush to wet. With a paper towel, soak up any drips of the color running off the tissue paper onto other parts of the egg (unless you don't mind that).
2. Continue to apply tissue paper as you desire to fully cover the egg. Fold a paper towel into quarters (fold in half once, and again in half) and place the egg on its end in the center of the paper towel (the padding of the towel allows the egg to stand upright). Allow excess liquid to soak into the towel for 1-2 minutes.

3. Place a waterproof layer in between the paper towel and egg (wax paper or plastic wrap). This allows the pigment of the tissue to absorb onto the egg and not be soaked up into the paper towel.
4. Leave egg in place until it is fully dry. When the tissue is dry is will begin to peel off the egg by itself. If you desire to layer more color on or add more shapes onto the color egg you may repeat the process above.

5. When the egg is finished and dry, you may apply stickers as adornment.

An Easter dilemma: What to do with hard-boiled eggs once they are all found? Keep your eye on Boulder Locavore for a delicious idea!
Cyndi Butler says
I missed dying eggs this year! First time in a long time that we didn’t have colored eggs and lots of egg salad. These are really pretty eggs and might have to give it a try – looks like fun!
Toni Dash says
It’s hard to get everything done around a holiday I think. These eggs were very fun; partially since it was such a different way to color them. It’s very simple and quick too; might be just the ticket next year for a busy gal like you!
Tibblets says
Looks really fun & inspiring!! =) This is all non-toxic, correct? Eggs are still edible?
Toni Dash says
Hi Jennifer. It is just like dip-dyeing eggs as the coloring only resides on the outer area of the shells.
Biren @ Roti n Rice says
How unique and pretty!
Toni Dash says
Thanks Biren!
Michelle @Amourbeurre says
Awesome idea! I love how much easier it would be to control where the color goes this way.
Toni Dash says
I completely agree Michelle. It was a much freer experience too since you can carefully place tissue or wrap an egg in two seconds and wait to see what happens. It was really fun.
Jennifer-The Adventuresome Kitchen says
Toni- what fun! For the last several years we have hosted an egg-decorating party on the Saturday before Easter. It’s a free for all foodiefest and folks bring all sorts of egg decorating stuff. This will be a great addition to the ‘egg table’ this year! I love the rhinestones too!
Toni Dash says
This is be a sure hit! It’s so easy other than being mindful about the wet tissue not touching things you don’t want dyed! It allows a different type of freedom I found too. Please let me know how your crew enjoys it!
Shoba Shrinivasan says
Awww these look super cute and very very original! I am thinking I shd make tie and dye style eggs!!!
Shobha
Toni Dash says
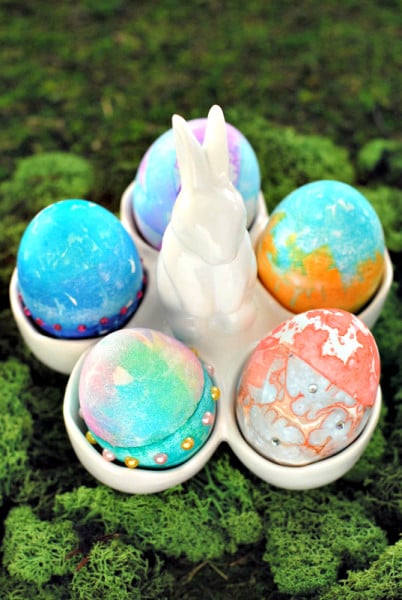
I agree Shoba, you should! It’s very fun and not all the colors come out as you’d expect. My favorite egg, or one of them, is in the photo with the bunny egg holder on the right. It has some crinkly designs; the lower part of the egg was dyed with chocolate brown paper which you’d never guess!
Meeling says
So pretty! We’ve never really gotten into the egg dyeing in our house. My kids were always more interested in the little plastic eggs and what yumminess they would find when they opened them. 🙂
Toni Dash says
We’ve always dyed eggs probably from growing up with that as a tradition. I think hiding plastic eggs makes a lot more sense, especially indoors. Have some bad memories of unfounded hard-boiled eggs months later!
Kayle (The Cooking Actress) says
These are GORGEOUS!
Toni Dash says
Thank you Kayle! They are really fun to make.