
Updated September 2018
Who says a cake has to be ordinary? Celebrating a trip to Hawaii? Want an unexpected cake for a birthday? This Smokin’ Volcano Cake will do the trick.
One part baking, one part craft and one part science project, this fun cake will WOW at any occasion. Special features like actual smoke and surprise POPS like little lave embers in every bite will make this (and you) the star of the show.
Smokin’ Volcano Cake
This recipe was originally created in 2011 when I was part of a vintage recipe swap. The base recipe I had to recreate was a ‘wacky cake’, a depression era technique of creating more air in cakes through a chemical reaction between vinegar and baking soda.
My interpretation both used this technique but applied it literally to a cake that created its own air or smoke: a Volcano Cake.
A BIG Shortcut for Making Volcano Cake
As much fun as I had making this cake from scratch, if you aren’t wed to making it from scratch, I’d substitute chocolate cake mix. It requires a batter volume slightly less than 2 mixes (or scratch batches) so you may have some leftover to make cupcakes with.
You can also use Chocolate Frosting to frost the full cake. If purchasing chocolate frosting I would suggest 2-3 tubs to be sure to have enough to cover the entire cake. If some is leftover, frost the cupcakes from the leftover batter!
I would make the glaze from scratch as directed as this allows the perfect consistency for a ‘lava flow’. But by making the cake with mixes and using prepared chocolate frosting for the base, you’ll greatly simplify the recipe.
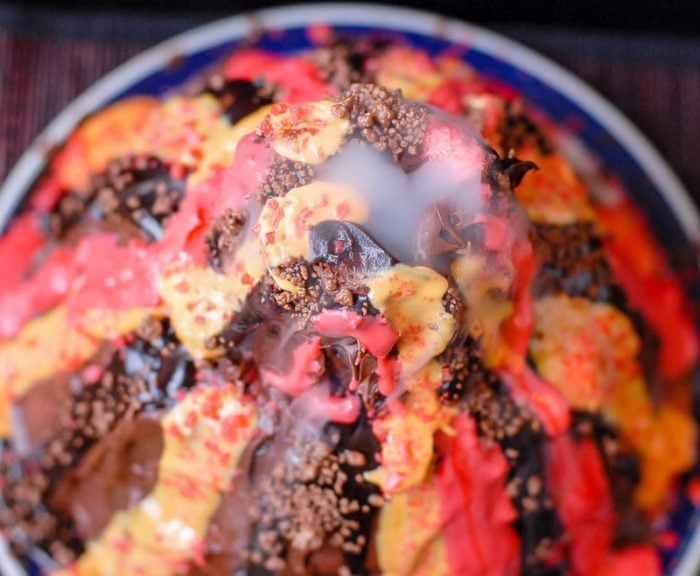
Glazing the Smokin’ Volcano Cake
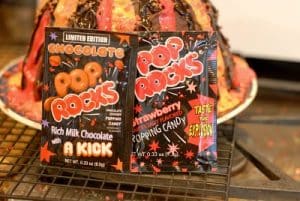
The purpose of the glaze is to simulate flowing lava and earth. After frosting the cake, I poured the glaze around the cake and decorated with my secret totally-put-it-over-the-top, Pop Rocks.
Strawberry (looks like lava embers) and Limited Edition Chocolate (looks like dirt). Adds more texture and I liked the idea they would pop, bringing the lava into one’s mouth (they do ‘pop’ when encountering moisture so my cake was popped when I added them; still looks cute and some were unpopped when I sampled).
Working with Dry Ice, a Cautionary Tale
If you are unfamiliar with dry ice, it requires precaution but nothing difficult. I purchased mine at a local grocery store chain. A one pound block was $1.52 and an amount far more than required for this purpose. This Dry Ice Guide has all the details you need to know!
Smokin’ Volcano Cake: Supplies
Paper Cups or Plastic Cups (don’t use glass)
Strawberry Pop Rocks and Chocolate Pop Rocks
Dry Ice
Recipe
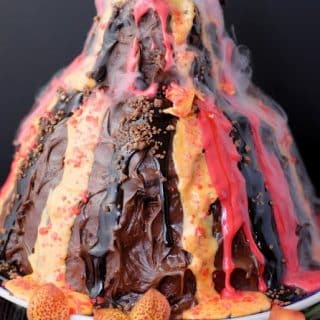
Smokin' Volcano Cake
Ingredients
CHOCOLATE CAKE
- 1 CUP unsweetened cocoa powder
- 2 teaspoons baking powder
- 3 teaspoons xanthan gum if making this GLUTEN FREE only; not required otherwise
- 5 cups flour gluten free or regular
- 1 teaspoon salt
- 2 teaspoons white vinegar
- 4 teaspoons baking soda
- 2 cups whole milk
- 2 cups butter softened
- 4 cups sugar
- 4 large eggs room temperature
- 2 teaspoons pure vanilla extract
- 2 cups boiling water
CHOCOLATE CAKE: SUPPLIES
- 1 Bundt Pan
- 1 Metal Bowl 8-inches diameter and 4-inches deep
CHOCOLATE FROSTING
- 1 cup butter softened
- 4 1/2 cups confectioners' sugar
- 1 1/4 cups baking cocoa
- 1/2 teaspoon vanilla extract
- 1/2 cup milk
CHOCOLATE GLAZE
- 3 tablespoons cocoa
- 2 tablespoons butter melted
- 1 cup powdered sugar
- 2 -3 tablespoons milk
VANILLA GLAZE
- 1 cup confectioners' sugar
- 2-3 tablespoons milk
- 1/8 teaspoon salt
- 1/8 teaspoon vanilla extract
- 1 tablespoon butter melted
- Red and yellow food coloring
ASSEMBLING THE VOLCANO: SUPPLIES
- Paper or plastic drinking cup do not use glass
- Dry ice see section below
- Serrated knife
- Apple corer
- Small plate
- Water in liquid measuring cup
- Red Pop Rocks
Instructions
- Spray the Bundt Pan and metal bowl with non-stick cooking spray to prepare for baking.
- Preheat oven to 350 degrees.
- In a mixing bowl combine all dry ingredients (EXCEPT the baking soda): cocoa powder, baking powder, xanthan gum (if gluten free), flour, salt.
- In a second mixing bowl, combine vinegar, baking soda and milk.
- In the bowl of a mixer, cream the butter until light and fluffy.
- Add eggs and beat to fully combine.
- Pour in dry mixture a bit at a time, alternating with wet mixture (milk/baking soda/vinegar) until fully combined. Mix in vanilla.
- With mixer on lowest speed, slowly pour in boiling water and stir in until standing water has disappeared.
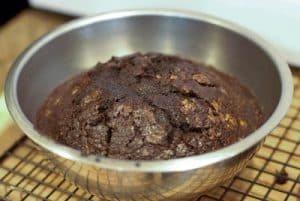
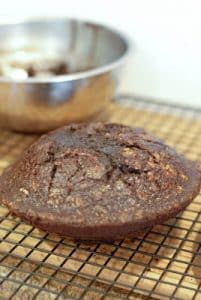
- Pour into Bundt pan and metal bowl, filling each a bit over 2/3’s full. Place into the preheated oven. NOTE: Begin to watch the pans at 30 minutes. For me the Bundt pan was done at 40 minutes and the bowl at 45-50 minutes. When a toothpick inserted comes out clean it's done (when it’s clean if cake seems firm, it’s good).

- Allow to cool slightly in the pans then turn out onto a cooling rack to cool completely. Start making the frosting as they cool.

CHOCOLATE FROSTING
- In a large mixing bowl, cream butter.
- Gradually beat in confectioners' sugar, cocoa and vanilla. Slowly add milk to achieve desired consistency for spreading.
- Slowly add milk to achieve desired consistency for spreading. NOTE: This should make a bit more than you’ll need, depending on how thickly you frost the volcano.
CHOCOLATE GLAZE
- Add all ingredients into mixing bowl. Mix well until achieving a ‘will run down the side of a volcano cake’ consistency. NOTE: You can play with the sugar and milk amounts to arrive at a texture you like. After running, it will harden in place so don’t make it overly runny or thin.
VANILLA GLAZE
- Add all ingredients into mixing bowl. Mix well until achieving a ‘will run down the side of a volcano cake’ consistency. NOTE: You can play with the sugar and milk amounts to arrive at a texture you like. After running it will harden in place so don’t make it overly runny or thin.
- Divide the batch into two smaller bowls. Color one batch red and one batch orange (mix of red and yellow coloring) for lava.
ASSEMBLING THE VOLCANO
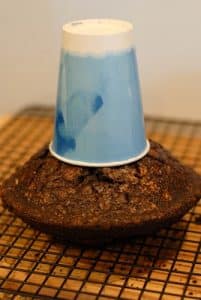
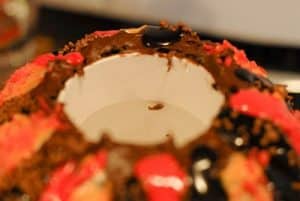
- Place the open side of the paper drinking cup you will use face down on the top (dome side) of the bowl cake. Cut around the edge, through the cake to remove a round circle of cake. NOTE: Do this gently as you will be using this piece for the top of the volcano.

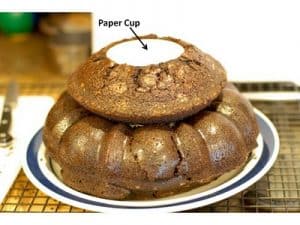
- Place the bowl cake on top of the Bundt cake, flat side against the rounded top of the Bundt cake, aligning the openings in the middle of each.
- Place the paper drinking cup into the top of the bowl cake, making the opening of the cup flush with the top opening of the bowl cake. The cake opening should hold the cup snugly.

- Using a serrated knife, ‘carve’ the sides of the cake so the sides form more of a smooth line (like a mountain). NOTE: My Bundt pan has many indentations as you can see and I wanted to minimize that look. Carved pieces may be inserted in between the two cakes (under the bottom of the bowl cake, on top of the Bundt cake) to form a cake ‘shim’ (an angled piece that fills the gap). This will stabilize the cakes, and fill the gaps before frosting.
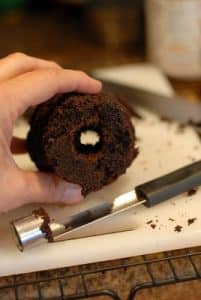
- Using an apple corer, make a hole all the way through the ‘top of the volcano’ (the cake piece you removed from the bowl cake). Place the top of volcano piece on a small plate.

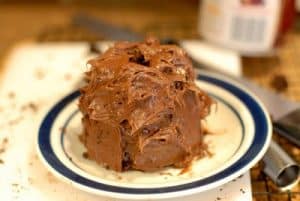
- Once in the shape you like, frost with the chocolate frosting. I used a spreader and made downward wave-like texture. Carefully frost the separate top of the volcano piece as well.

- Drizzle the different color glazes down the cake, making the affect of lava. Do the same on the volcano top.
- Sprinkle with Pop Rocks if you choose to do so for both the base cake and top.
- Place the separate top only in the freezer. Leave in the freezer for at least 30 minutes. This will ensure it's firm before placing on the top of the volcano.
FINAL ASSEMBLY INSTRUCTIONS BEFORE PRESENTING THE SMOKING CAKE FOR SERVING
- When ready to complete the assembly (immediately before presenting the smoking cake), add water to fill paper cup ¾’s full of water.
- Have the cake top ready. Following the Handling Dry Ice Precautions in the blog post, with gloved hand place a piece of dry ice in the water (no bigger than 2 inches by 1 one inch; it will melt and you don’t want it to overflow inside the cake). It will begin to smoke immediately. Place the top on the volcano, aligning the hole in the middle of the opening. Voila! You should have a smoking volcano!

- Sprinkle Pop Rocks on cake before serving if desired.


Aroma y Cocina says
I thought I send you a comment last monday, but I cannot see it probably I did wrongly ???
I find this cake amazing.
I gave you an award and left it in:
Dee says
We go to Florida every year and stay at a Marriot resort. I am very familiar with Sneaky Tiki's! They are my favorite.
Trish says
The sneaky tiki is so up my alley – I LOVE mai tai! Sounds yummy. And the cake idea if genious. Such a fun and festive cake.
Kimberly says
That is one awesome cake! I can see this being a huge hit at a boys birthday party… Love it!
A little bit of everything says
Oh My Goodness a steaming cake. Thanks for the tutorial, not in million years I would have guest how you made the steam.
Glen Hammond says
Hi Toni,
I have a food trailer named “the Smokin Volcano”. Your cake recipe will be my new go to dessert.
Toni Dash says
Lol! It’s serendipity!
Lisa @ Tarte du Jour says
One Sneaky Tiki please…. shaken not stirred. You are soooo clever! This cake is over the top and then some. I was afraid my son would see your post over my shoulder and then my static desserts without smoke would no longer do for him. Awesome!
Sandra says
Amazing, stunning, fantastic idea, and still the cake look sooo tasty!!!
TheChocolatePriestess says
That is very COOL!
Manu says
This is soooo cool! I love it! It is a fantastic idea!
Mary S says
OMG! I LOVE this! What a great idea…if I mention soda and mentos I might actually get the teenage boys in the kitchen to make this one, lol!