
It’s not too late to ensure a warm summer memory for winter in the form of sweet corn you freeze yourself! It’s very easy, not too time consuming and you’ll feel happy for having done it when you need a quick meal, addition to soups or just want a flavor flashback to late summer.
How to Freeze Corn {tutorial}
1. Shuck (remove all outer husks) and remove silk from the corn cobs. Brush with a vegetable brush to remove any leftover silks.
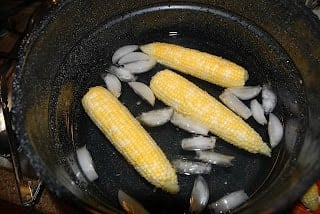
2. Before you begin, bring a large pot of water to a boil and set up another pot or large bowl with cold water and ice. This is for blanching the corn which does not cook it all the way but stops the enzymatic process which will destroy nutrients, as well as change the color, texture and taste if not halted before freezing.
3. Put cobs in the boiling water to allow room around them (you don’t want to pack it so full they all don’t have the same exposure to the water) and allow to boil for 4 minutes.
4. Remove and immediately put into the ice water also for 4 minutes. The key in blanching is to soak the vegetable in the ice water for the same amount of time as you boiled it; no more or less. You don’t want it soggy and water logged before freezing.
5. I then remove them and put the cobs onto a cloth kitchen towel to help absorb any extra moisture.
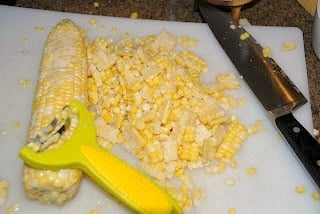
6. Next you want to remove the niblets from the cob. I have this handy dandy corn removing device (Kuhn Rikon Corn Zipper) that was a gift from a friend. It effortlessly slices off the niblets when placed at the right angle. You can accomplish the same with a sharp knife. Try not to cut into the cob when doing this or you may get some bits that are not as tasty.
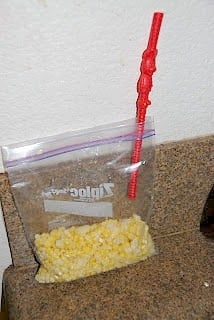
7. I have a Foodsaver which I will sometimes use for this however I like the ‘Poor man’s Foodsaver’ just as well. For this you can use quart size zip top freezer bags and a straw. Once you’ve filled the bag with the amount of corn you’d like to store (note: I always write down the amount in the bag so if I am using it for a recipe I know), insert a straw in the end of the sealing strip of the bag. Seal bag up to the straw, take a big inhale through the straw sucking out all the air (a big exhale before doing this helps!), pull the straw out while inhaling and seal it up! NOTE: I’m always careful to place the end of the straw in the bag an inch or so higher than the corn since I bear a deep-seated fear of inhaling corn into my lungs.
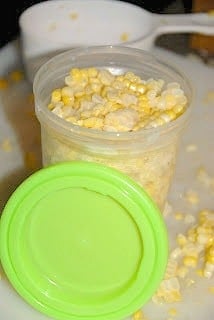
An alternative container I like depending on my freezer space constraints are these freezer containers by Ball (usually available in grocery stores). Easy to fill and with a screw off top.
8. Label and place them in the freezer.
9. Clean up can be hastened by positioning a corn-eating dog at your feet during the operation.
Freezing Corn on the Cob: I will confess despite having read in several food preservation books that you must still blanch corn on the cob before freezing it I decided to experiment last year. I ran out of time when putting the corn away and stuck 4 ears in their husks in a Foodsaver bag and sealed them. I pulled them out during the winter and they were soggy. I shucked them all and threw them in soup which was ok but they had a distinct musty smell too. I’d heed the warnings if you want to try this and blanch each ear 7 to 11 minutes depending on the size of the ears you are freezing. Remember to put them in ice water for the same amount of time you boiled them before bagging and freezing.
Great local source for Boulder corn:
Munson’s Farms will still have corn for a few weeks! It’s crisp, firm and flavorful (unbelievable for October 2nd). Their farm stand on the corner of Valmont and 75th will be open from 9:00 a.m. to 6:30 p.m. daily through October 31.

Leave a Reply