Chocolate Thumbprint Cookies are a chocolate lovers dream! A deep chocolate cookie with a bite of creamy chocolate center and crunch in the middle. The chocolate cookies are filled with a creamy chocolate ganache and topped with sprinkles or crushed peppermint candies.
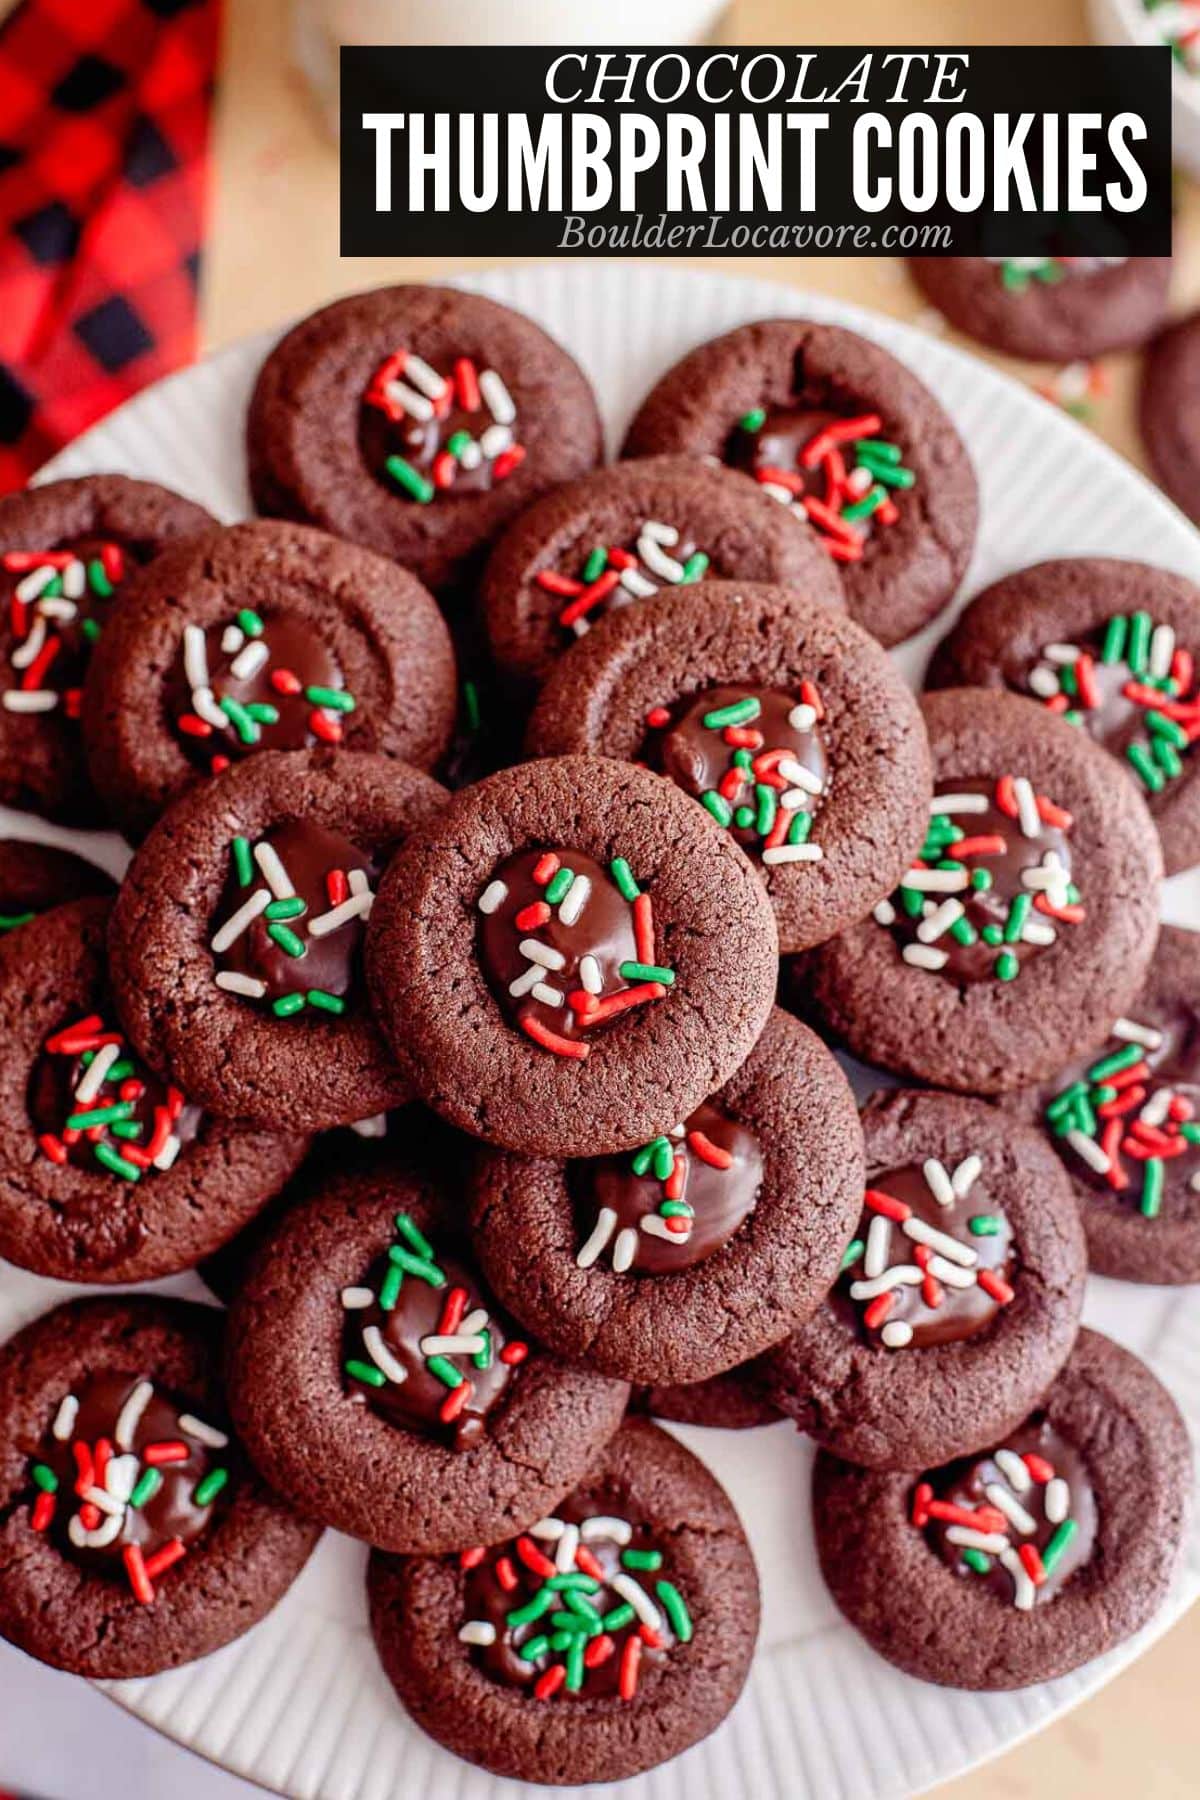
Thumbprint cookies are a classic for holiday cookie trays and cookie swap parties. Thumbprint cookies have an indentation in the top that’s filled with something delicious. A classic thumbprint cookie is buttery shortbread cookies with jam or fruit preserves in the indentation.
This chocolate spin makes perfect cookies any time of the year and is also a perfect holiday cookie too. Chocolate cookie with silky ganache chocolate filling and you can change the topping up in lots of different ways (suggestions included).
Jump to:
Recipe Ingredient Notes
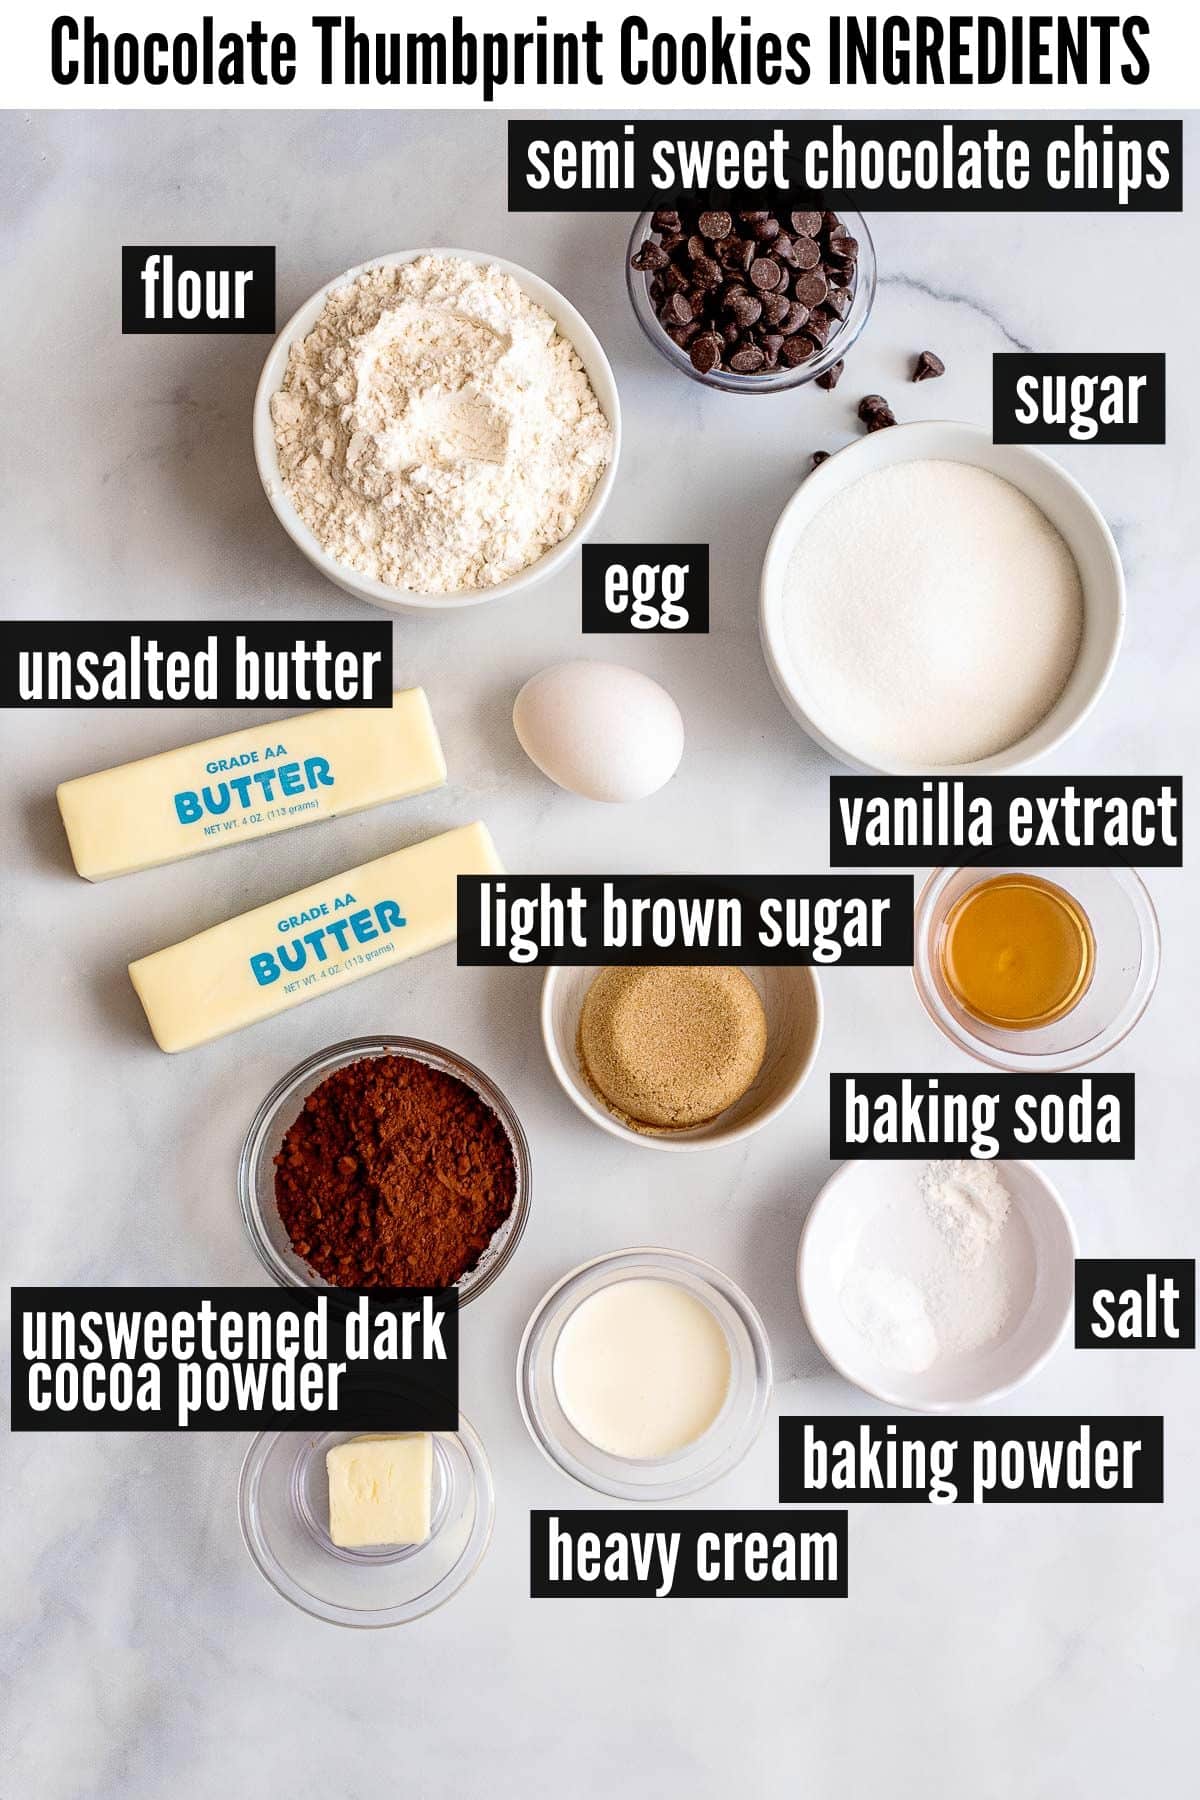
Unsalted Butter. Use room temperature butter for best results.
Egg. You’ll need one large egg at room temperature.
Unsweetened dark chocolate cocoa powder. Dark chocolate cocoa powder really creates the rich chocolate flavor in these cookies. For substitutions see Variations & Substitutions below.
All purpose flour. Regular or gluten-free measure-for-measure flour blend can be used. We use and recommend Bob’s Red Mill gluten-free 1-to-1 flour blend for gluten-free baking. Be sure to scoop the flour into a measuring cup and level it off on top with a dull knife to not use too much flour (scooping out the flour can lead to packed flour).
Semi sweet chocolate chips. These are used to make the chocolate filling in the center of each cookie.
Heavy whipping cream. This is also used to make the filling.
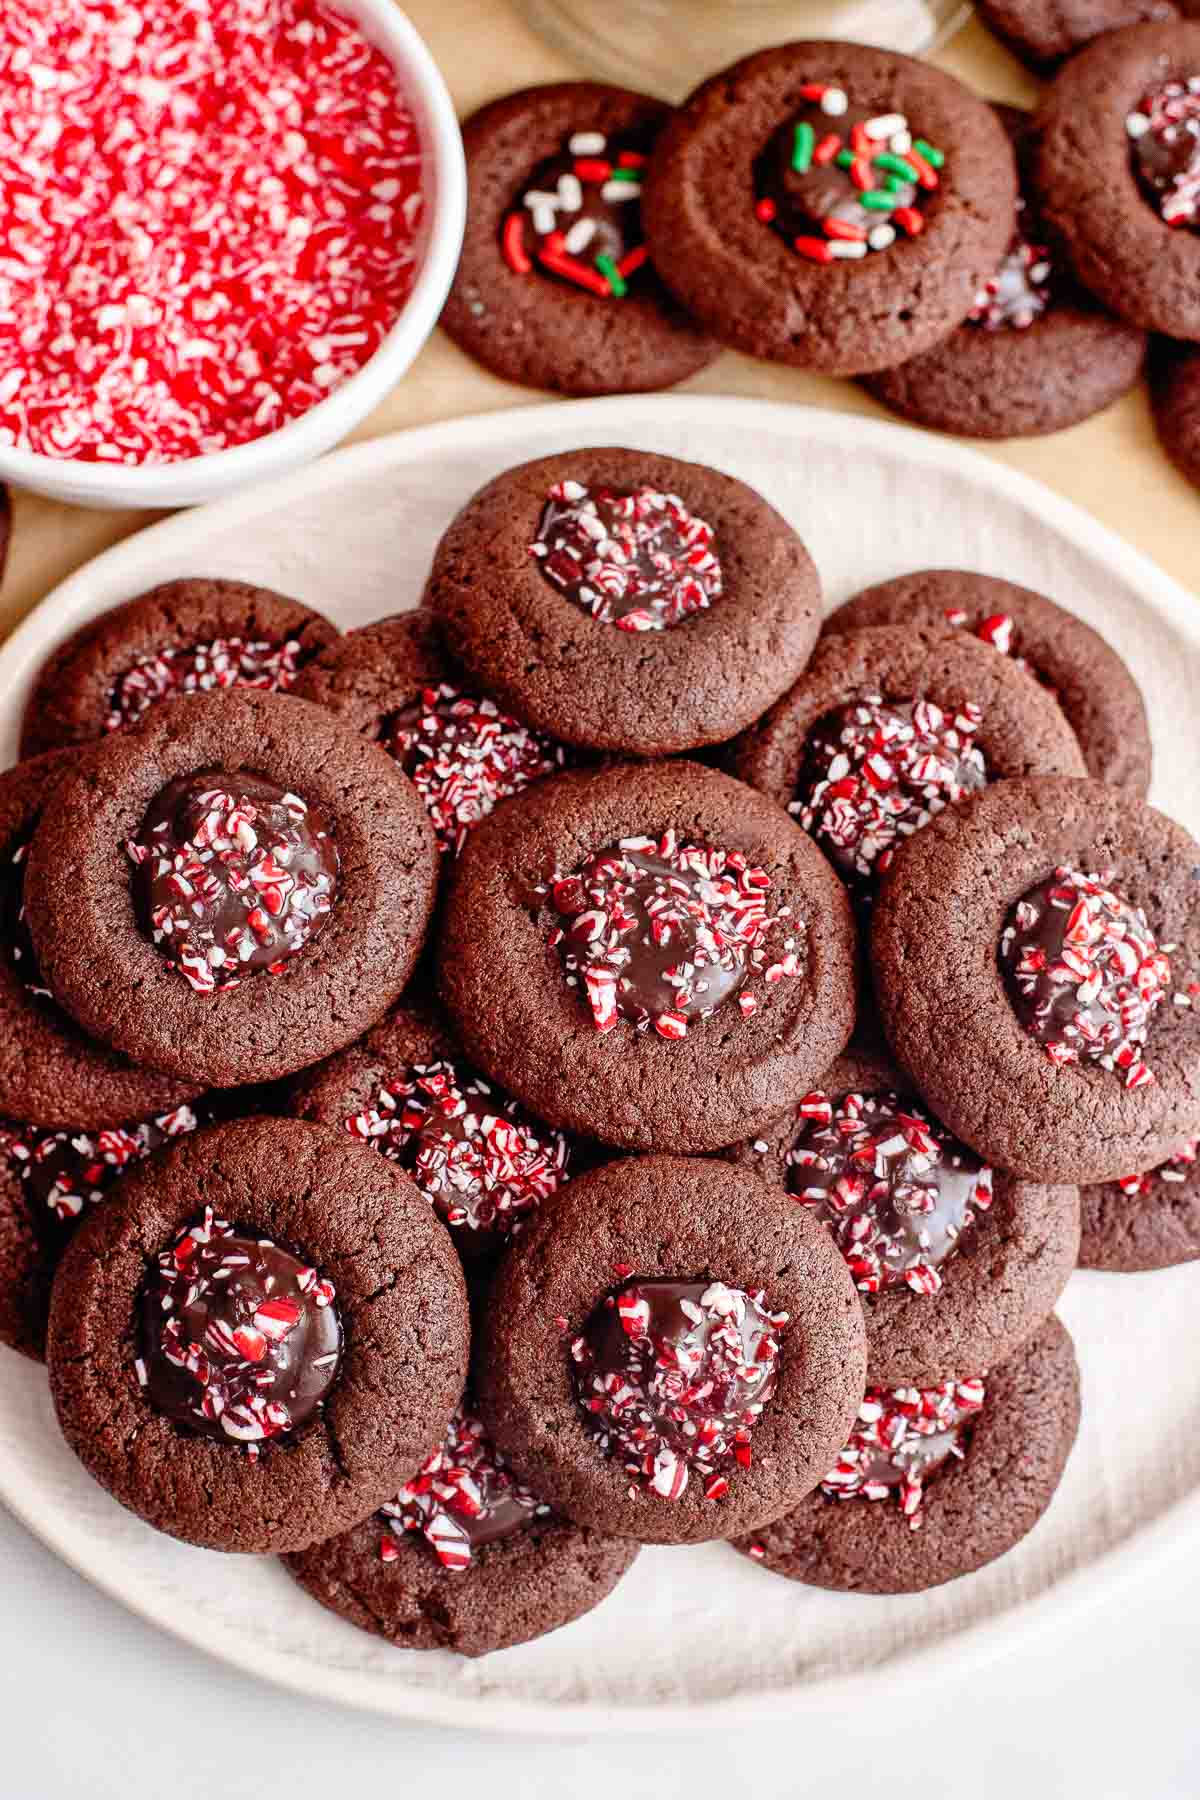
Sprinkles or toppings. These are optional but can be anything small from sprinkles to crushed candy bits, nuts and more (see Variations below).
How to make Chocolate Thumbprint Cookies
STEP 1. Preparation
Pre heat oven to 375 degrees F. Line a baking sheet with parchment paper.
IMPORTANT NOTE: do not spray the cookie sheet as it could cause the cookies to spread too much. An ungreased cookie sheet is needed for this recipe to work well.
STEP 2. Make the cookie dough
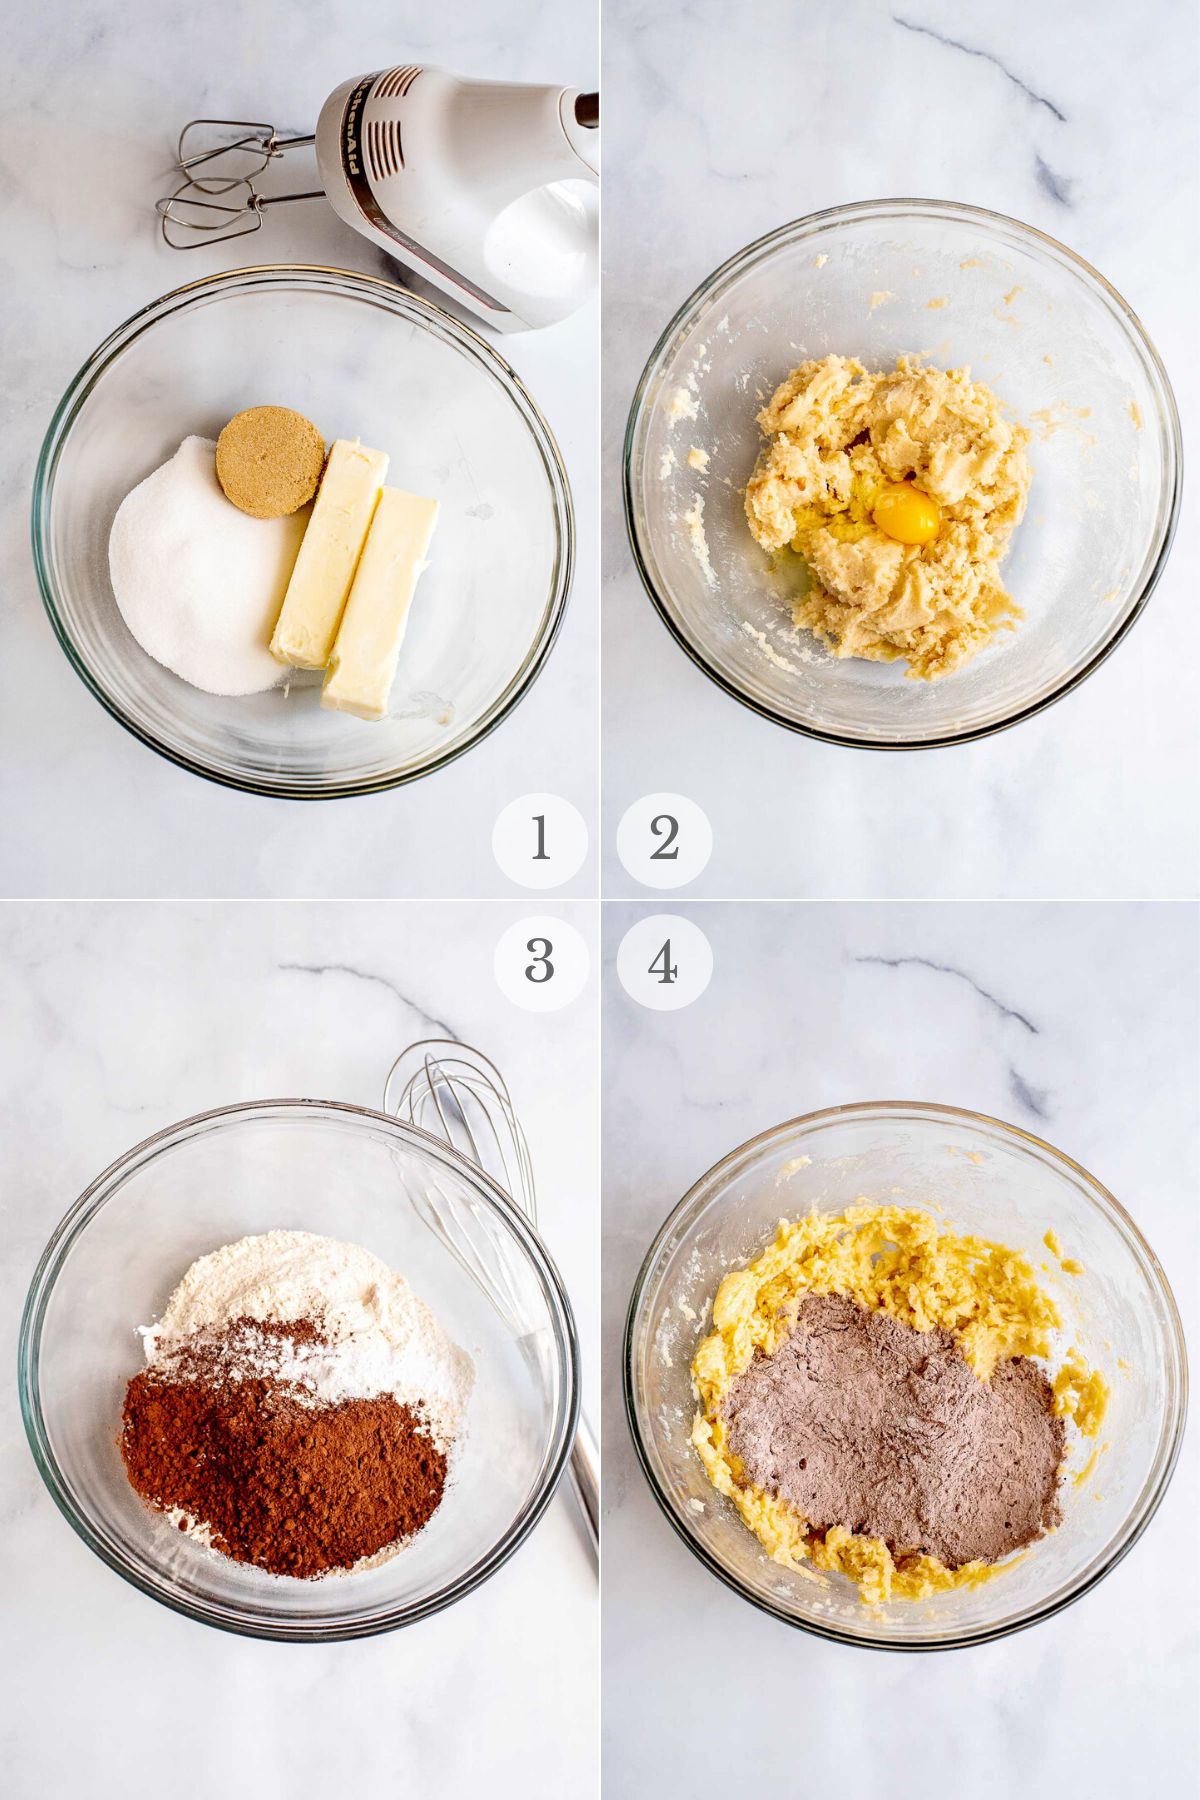
In a large bowl, using an electric hand mixer or in the bowl of a stand mixer fitted with paddle attachment, cream together the butter, sugar, and brown sugar until light and creamy (photo 1).
Add the egg and vanilla extract; mix until combined (photo 2). Scrape the sides of bowl as needed. Set aside.
In another bowl, whisk the dry ingredients: cocoa powder, flour, salt, baking soda, and baking powder (photo 3). Add half of the flour mixture into the butter mixture and mix until combined. Add the other half and continue mixing just until combined (photo 4).
STEP 3. Scoop
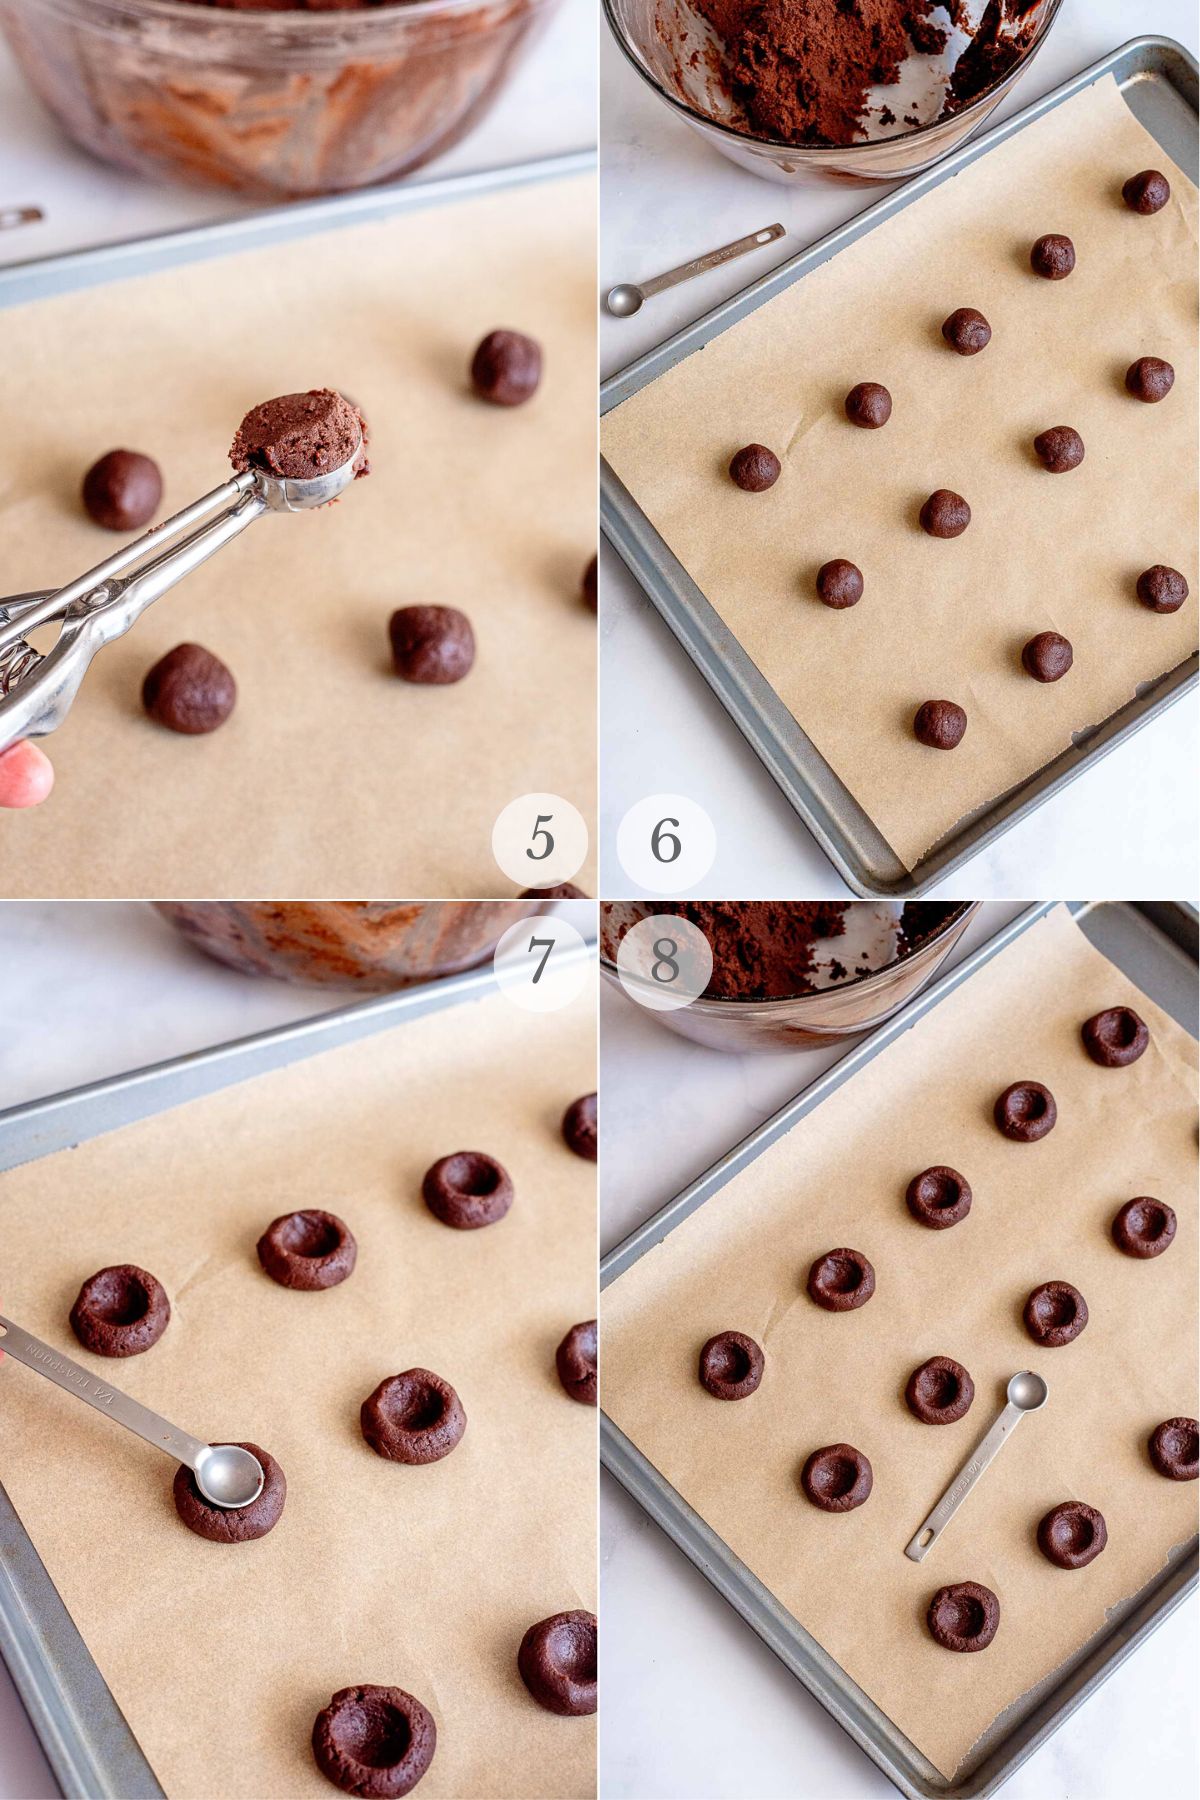
Using a small cookie scoop (1 tablespoon in volume) or a tablespoon, scoop a ball of cookie dough and roll it into a ball (photo 5).
Place the cookie dough balls on the prepared cookie sheet 2 inches apart (photo 6). Using the back of a ¼ teaspoon, make an indention into the center of each ball (photos 7-8).
STEP 4. Bake and Cool
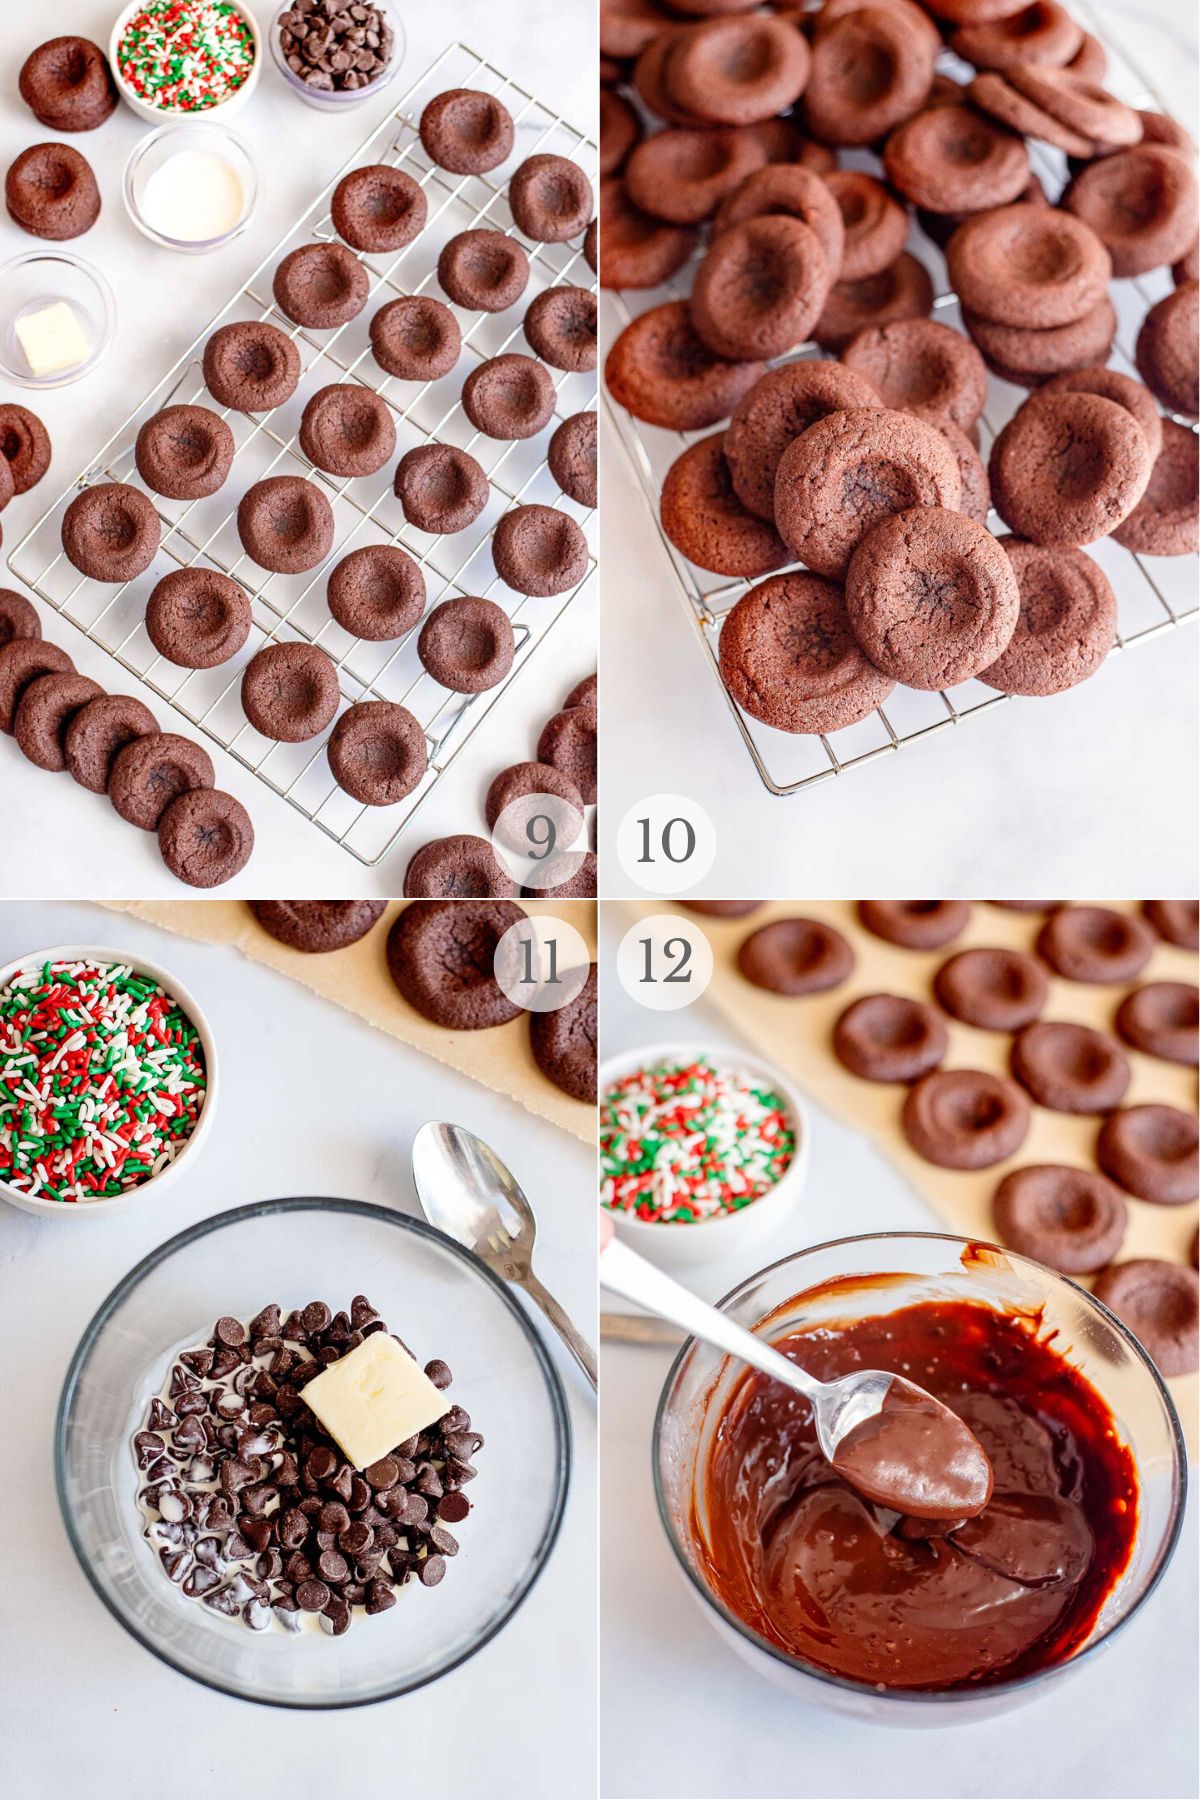
Bake for 8-10 minutes, until the cookies no longer look wet.
When the cookies are done, remove from the oven and allow to cool for a minute or two before moving to a cooling wire rack (photos 9-10).
If the cookies have lost their indention while baking, press the back of a teaspoon into the cookies while warm to recreate the indention.
While cookies are cooling, prepare the filling.
STEP 5. Make the filling
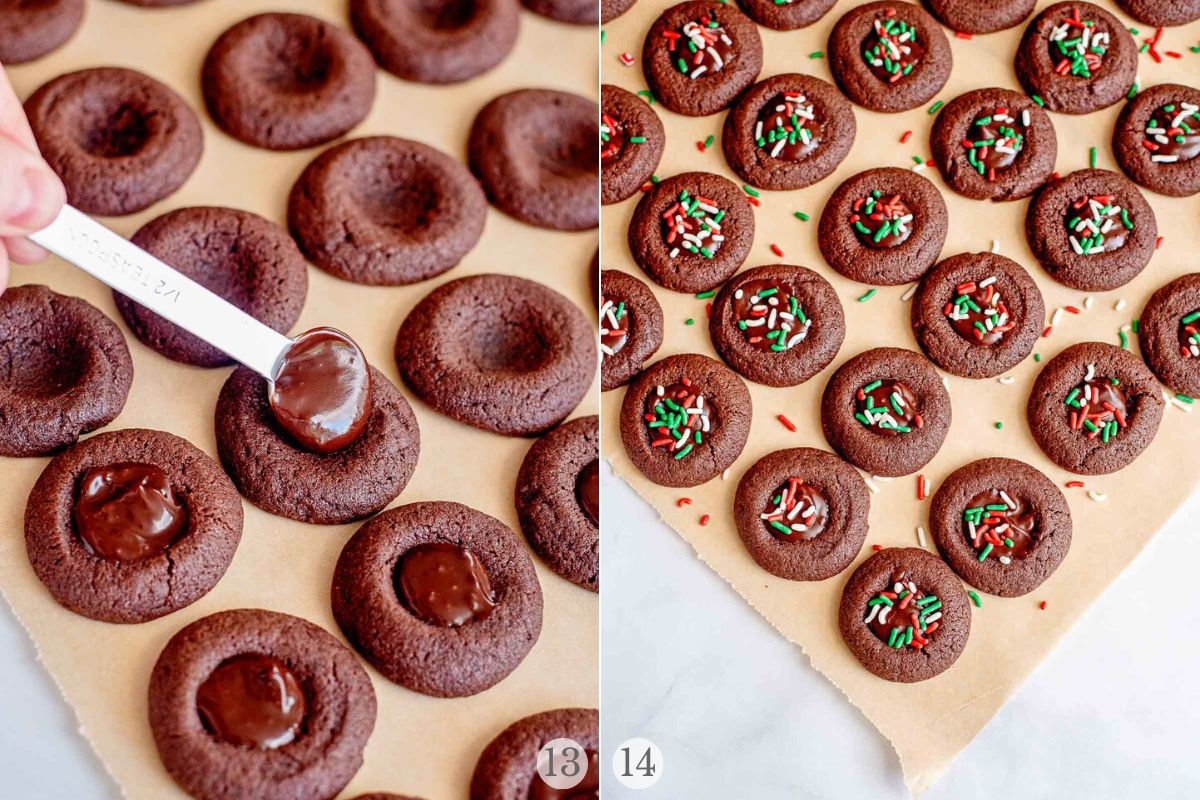
In a small microwaveable bowl, combine the filling ingredients (semisweet chocolate chips, heavy cream and butter) and microwave on high for 30 seconds; stir (photos 11-12).
If not completely melted, cook for another 10 seconds; stir. Continue at 5 second intervals, stirring between each time, until the chocolate is melted and smooth.
Spoon ½ teaspoon of chocolate creamy ganache into the indentation of each cookie (photo 13). Top with decorations if desired (photo 14). Allow the cookies to set for 2 hours before storing.

Expert Tips
- Make sure the butter is room temperature, but not too soft. If the butter is too soft it could cause the cookie to spread.
- The dough is best not chilled. Chilling the dough could cause the cookie to crack. Cracking will not affect the taste of the cookie, but it will affect presentation.
- If a teaspoon isn’t available to press the cookies, use your thumb! Using a teaspoon will provide a more uniform indention.
- Use the end of a wooden spoon. Though we prefer using a 1/4 teaspoon for the indentation the end of a wooden spoon can also be used.
- If after the cookies have baked the indention tends to lessen, remake the indention using a teaspoon. I like to press deep as possible to make room for lots of chocolate filling.
Variations & Substitutions
Substituting cocoa powder type. If dark chocolate cocoa powder isn’t available, use regular cocoa powder. The best taste will come with the dark chocolate.
Toppings. Any topping could be used: sprinkles, peppermint pieces, sanding sugar, crushed nuts, or even crushed toffee. Consider cookie add-in ingredients that are very small size like Andes Creme de Menthe baking chips, Health Bits-o-Brickle toffee bits, Wilton Peppermint Crunch sprinkles. These work great for toppings.

How to store
Store in an airtight container at room temperature for up to 5 days in cool conditions out of direct sunlight.
Frequently Asked Questions
Yes! Once they have been assembled allow them to sit for 2 hours. Place in an airtight freezer-safe container (I usually add parchment paper between layers too) and freeze for up to 3 months. Allow them to that in the refrigerator before serving.
More recipes you’ll love!
Recipe

Chocolate Thumbprint Cookies
Equipment
Ingredients
Cookies
- 1 cup unsalted butter room temperature
- ¾ cup granulated sugar
- ¼ cup light brown sugar packed
- 1 large egg room temperature
- 1 teaspoon vanilla extract
- 1/3 cup unsweetened dark chocolate cocoa powder
- 2 cups all purpose flour regular or gluten-free measure-for-measure flour blend
- ½ teaspoon kosher salt
- ½ teaspoon baking soda
- ½ teaspoon baking powder
Filling
- 1 cup semi-sweet chocolate chips
- 4 tablespoons heavy whipping cream
- 2 tablespoon butter
Instructions
Cookies
- Preheat oven to 375 degrees F. Line a baking sheet with parchment paper. NOTE: do not spray with non-stick spray; this will cause the cookies to spread.
- In a large bowl, using a hand or stand mixer, cream the butter, sugar, and brown sugar until light and creamy. Add the egg and vanilla extract; mix until combined. Set aside.1 cup unsalted butter, ¾ cup granulated sugar, ¼ cup light brown sugar, 1 large egg, 1 teaspoon vanilla extract
- In another bowl, whisk together the cocoa powder, flour, salt, baking soda, and baking powder.1/3 cup unsweetened dark chocolate cocoa powder, 2 cups all purpose flour, ½ teaspoon kosher salt, ½ teaspoon baking soda, ½ teaspoon baking powder
- Add half of the flour mixture into the butter mixture and mix until combined. Add the other half and continue mixing just until combined.
- Using a small cookie scoop (1 tablespoon in volume) or a tablespoon, scoop a ball of cookie dough and roll it into a ball. Place the balls on the prepared cookie sheet 2 inches apart.
- Using the back of a ¼ teaspoon, make an indention into the dough. Bake for 8-10 minutes, until the cookies no longer look wet.
- When the cookies are done, allow to cool for a minute or two before moving to a cooling rack. NOTE: If the cookies have lost their indention while baking, press the back of a teaspoon into the cookies while warm to recreate the indention. While the cookies are cooling, prepare the filling.
Filling
- In a small microwaveable bowl, combine the filling ingredients and microwave on high for 30 seconds; stir. If not completely melted, cook for another 10 seconds; stir. Continue at 5 second intervals, stirring between each time, until the chocolate is melted and smooth.1 cup semi-sweet chocolate chips, 4 tablespoons heavy whipping cream, 2 tablespoon butter
- Spoon ½ teaspoon of chocolate into the wells of each cookie. Top with decorations if desired.
- Allow the cookies to set for 2 hours before storing.
Notes
- Make sure the butter is room temperature, but not too soft. If the butter is too soft it could cause the cookie to spread.
- The dough is best not chilled. Chilling the dough could cause the cookie to crack. Cracking will not affect the taste of the cookie, but it will affect presentation.
- If a teaspoon isn’t available to press the cookies, use your thumb! Using a teaspoon will provide a more uniform indention.
- After the cookies have baked the indention tends to lessen, remake the indention using a teaspoon. I like to press deep as possible to make room for lots of chocolate filling
- If dark chocolate cocoa powder isn’t available, use regular cocoa powder. The best taste will come with the dark chocolate.
- Any topping could be used, sprinkles, peppermint pieces, sanding sugar, crushed nuts, or even crushed toffee.




Steph says
These were a hit. Love making a different version of thumbprint cookies. The ganache is everything!
Beth says
I made these over the weekend, and everyone needs to try them. They are double choco-licious!
Kim says
These cookies are absolute perfection. We made two batches for a cookie exchange and everyone raved about them.
Jen says
My kids couldn’t stop eating these!! Really amazing treats!
Teresa F says
My new favorite cookie! I just wish I made a double batch because my kids ate them all. I loved one in teh afternoon with tea!
Kelley says
These were almost too pretty to eat! My kids loved adding the sprinkles to these cookies!
Suja says
Wow! this is my new favorite recipe!
Sarah James says
Your chocolate thumbprint cookies were delicious and went down well with the family. They were so easy to make and everyone love the chocolate filling.
Sharon Harvey says
We make regular thumbprint cookies every year and I wanted to make a different version this year. I’ve made your eggnog magic cake and loved it so looked at your cookie recipes and found these! They are so delicious. We are adding them to our cookie trays this year. We did some with sprinkles and some with crushed peppermints. So pretty! Thank you!
Toni Dash says
Hi Sharon! So happy to read your comment. We are delighted you found a new cookie to add to your collection! Love that you are making the eggnog magic cake too. That’s so fun for the holidays! Happy holidays to you and yours!
Dave says
I made these with my kids. They supplied the manpower to make the thumbprint and as taste testers. We all agreed they are a win! Delicious.