
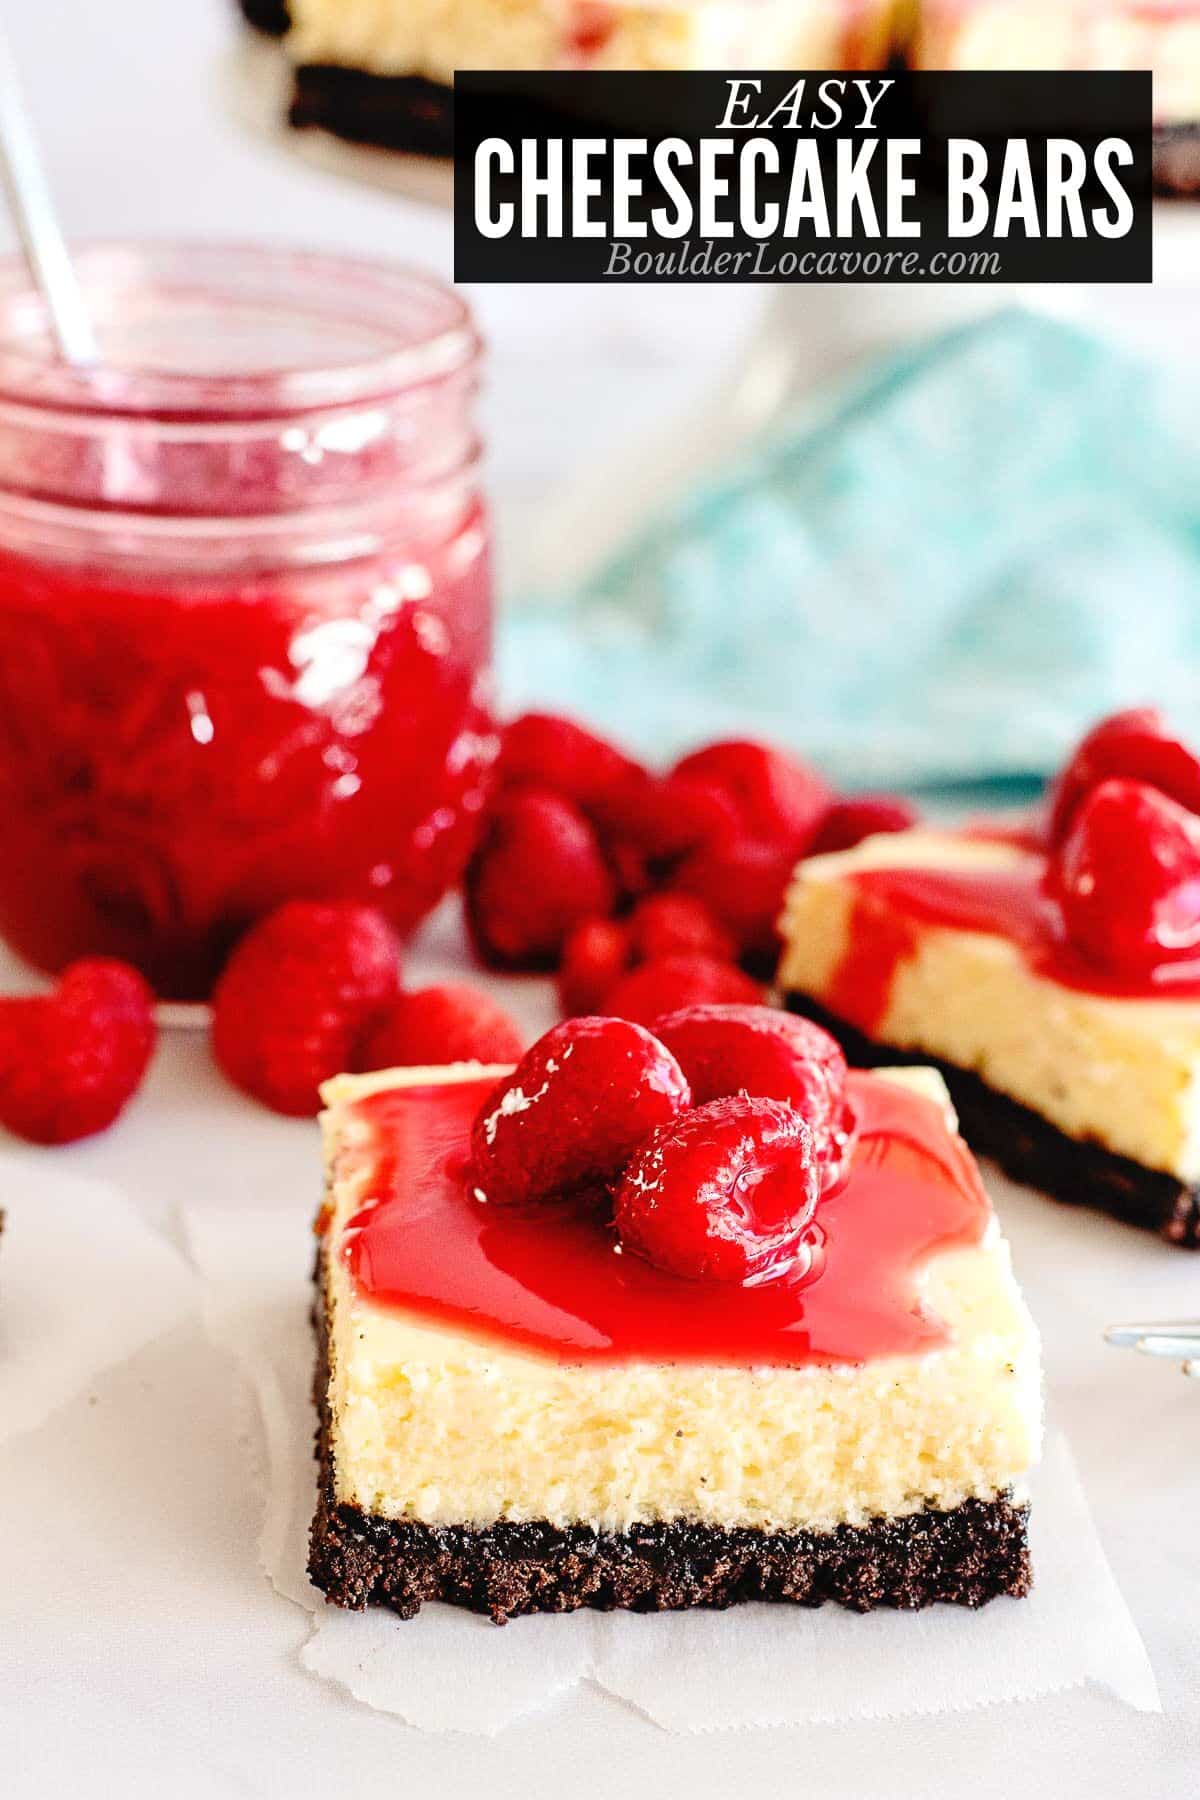
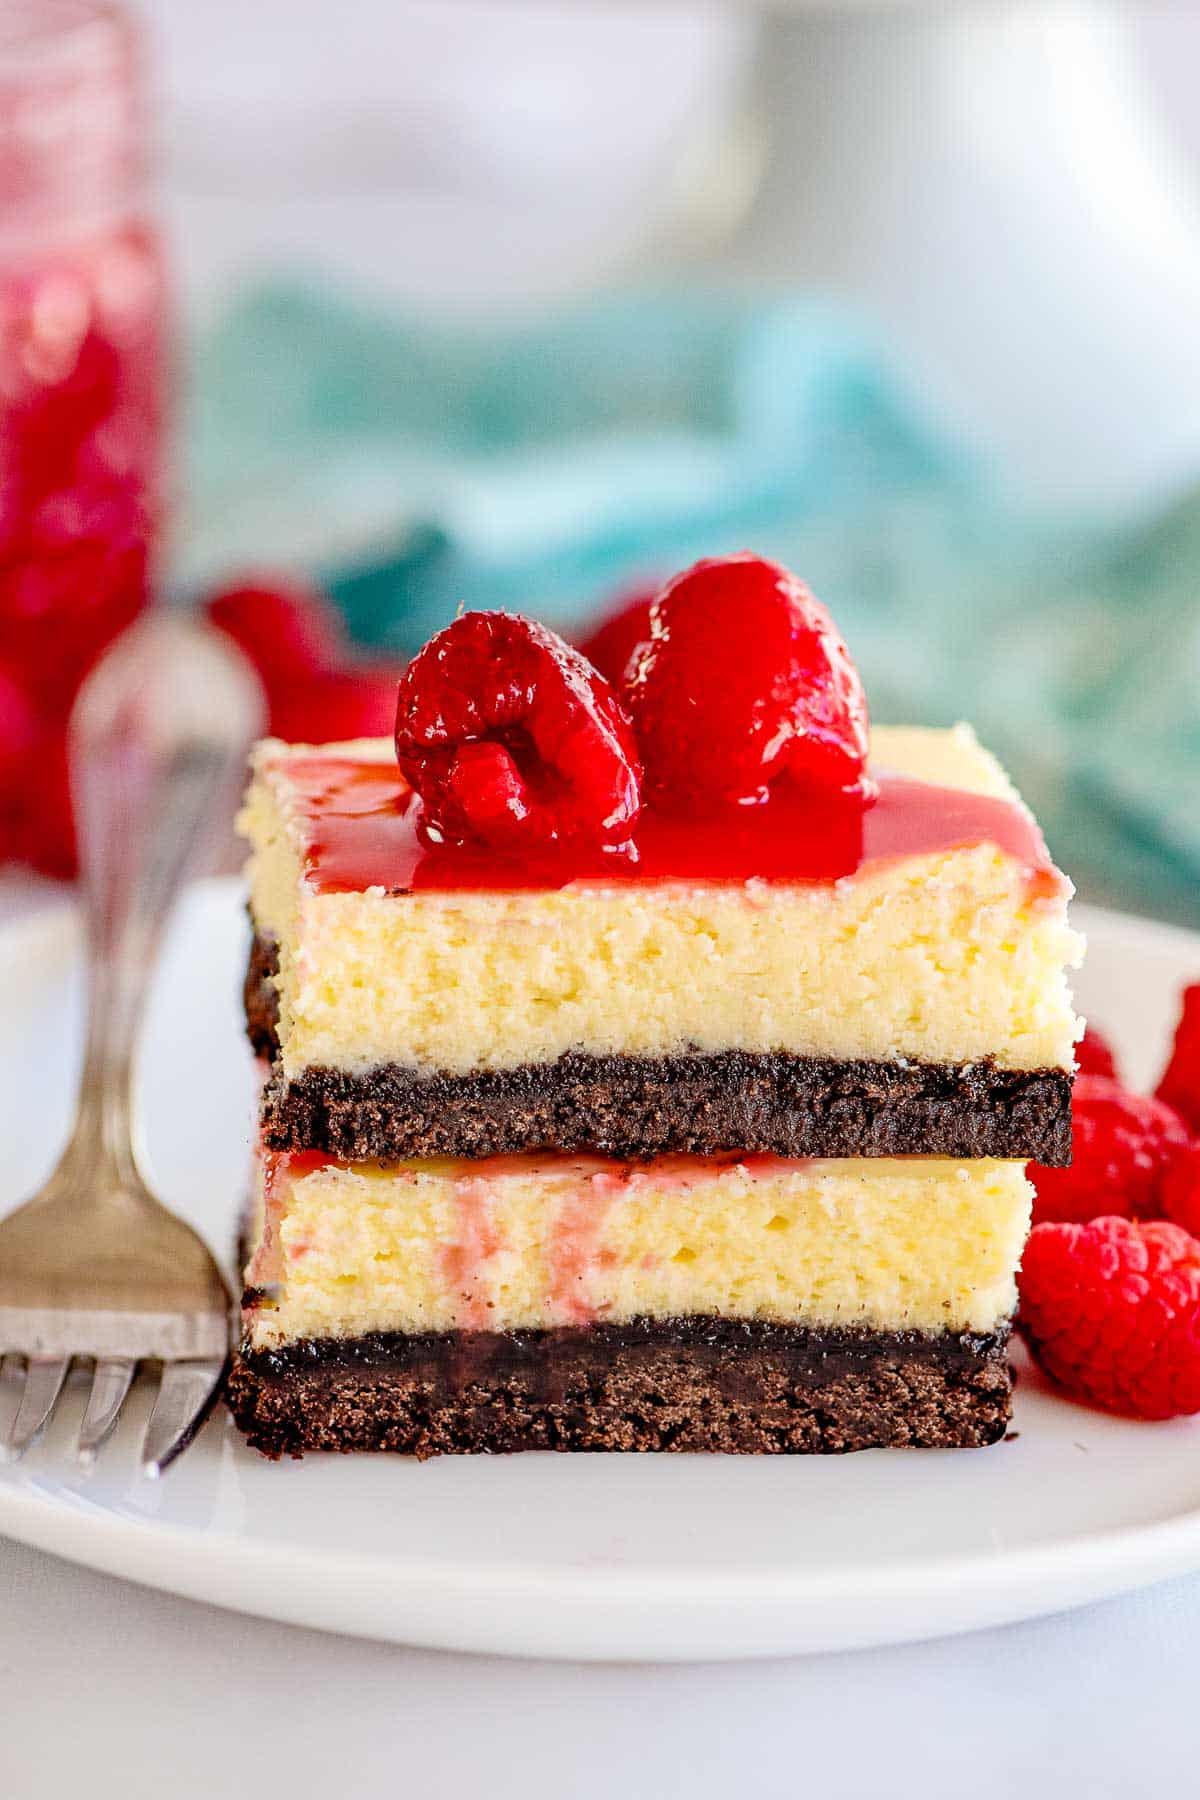
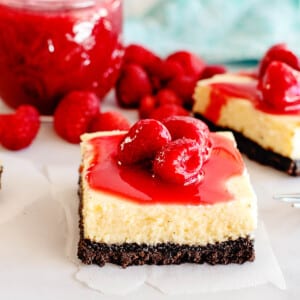
If you love a good creamy cheesecake but don’t feel like making one, these Cheesecake Bars are the perfect solution! With all the classic cheesecake flavors, creamy filling and delicious chocolate Oreo cookies crust, they are an easy dessert recipe everyone loves.
No springform pan or water bath required for these yummy dessert bars. They taste like regular cheesecake but are easier and faster to make. The chocolate cookies are ground into fine crumbs for a chocolate crust that perfectly complements the tangy cheesecake layer.
This delicious dessert is easy enough to make for every day dessert or impressive enough for special occasions or for holidays! Instead of a full-size cheesecake enjoying traditional cheesecake in bar form is a fun change up that’s easier for you too!
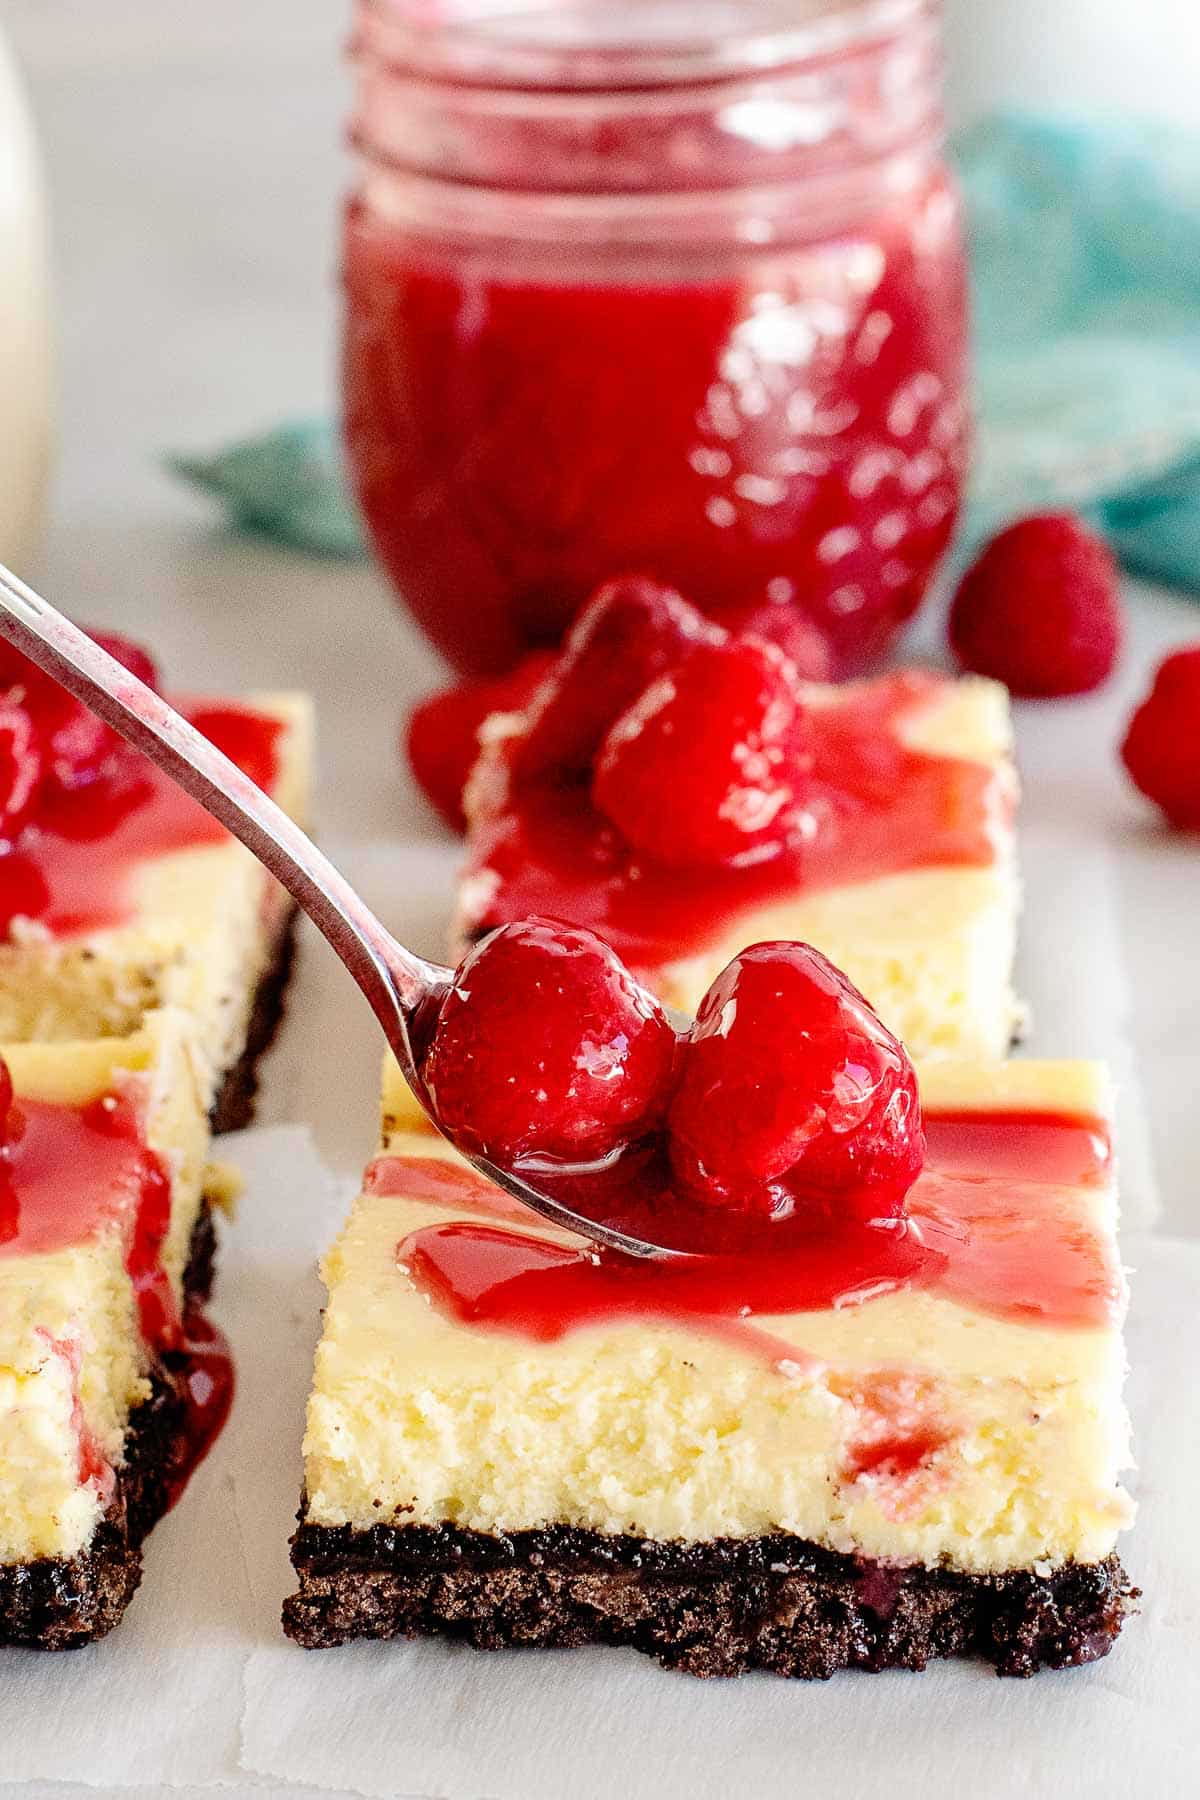
We love it with our Raspberry Sauce on top but the bars on their own taste like your favorite real cheesecake! The hardest part of this recipe? Not eating all the bars yourself.
Try our Pumpkin Cheesecake Bars too!
Jump to:
Recipe Ingredients Notes
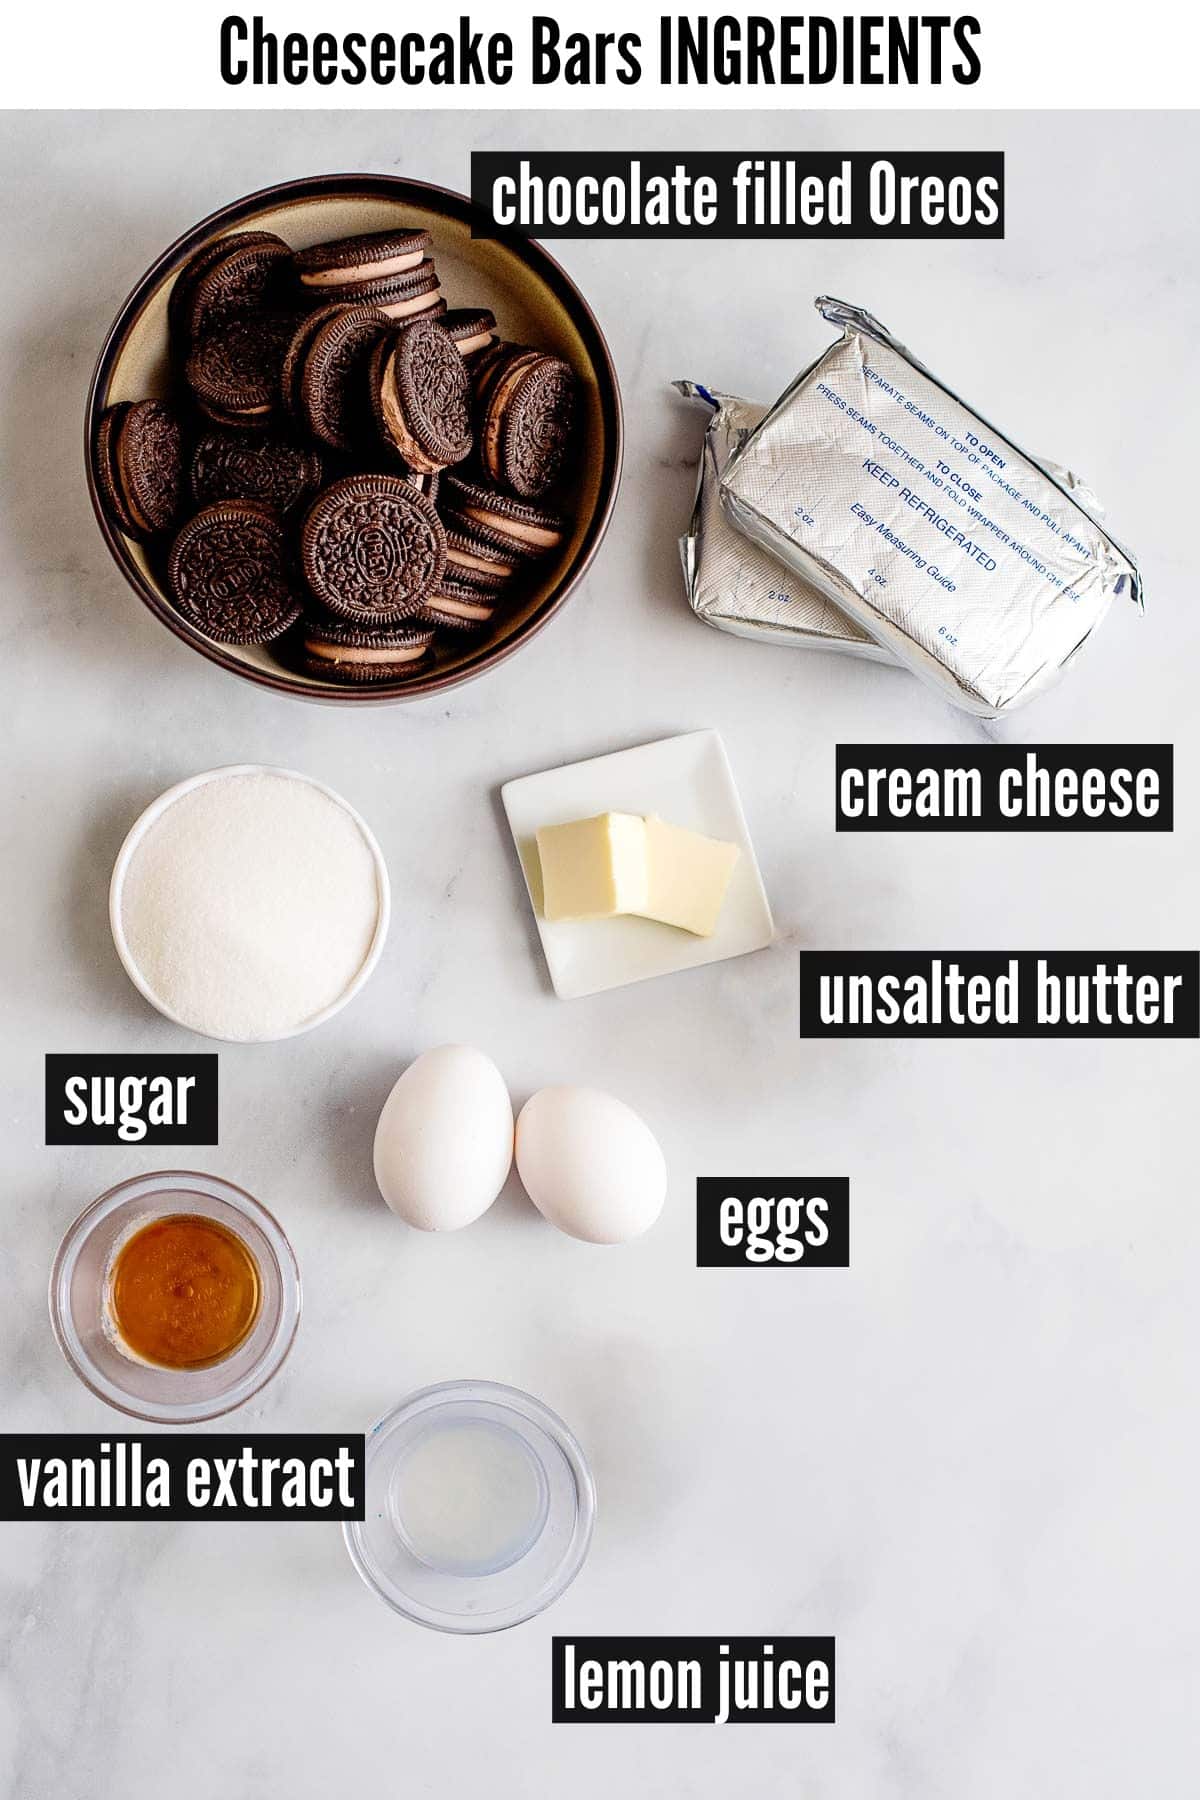
Cream cheese. You’ll need 2 8-ounce packages of cream cheese softened to room temperature before starting the recipe.
Eggs. Start with room temperature eggs for a creamier filling.
Oreos. We used chocolate cream Oreos. Regular or gluten-free Oreos or equivalent sandwich cookies can be used (regular Oreos or chocolate filled).
Unsalted butter. Two tablespoons of melted unsalted butter are used to make the crust.
How to make Cheesecake Bars
STEP 1. Preparation
Preheat oven to 350 degrees f. Prepare an 8-inch by 8-inch square baking pan by spraying with a non-stick cooking spray. For easier removal of the bars, line the baking pan with a sheet of foil and spray the foil with a non-stick spray (photos 1-2).
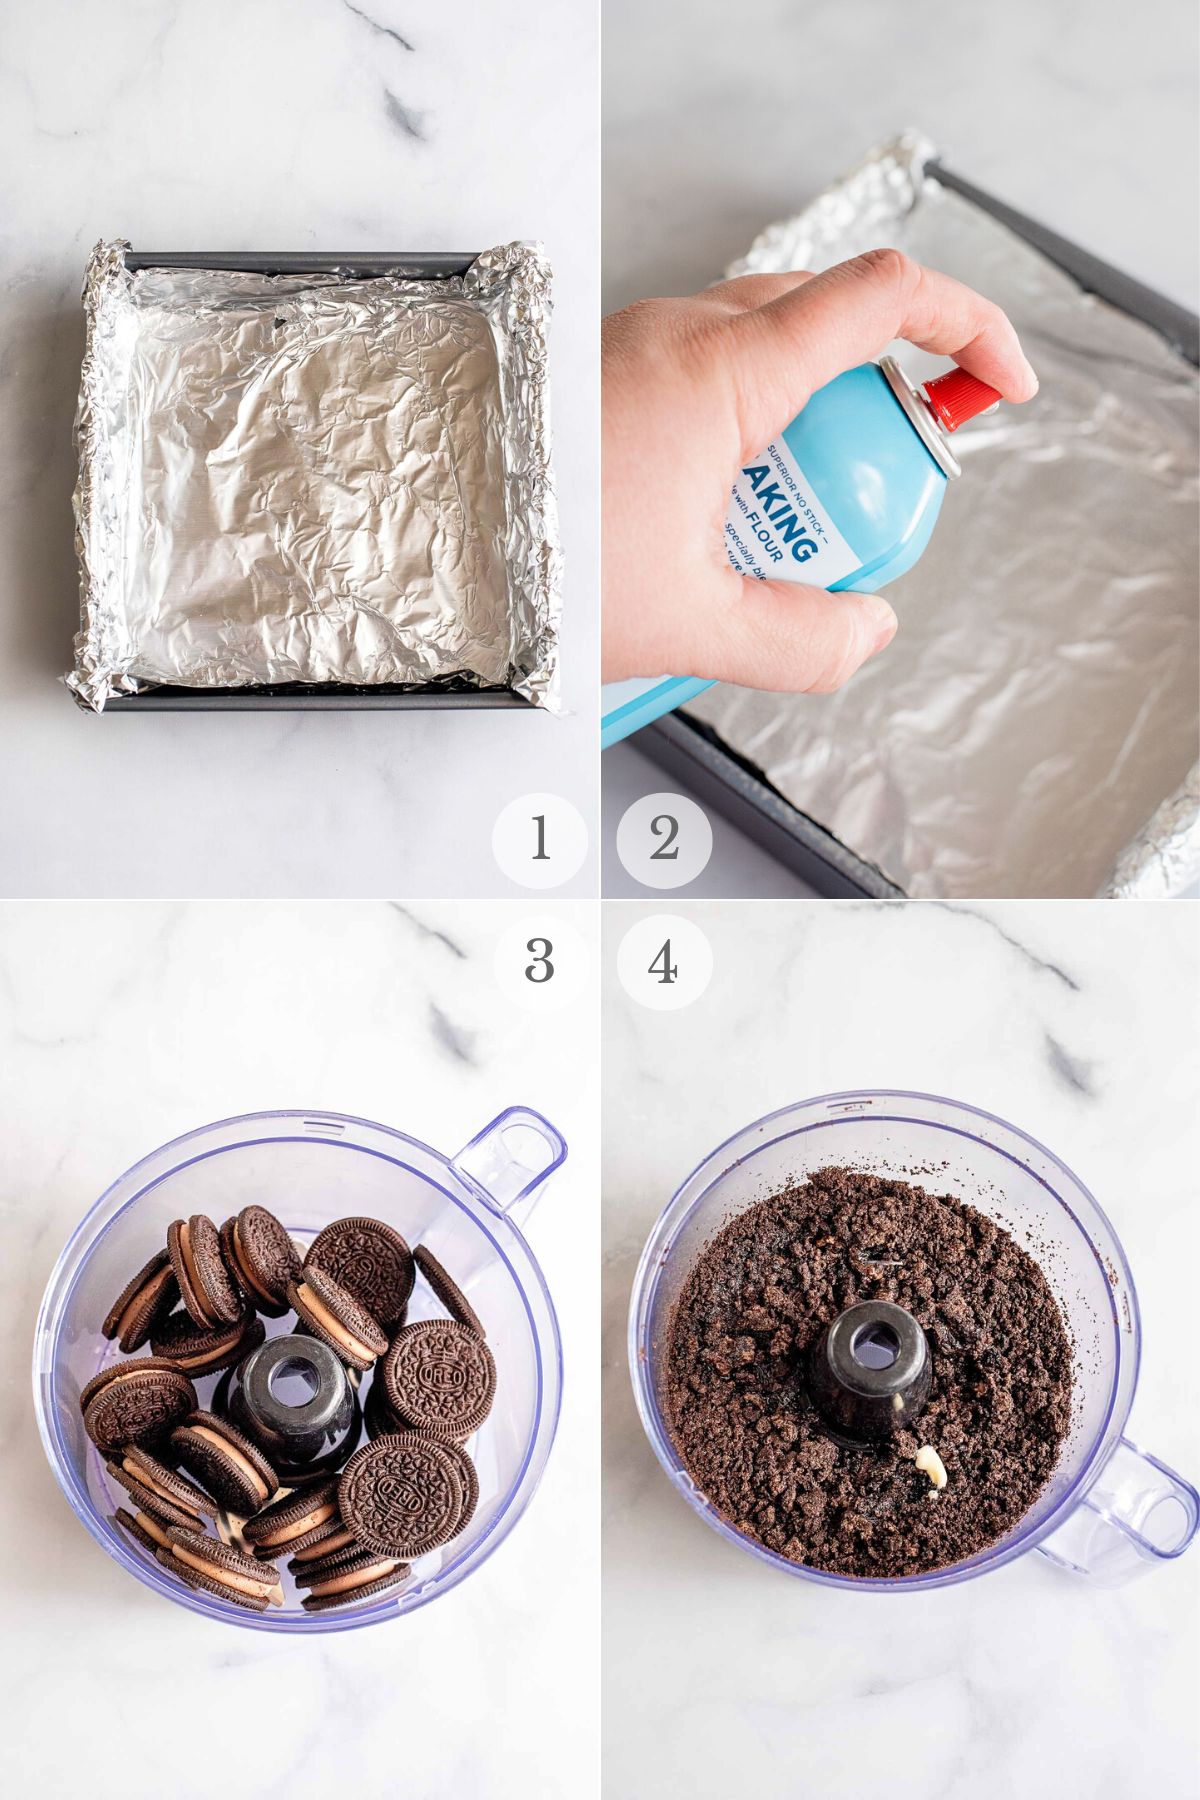
STEP 2. Make the crust
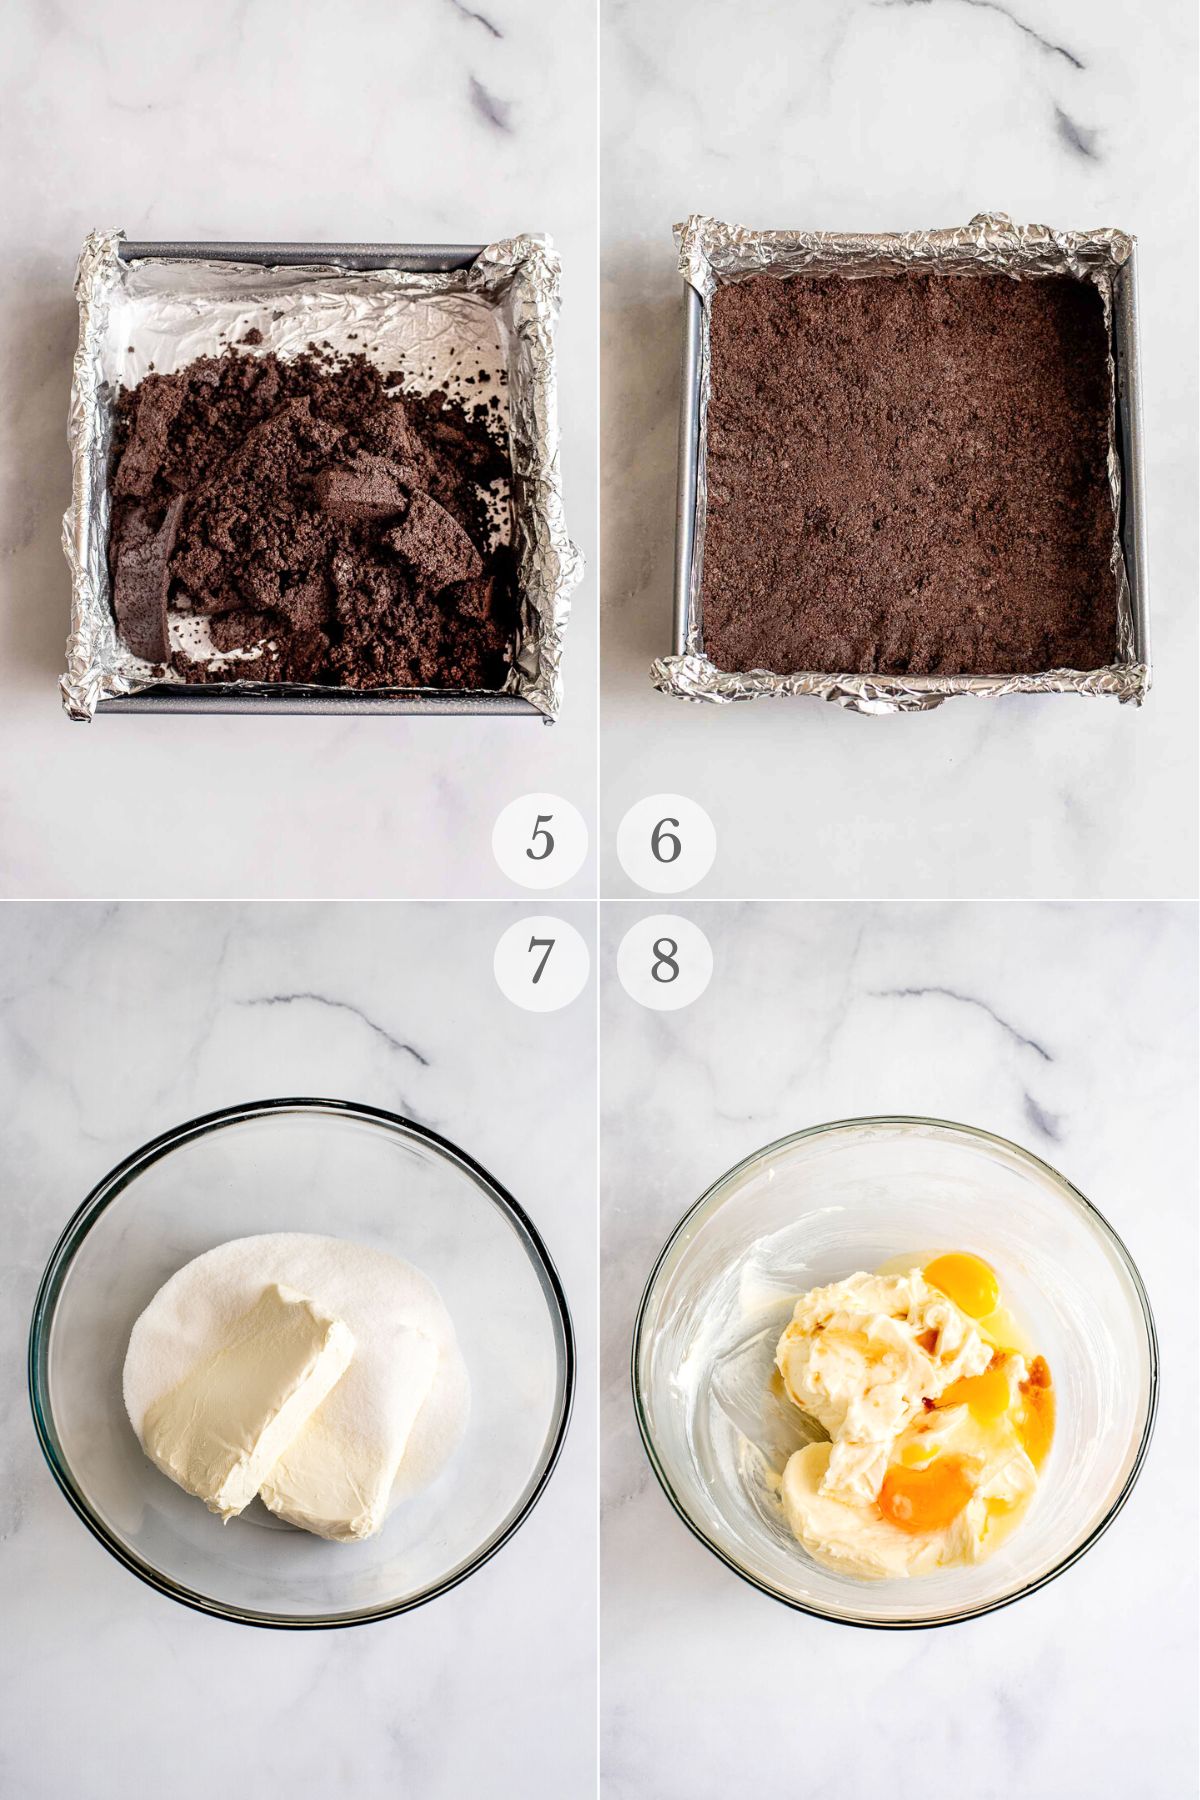
Using a food processor, blend the Oreos until a fine crumb has formed. Add in the melted butter and blend until combined (photos 3-4).
Spoon the crust ingredients into the prepared pan (photo 5), firmly press the crumbs into the bottom of the pan (photo 6) and bake in the oven for 10 minutes.
Set aside to cool and lower the oven temperature to 325 degrees. Continue onto the cheesecake mixture.
STEP 3. Make the cheesecake filling
In a large mixing bowl, using a hand electric mixer or in the bowl of a stand mixer fitted with the paddle attachment make the filling mixture. Beat the cream cheese and sugar until smooth and creamy (photo 7). Add in the lemon juice, vanilla, and eggs; mix until well combined (photo 8).
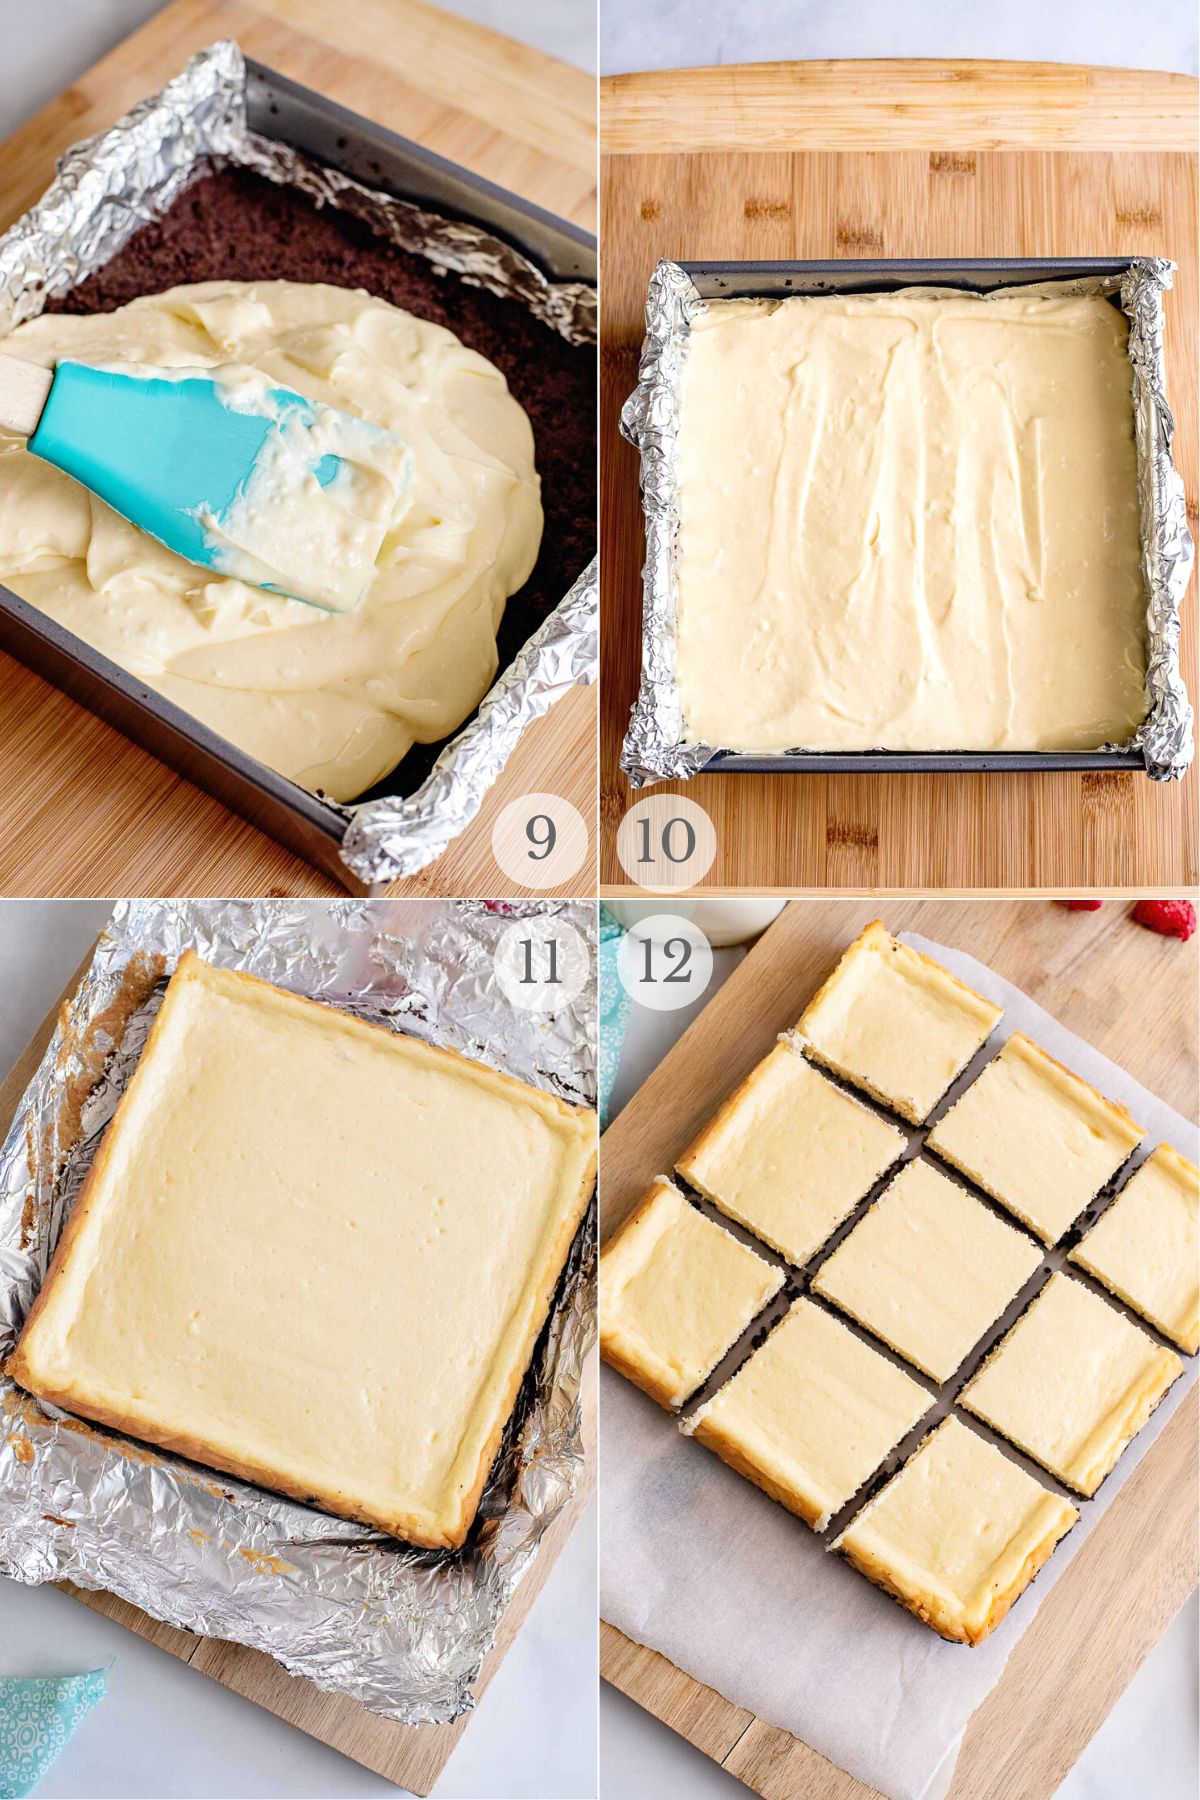
Pour the cream cheese mixture on top of the cooked crust and spread into an even layer to the edges of the pan (photo 9-10).
STEP 4. Bake
Before putting the cheesecake bars into the oven, place a baking pan full of hot water onto the bottom rack of the heated oven. This process will help prevent the cheesecake from cracking on top.
Place the cheesecake bars into the oven, on the middle shelf, and bake cheesecake bars for 40-45 minutes, just until the middle sets and jiggles slightly (photo 11).
STEP 5. Cool
Cool on the countertop on a wire rack for an hour and then finish cooling in the refrigerator for a minimum of 3 hours. Best if chilled overnight.
When fully cooled, cut into bars (6 large bars or 12 smaller bars) to serve (photo 12) and drizzle the desired amount of sauce on top (below). Serve and enjoy!
Variations
Try lemon Oreos. For a different crust flavor use lemon Oreos (not available gluten-free but another lemon sandwich cookie will also work). It gives a hint of lemon that’s delicious with the cheesecake top. You could add some lemon zest on top or in the layer of cheesecake too for lemon cheesecake bars.
Try a topping. We love these cheesecake bars with our Raspberry Sauce but try salted caramel sauce, chocolate sauce, cherry pie filling or other pie fillings.
Add some fresh fruit on top. If you don’t want to add a topping but want to garnish the bars the best way to do that is adding some fresh fruit. Sliced strawberries, fresh blueberries or other fruits cut into small pieces work great!
Expert Tips
Line the pan. Even though spraying a baking pan allows the dessert bars to release lining the pan with heavy-duty aluminum foil makes it easier to remove the full cheesecake recipe from the pan to cut the bars well.
Start with room temperature cream cheese and eggs. If the cream cheese is still cold or partially cold it will have small pieces of cream cheese and the filling will not be as smooth as starting with room temperature ingredients.
Scrape the bowl. Be sure to scrape the sides and bottom of the bowl while mixing the cheesecake mixture to ensure all ingredients are incorporated and smooth.
The cheesecake layer will still jiggle! If you aren’t familiar with making cheesecake it can seem it is not done because it will still jiggle slightly (not alot) after baking. This is normal and what you want! As it cools it will become totally solid. If you bake it until it is solid it can crack and not have the same creamy texture.
How to store
Store sealed with plastic wrap or in an airtight container in the refrigerator for up to 5-7 days.
More recipes you’ll love!


Recipe
Cheesecake Bars
Equipment
Ingredients
- 2 8-ounce packages cream cheese softened and room temperature
- ½ cup granulated sugar
- 1 tablespoon lemon juice
- ½ teaspoon vanilla extract
- 2 eggs room temperature
- 23 Oreos - chocolate cream variety or regular Oreos (regular or gluten-free)
- 2 tablespoons unsalted butter melted
Instructions
- Preheat oven to 350 degrees. Prepare an 8-inch by 8-inch baking pan by spraying with a non-stick cooking spray. For easier removal of the bars, line the baking pan with a sheet of foil with some overhanging the edges of the pan and spray the foil with a non-stick spray.
- Using a food processor, blend the Oreos until a fine crumb has formed. Add in the melted butter and blend until combined.
- Spoon the Oreo mixture into the prepared pan, firmly press the crumbs into the bottom of the pan and bake in the oven for 10 minutes.
- Set aside to cool and lower the oven temperature to 325 degrees.
- In a large mixing bowl, using a handheld electric mixer or stand mixer fitted with a paddle attachment, mix the cream cheese and sugar until smooth and creamy.
- Add in the lemon juice, vanilla, and eggs; mix until well combined. Pour the cheesecake mixture on top of the cooked crust and spread it to the edges.
- Before putting the cheesecake into the oven, place a pan full of hot water onto the bottom rack. This process will help prevent the cheesecake from cracking on top.
- Place the cheesecake bars pan into the oven, on the middle rack, and bake for 40-45 minutes, just until the middle sets and still jiggles slightly.
- Cool on a wire rack on the countertop for 1 hour and then finish cooling in the refrigerator for a minimum of 3 hours. Best if chilled overnight.
- Cut into 12 smaller bars or 6 large bars. Serve with a topping (our raspberry sauce!) or as is.
Karin says
Made these over the weekend and they were gone in minutes! Will definitely make them again.
Jessie says
Cheesecake is one of those things that I love to eat but generally hate to cook – until now! I love that these are in bar form – it makes the entire process feel so much easier. And the hot water pan trick to keep the top from cracking is SO helpful!
Aimee Mars says
Heaven in my kitchen! This delicious recipe is delightful and I can’t wait to make another batch again soon!
Jayne says
These were delicious! Very creamy and so much easier than a full cheesecake. Loved the pan of water trick. Turned out great.
Caroline Y says
I love these so much. So much easier than making an actual cheesecake! Thanks!
Carrie says
These were so perfect when my niece and nephew were visiting. They loved the bars so much and asked that I give the recipe to their mom!!!