
As holiday menus take shape, there usually is a spot for rolls, bread, biscuits or muffins of some sort. I personally am not a huge bread or roll eater. My husband on the other hand would be a happy person if the only food left in the world were carbs; cereal and pasta is all her needs (though he is actually a very healthy, well-balanced eater). It's always fun to prepare something unexpected or special in the bread department and for me that is popovers.
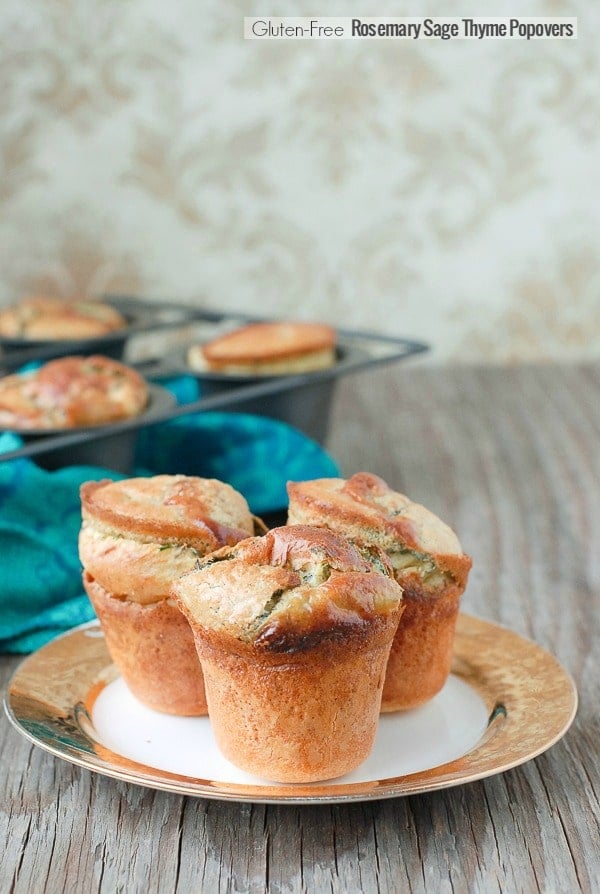
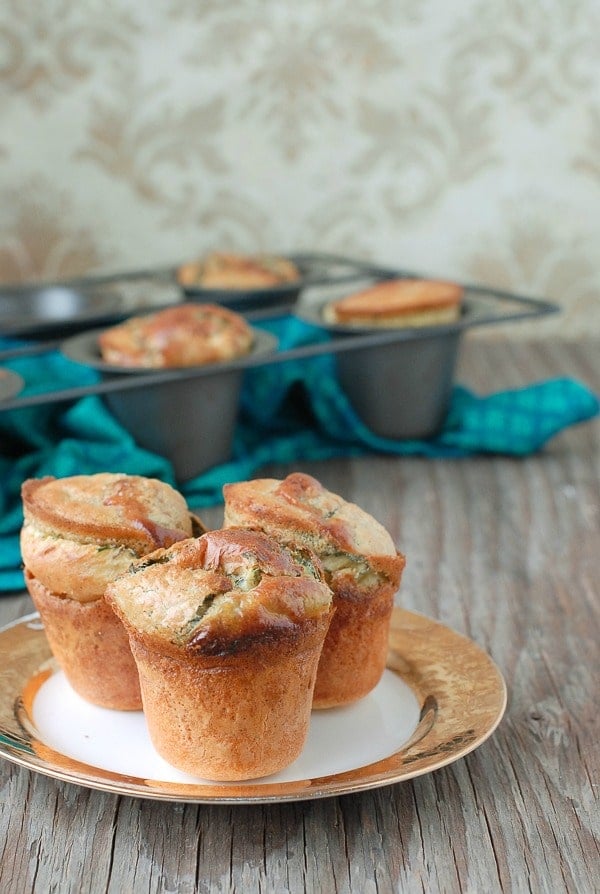
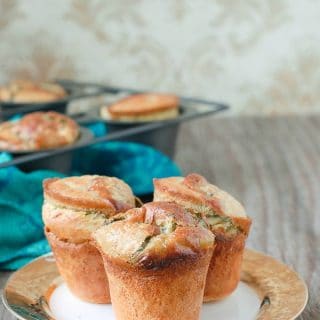
Popovers are a custardy bread that appear to be an overzealous, contorted muffin but reveal a light, eggy custard bottom to compliment the lofty top and hollow middle. If you've ever had Yorkshire Pudding, a popover is in the same family. They are satisfying without being overly filling. To be honest they can be a bit picky with rising certainly at Colorado altitudes and with gluten-free flour. Popovers make any meal feel special however if making them for a large holiday meal do know they will demand your full attention for a few minutes before putting them into the oven and if you open the oven to peek at their progress, they pout and collapse like a crestfallen two year old declaring 'game over'.
I love flavoring popovers with fresh seasonal herbs. My maiden voyage in the spring started with my Grandmother's recipe (which she made at sea level and with gluten flour) was adapted multiple times, 23 test batches to be precise, until the perfect gluten-free popover was revealed. My family was happy still to eat the imperfect testers!
Now having my formula down I wanted to adapt the popovers with deeper, more serious herbs for cold weather dishes. Rosemary, sage, thyme and chives combined to make these popovers a welcome option to accompany most meat dishes, omelets, soups or stews. Any herbs will do and because they rise with the popovers the depth of flavor is always lighter than one would imagine. They tend to hover toward the top of the popover reserving the custardy bottom in a more pure buttery form.
What I Learned About Baking Popovers:
- Unlike many recipes, everything is deliberate in a popover recipe. Follow the steps and ingredient notes to the letter.
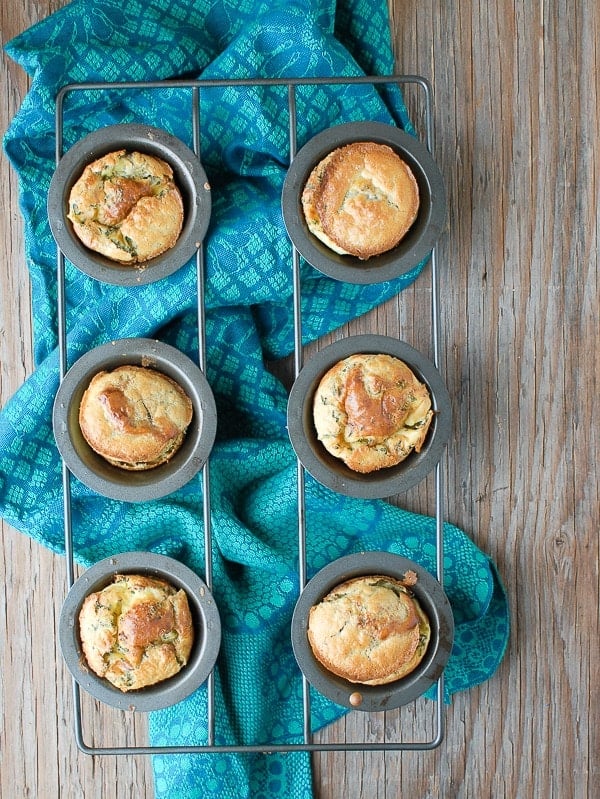
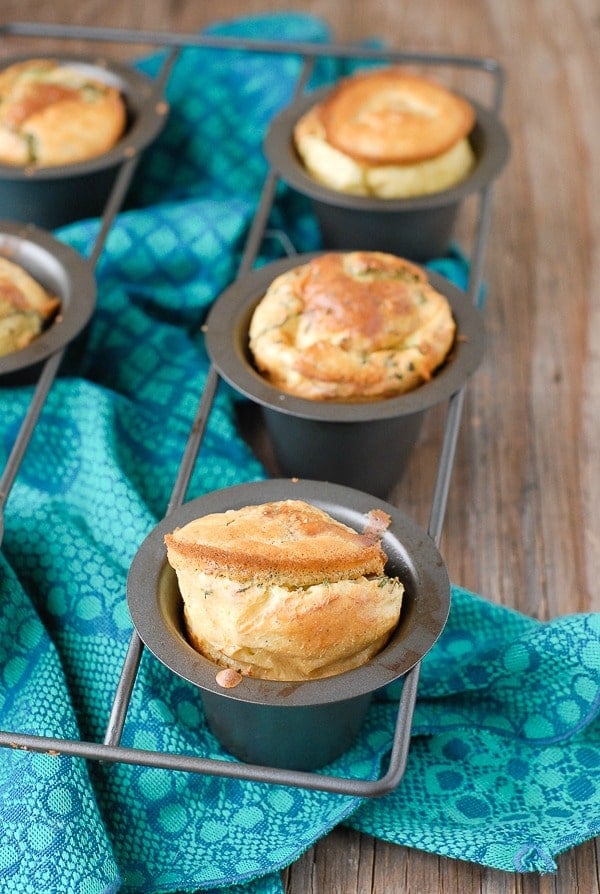
- Use a real popover pan. I was not successful getting my popovers to rise in a muffin tin.
- Preheat the popover pan. I found placing mine in a cold oven and bringing the pan out once the oven reached temperature to add the batter worked best.
- Don't grease the popover pan before preheating. It will smoke and smell and the greasing effect will disappear by the time it's time to add the batter.
- Make sure all ingredients are at room temperature; with the exception of the milk which should be heated as described in the recipe. The heating of the milk really made a difference I noted.
- The cardinal rule: Never, E.V.E.R. open the oven during popovers cooking. It will deflate them.
Recipe
Gluten-Free Rosemary Sage Thyme Popovers
Ingredients
- ¾ cups King Arthur’s Gluten-Free Flour blend*
- ½ teaspoon Kosher Salt
- ½ teaspoon freshly ground Black Pepper
- 1 teaspoon fresh Thyme (Lemon Thyme if available), leaves only, diced
- 1 tablespoon fresh Chives , finely diced
- 2 ½ teaspoon fresh Rosemary , leaves only; finely diced
- 1 tablespoon fresh Sage , finely diced
- 4 large Eggs , room temperature
- 1 cup Whole Milk
- 1 full stick of chilled unsalted butter (for greasing the pan; it will not all be used)
Instructions
- Place a non-stick popover pan in the cold oven and preheat to 400 degrees. While the oven is heating combine the flour, salt and pepper in a small mixing bowl and stir to combine. Also combine the herbs in a separate small bowl and using a dining fork to stir the herbs together.
- When oven has almost reached 400 degrees, place room temperature eggs in a blender, pulse 1-2 seconds only to lightly blend.
- Place the milk in a microwave-safe container and heat on high for 45 seconds. Stir and heat 30 additional seconds on high (alternatively milk may be heated on the stove; it should be very warm to the touch but not simmering as it can cook the eggs).
- Turn blender on a very low speed and slowly pour in milk to combine it with the eggs. Do not over blend.
- Add the flour mixture to the eggs and milk in the blender. Pulse only to combine; it will be a watery batter.
- When the oven reaches 400 degrees, remove the new stick of unsalted butter from the refrigerator. Peel back the wrapping to expose about 2 inches of the butter stick, leaving the wrapper on the opposite end so you may maintain a firm grasp of it when greasing the pan.
- Remove the heated popover pan from the oven and place on a heat proof surface such as a cooling rack. Grasping the butter by the wrapped end, swirl the stick around inside each popover mold a few times to coat the sides and bottom. The butter will melt.
- Pour the fresh herbs into the blender and pulse just to mix up the batter and integrate the herbs. Pour evenly into all of the six popover molds, filling them approximately ¾ full.
- Place the pan in the oven. DO NOT OPEN THE OVEN WHILE THE POPOVERS ARE COOKING! This will cause them to deflate.
- Cook the popovers at 400 degrees for 20 minutes. Reduce the heat to 375 for an additional 15-20 minutes. Popovers should be expanded over the top of the molds, dark brown and firm when removing from the oven. The longer the popovers cook, the more they hold their form when removed from the oven.
- Remove pan from oven. Remove the popovers from the pan onto a cooling rack. Stick a sharp knife in the side of each popover, making a small slit (1/2 inch) to allow steam to escape. Ensure the slit side of the popover is facing upwards. Allow the popovers to cool to the touch and serve warm.
Deb says
Does the gluten-free flour blend contain xanthan gum, or is it the gum-free type of flour? King Arthur has more than one gf flour blend.
Toni Dash says
Hi Deb. This recipe is from 2014 before King Arthur began to carry multiple GF flour blends and before measure-for-measure flours were invented. I’m unsure the blend I mentioned using at the time is the same as the blends they have now. I actually use Bob’s Red Mill gluten-free 1-to-1 baking flour for all baking recipes these days. I have NOT tested it with this particular recipe but have found it to be the most accurate swapping into gluten recipes and for flavor and consistency.
Jaime says
Would these be good made a day ahead?
Toni Dash says
Popovers really are at their best when they are freshly made and served. They can become a bit gummy in texture if served the day after.
Sue Hill says
I get the picture now. Maybe I should stick with the Yorkshires!
Sue Hill says
Having been brought up with Yorkshire puddings, this intrigues me. But if they have a custardy base, what do you serve them with? Sorry, but a Brit who is new to popovers!
Toni Dash says
I should provide a disection vertical shot of the inside of a popover which would make this easier to explain! The inside of a popover is hollow with the exterior being crispy on the sides and bottom; the top is fairly soft. The bottom 1/2 inch of the popover is cooked but rather than having the texture of a cooked bread, it has a ‘creamier’ texture due to the eggs but not like a traditional custard that you’d eat with a spoon. Therefore you would serve it with anything you like, it just offers a different constitution than traditional dinner rolls. Does that help?
Julia says
Holy mackerel these popovers look amazing! Huge kudos to you for trying at the recipe until you got it just right – there’s something so cool about taking a family heirloom recipe and tweaking it to be gluten-free in order to keep the tradition alive. Can you believe I’ve never made popovers? I must get a hold of a legit popover pan and try these puppies out!
Toni Dash says
Well after making them, YES I can believe you have never made them Julia! My childhood memories of them were such effortless creatures. Again I think being at 5,500 feet and using gluten-free flour has made a difference for me (more challenging to really get a good ‘pop’). They are pretty simple once all the nuances are worked out. I definitely recommend the popover pan which encourages them vertically.
Lisa @ Garnish with Lemon says
Such great popover baking tips. There’s nothing better than a big, fluffy popover!