Decorating for the holidays has always been something my family enjoys and when there is a crafty project involved all the better per the kids! Over the years we’ve made beaded ornaments, paper snowflake garland and countless other projects that get us in the mood for Christmas!
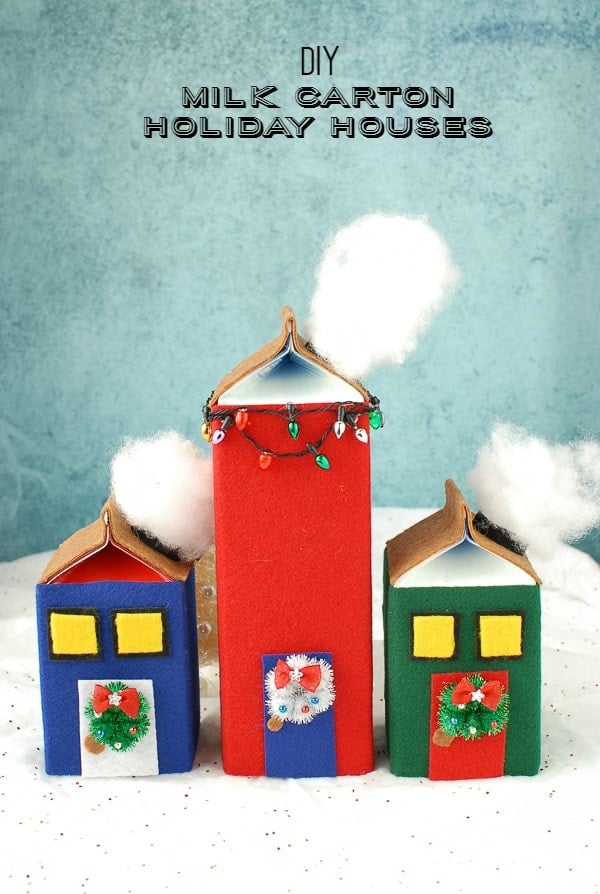
I’ve always loved little Christmas villages and houses but prefer the more rustic, handmade versions over those store-bought. Today I have a really fun and easy project for your holiday preparation: DIY Milk Carton Holiday Houses. This idea really belongs to my teen daughter and I had the most fun making them. So glad to share them with you too! We loved the recycling and repurposing element as well.
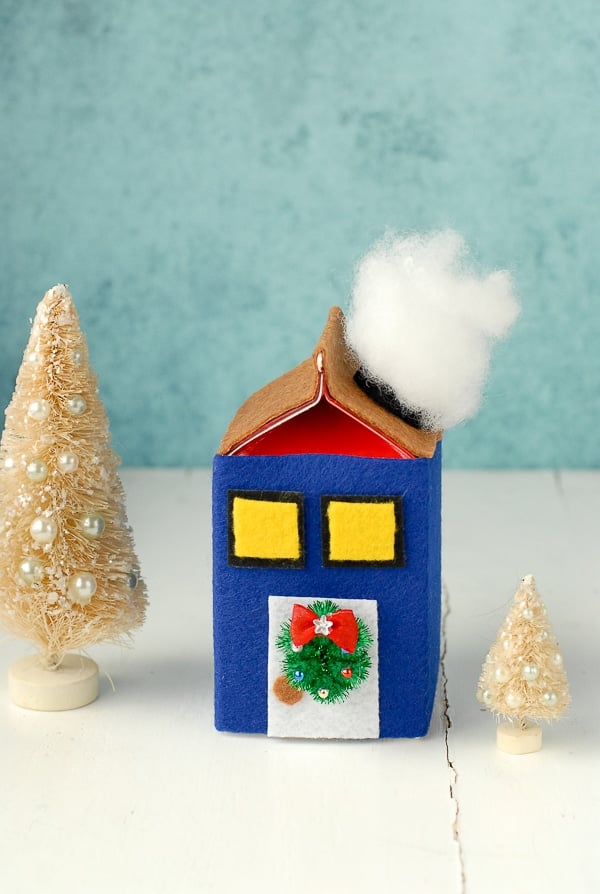
This project is so easy with the use of adhesive-backed felt. Available in craft stores (and I’m sure online) it comes in multiple colors and two varieties of stiffness. One version feels like regular felt, is very pliable, the second is stiff so when you hold a sheet it does not bend. I found them each great for different aspects of this project with the stiffer version perfect for doors and windows though the soft variety will work for that as well.
The adhesive sticks easily to the waxy surface of the milk cartons and is also forgiving. If you adhere a piece of felt and need to adjust it right away, you can move it and then after it stays in place for a bit it will stick permanently. I also found if a piece is cut short exposing some of the milk carton, an extra piece to cover the spot can be added and massaged a bit for the felt to blend in together. The felt has a wonderful look of wool and feels very cozy on these little homes.
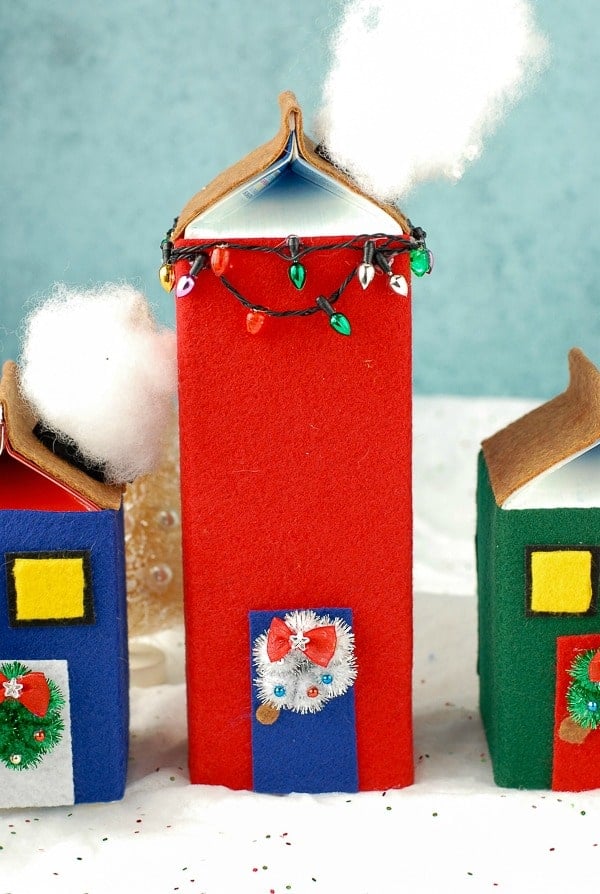
Extra elements may be added as well. For instance I could not resist these cute little dollhouse size wreaths for the doors that I found in the holiday dollhouse craft area. I also used a battery powered light up holiday lights necklace strung on a house to look like Christmas lights. With the on/off switch concealed at the back of the house, it can be turned on to imitate real house lights.

When starting your project consider the ‘look’ you desire. Any milk cartons will work however I loved the idea of short, little houses (creamer cartons) and tall, skinny houses (quart cartons) together. Planning the size of cartons and quantity before shopping for the felt will make it easier.
Measuring for felt needs:
To plan the amount of felt you’ll need before shopping, it’s easiest to pre-measure. Each aspect of the house will need a square or rectangle of felt (other than the door knob). The following explains the two measurements you’ll need for the house color, roof and chimney; the windows and doors may be cut to your visual preference.
House color: (1) measure around the carton, and (2) the distance between the bottom of the carton and the fold below the top, slanted area of the carton for the amount of felt to cover the house. Also panels of different colors may be used (measure the width of one side and the bottom to the fold to determine the panel size).
Roof:using a soft measuring tape, (1) measure from the fold at the top of the house color, up and over the peak of the carton and to the opposite fold, and (2) the width.
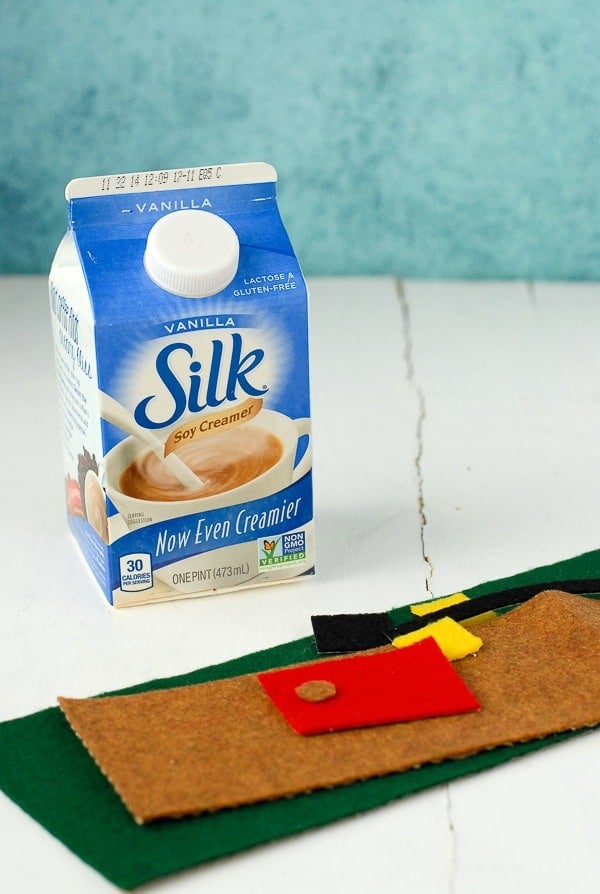
Windows and doors: planning 1-2 sheets of stiffer felt in your preferred door color, window background color and yellow for a lighted window effect should cover your project unless you are making a very large amount of houses. Refer to Step 5 below for guidance on planning windows and inserts.
Chimney: (1) using the ruler, place the end of the ruler on the bottom of the threaded opening of the milk carton and take the measurement from the bottom to the top (in the case of the creamer and quart carton it was approximately 1/2 inch tall). (2) Using a soft tape measure, measure the length around the outside of the opening.
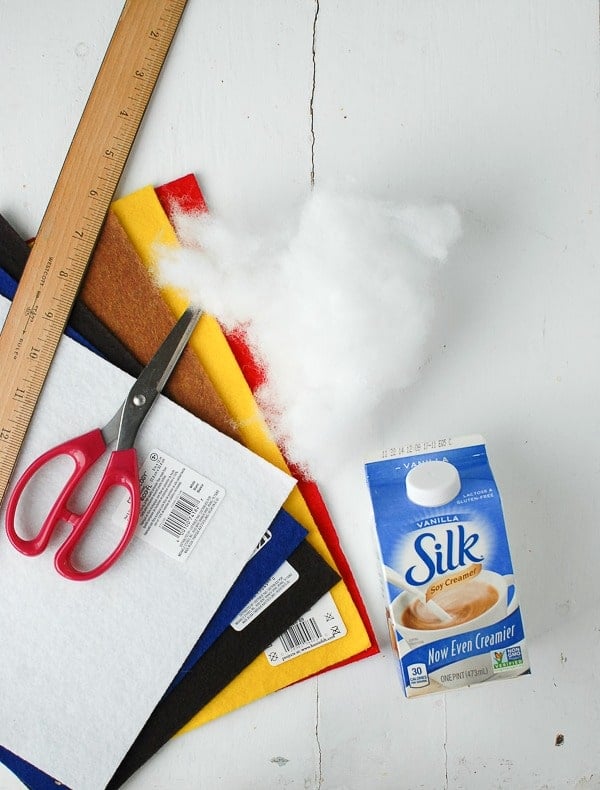
Supplies You’ll Need:
- Empty Milk Cartons, rinsed and drained
- Sheets of adhesive-backed felt in multiple colors (house colors, roof colors, black for windows, yellow for window insets, white for snow drifts, etc.); the amount needed will depend on how many houses you’ll make and the size milk cartons you will use (see measuring note above)
- Sharp scissors
- Ruler
- Sharpie (works best on the plastic cover of the adhesive back to draw cutting lines)
- Batting/stuffing to create chimney smoke (available at craft or fabric stores for stuffing pillows or animals)
Assembly instructions:
1. Draw the measurements for all felt pieces for your house (house color, roof, windows and door, door knob) on the back side of the felt (on the plastic adhesive cover). Cut out all felt pieces and set aside.
2. Starting with the house color felt, peel part of the backing off and align the felt piece with a back corner on the carton (so the front of the house will be free of felt seams). Press the felt onto the carton, one side at a time (and only unpeeling the backing one side at a time so the felt doesn’t accidentally adhere to itself), ensuring the felt is properly aligned to the sides of the milk carton. Press to adhere fully.
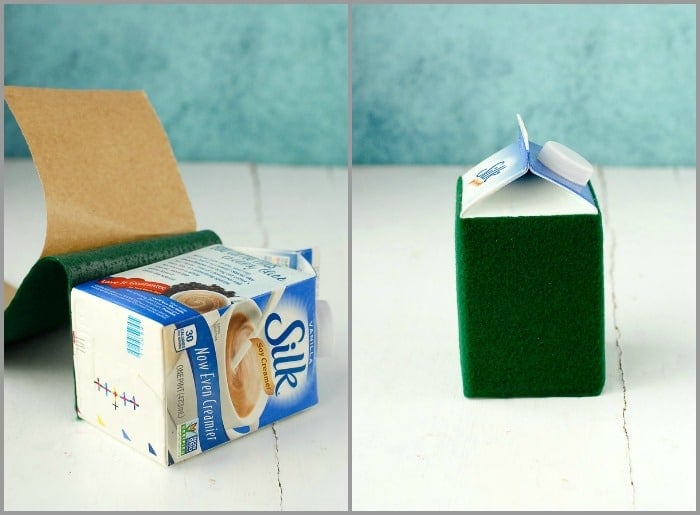
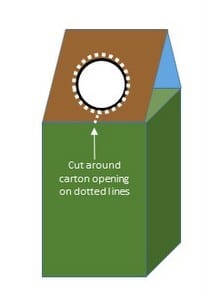
3. Next apply the roof felt, aligning the piece to the bottom of the roof and unpeeling the backing as the felt is adhered to the roof side, peak and opposite side. Cut around the opening of the milk carton. TIP: I found rather than cutting an exact circle, making a small cut from the bottom of the roof just below the milk carton opening, to the bottom of the carton opening and then cutting around the opening much easier. The felt can be easily pushed together at the straight cut below the carton opening so it will not be visually distracting.
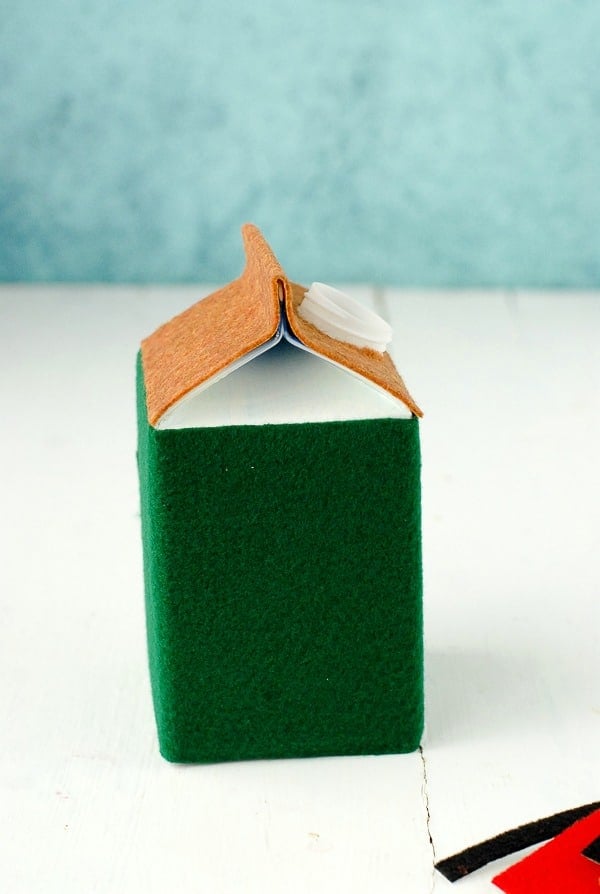
4. To adhere the chimney felt, peel the backing from one end of the felt strip and starting at the bottom of the carton opening, stick the felt strip onto the threaded opening. Peeling the backing and pressing the felt into the carton opening, press the felt strip around the opening to cover.
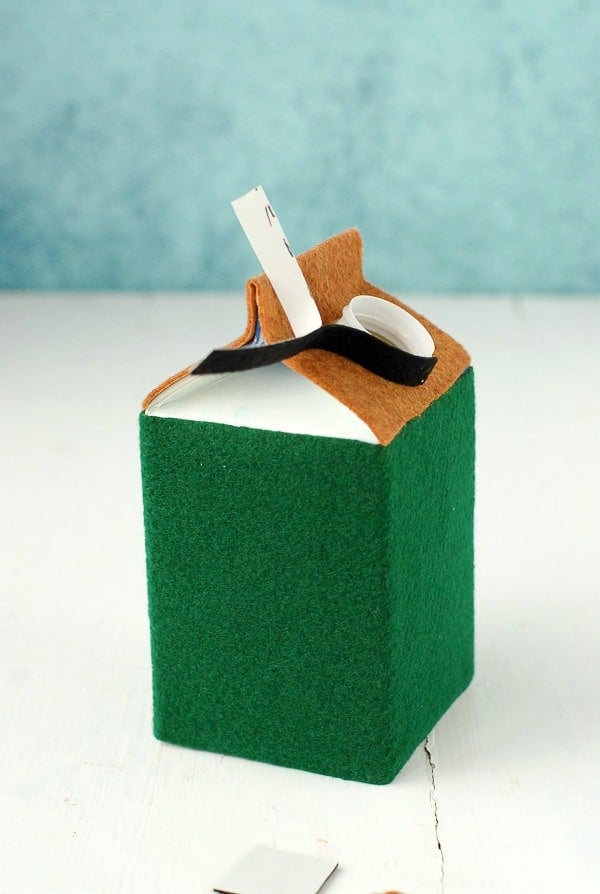
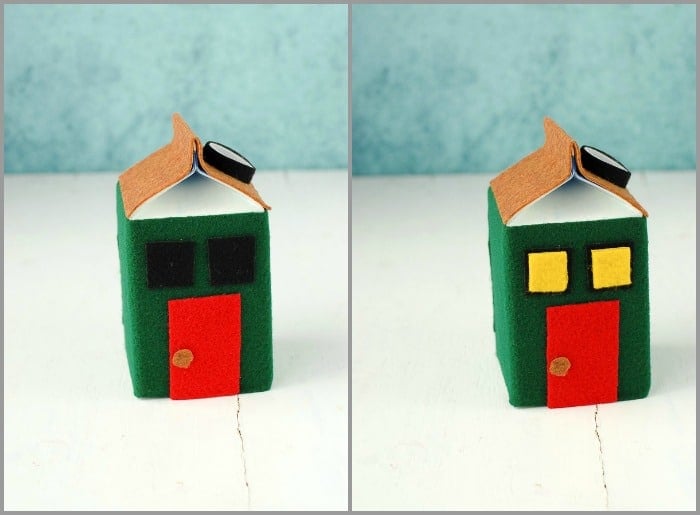
5. Adding a door and windows: Place the felt door in place on a side of the house and the knob onto it. Cut out squares or rectangles in black (or your desired color) for the window frames. Cut out corresponding yellow felt squares or rectangles a bit smaller than the frame. Place the window frames in the desired location(s) on the house and then place the yellow inserts on top of them allowing a border to show around them.
6. Chimney smoke: take a handful of batting and stuff a portion of it into the milk carton opening until it stays in place.
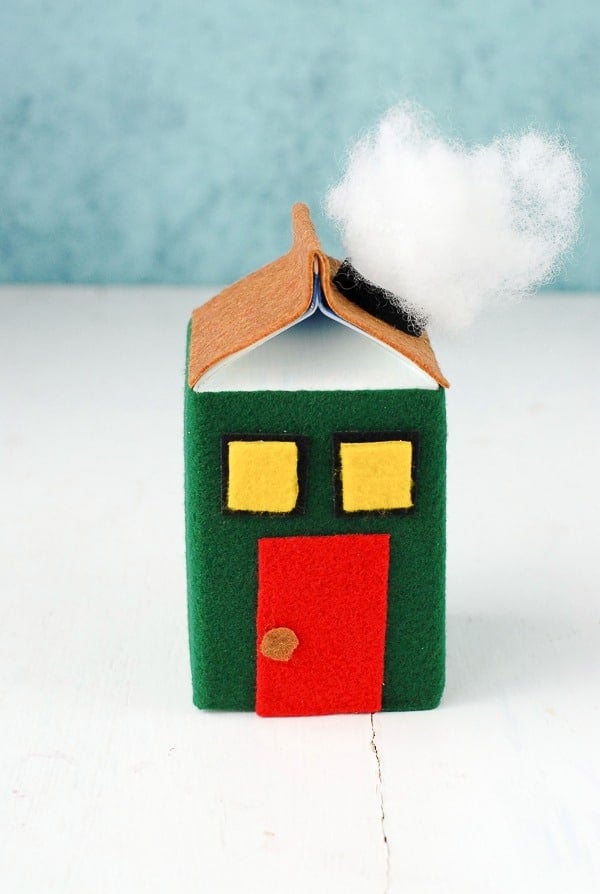
7. Extra adornments such as the wreath or the lights may be glued into place (hot glue gun or white glue).
This conversation is sponsored by Silk. The opinions and text are all mine.
Leave a Reply