

Dying Easter Eggs in Cool Whip or Shaving Cream is a fun project with beautiful tie-dye like results! Learn the easy way to do both below!

I love different ways for decorating Easter eggs and this one is easy and fun for all ages: Dying Easter Eggs with Cool Whip or Shaving Cream!
It is inexpensive, creative fun for the whole family and the end result is perfect for egg hunts of table décor.
You'll find tips, tricks and the step-by-step instructions for both shaving cream eggs and for dying Easter eggs with cool whip below!
The Process: Dying Easter Eggs with Cool Whip or Shaving Cream
The process for creating beautiful Easter eggs is the same whether using shaving cream or whipped cream.
The main difference is whether you want to eat the eggs after making them.
Do Not Eat Shaving Cream Eggs
Egg shells are semi porous, meaning they are not a full barrier between what is on the shell and what sinks in THROUGH the shell to the egg itself.
If you only want to use shaving cream eggs for egg hunting or decoration, they are fine for that.
Shaving cream eggs should not be eaten.
Cool Whip Dyed Easter Eggs ARE Edible
Dying Easter eggs with Cool Whip allows them to be eaten if desired since no chemicals have been used on them.
Also, if dying Easter eggs with younger children, whipped cream doesn't pose a problem if they accidentally get it into their little mouths.

Eating Dyed Easter Eggs
Even if dying Easter eggs with Cool Whip some other precautions should be followed when planning to eat the dyed Easter eggs later:
- Do not eat dyed hard-boiled eggs that have been unrefrigerated for over 2 hours
- Only eat Easter eggs dyed with food safe substances. So, dying Easter eggs with Cool Whip is a great option if desiring to eat them later.
- Don't eat any dyed Easter eggs with cracks. Cracks even the smallest crack can allow bacteria to penetrate the egg.
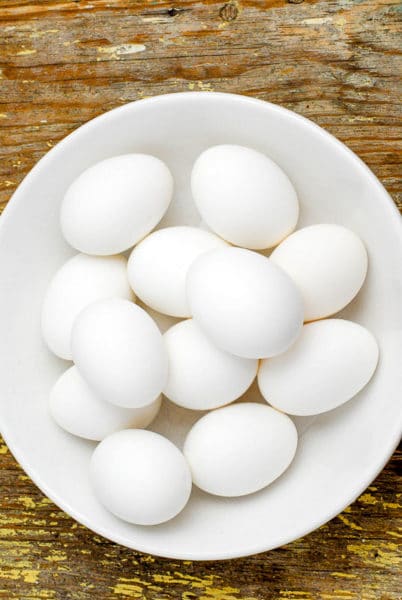
Start with Hard-Boiled Eggs
The first step in dying Easter eggs with Cool Whip or shaving cream requires hard boiled eggs.
I have two hard-boiled egg recipes I really like and use all the time:
Why Vinegar Helps
Soaking the hard-boiled eggs in vinegar before dying the eggs will make much more vibrant colors!
Supplies Needed
The supplies for dying Easter eggs through this method are simple, inexpensive and easy to find.
NOTE: the food quantities will depend on how many eggs you choose to dye
- Hard Boiled Eggs
- Cool Whip or Shaving Cream
- Food Coloring: gel will create more vivid colors; liquid works well too
- Vinegar
- Large Mixing Bowl or tub (to soak hard-boiled eggs in vinegar)
- Large Baking dish with sides (for the whipping cream or shaving cream)
- Toothpicks, Fork or Knife (to mix food coloring into Cool Whip or shaving cream)
- Spoon (to roll the eggs)
- Paper Towels (or dry eggs once rinsed off)
How to Make Dyed Easter Eggs with Cool Whip or Shaving Cream – Step by Step
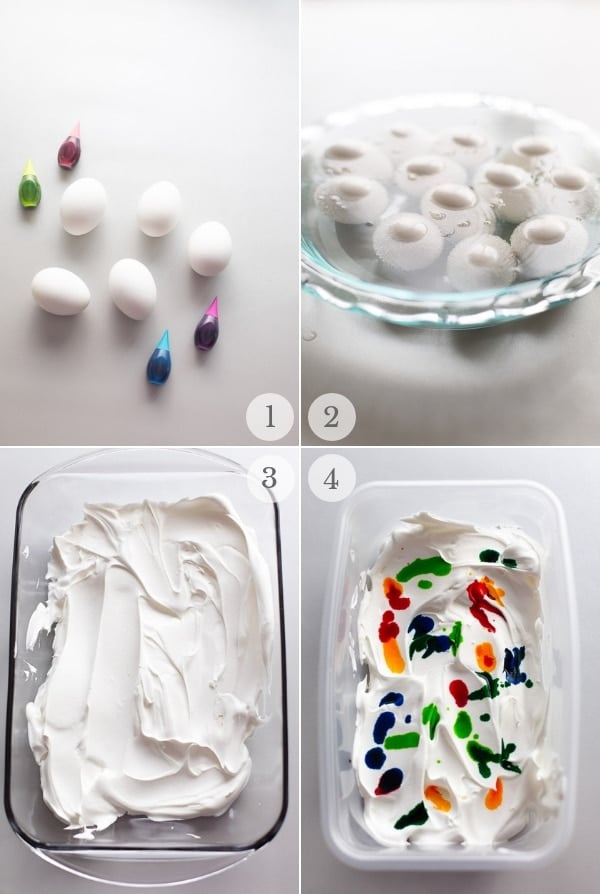
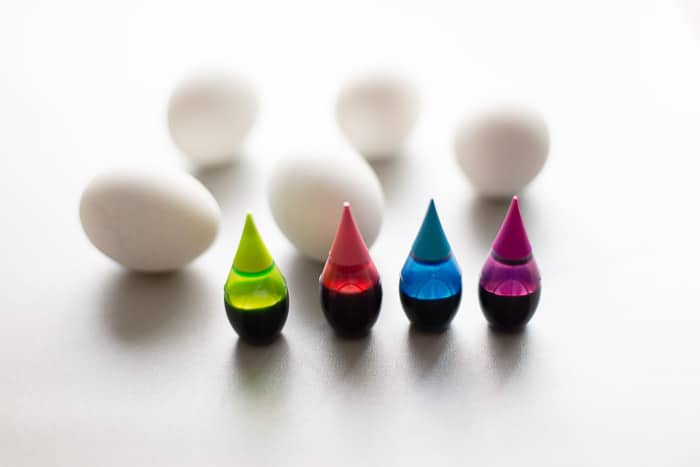
- Assemble the supplies (photo 1).
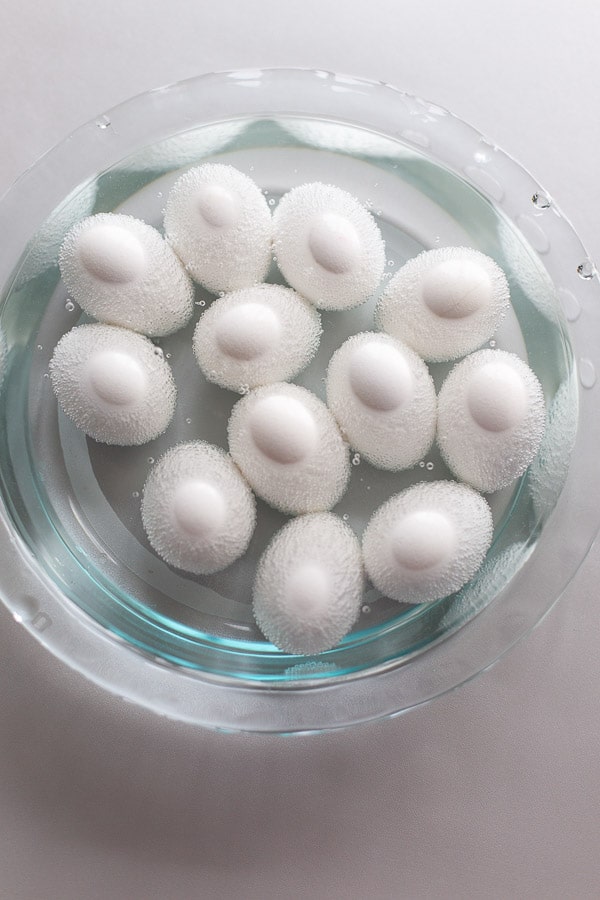
- Soak the hard boiled eggs in vinegar for two minutes (photo 2). This helps to make the colors more vibrant.
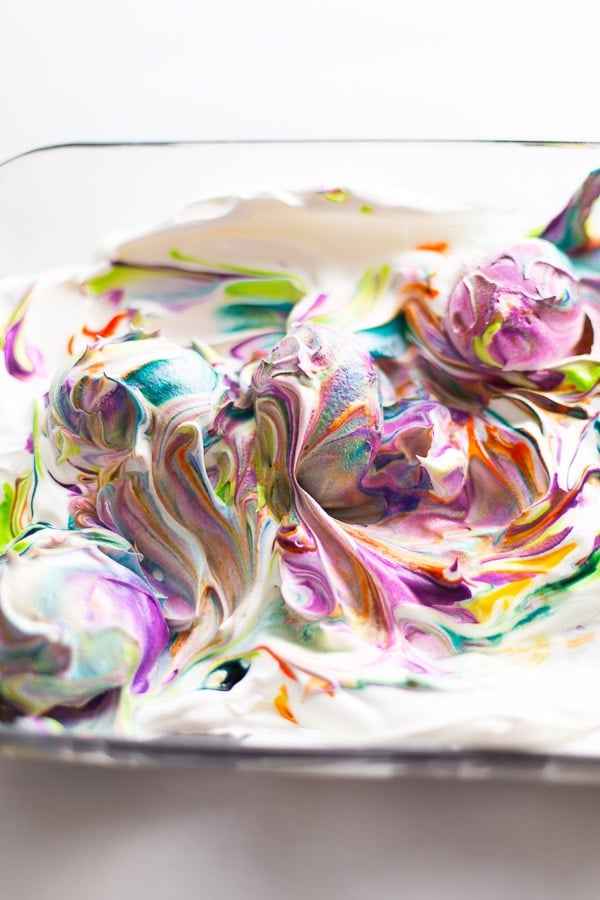
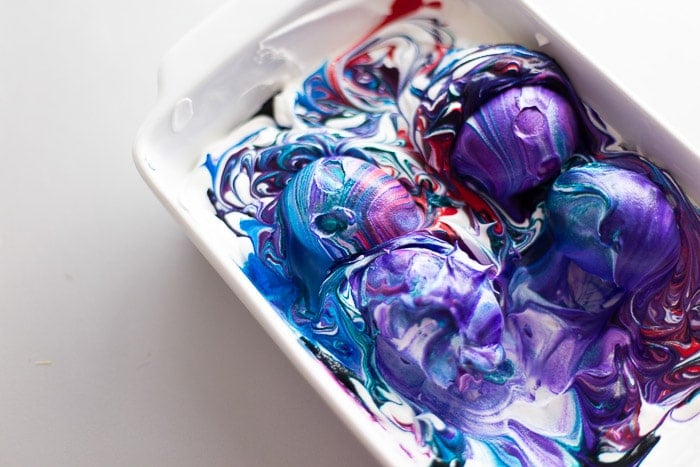
- Spread the whipped cream into a pan or dish with sides (photo 3).
- Add drops of food coloring to the whip cream (photo 4). As many drops and / or colors as your heart desires.
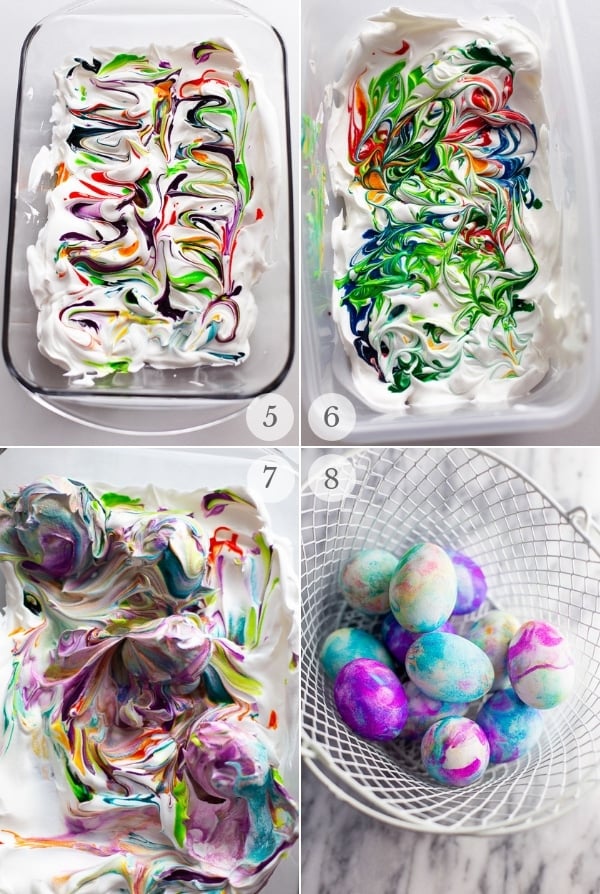
- Using a toothpick, fork, or knife swirl the food coloring around. Careful to not combine the colors too much. (photos 5 & 6)
- Place an egg in the cool whip and food coloring and roll using a spoon. One roll is recommended so that the colors don't mix. (photo 7)
- Repeat with as many eggs as you choose.
- Let the eggs set in the cool whip mixture covered in the color for 10-30 minutes (photo 7). This allows the egg to absorb the food coloring.
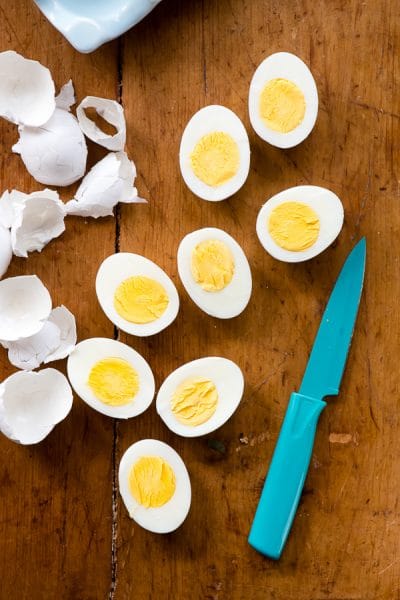
- Rinse the eggs with cool water and then dry!
And your beautiful masterpiece eggs are complete (photo 8)!
Repeat with different colors and combinations.

Please SUBSCRIBE and FOLLOW ME on FACEBOOK , TWITTER , INSTAGRAM and PINTEREST!

Dying Easter Eggs with Cool Whip or Shaving Cream
Ingredients
- Hard Boiled Eggs
- Cool Whip
- Food Coloring gel (for brighter color) or liquid
- Vinegar
Instructions
- Soak the hard-boiled eggs in vinegar for two minutes. NOTE: This helps to make the colors more vibrant.
- Take the whip cream (or shaving cream) and spread it into a pan or dish with sides.
- Add drops of food coloring to the whip cream. Use as many drops and / or colors as desired.
- Using a toothpick, fork, or knife swirl the food coloring around. Be careful to not combine the colors too much.
- Place an egg in the Cool Whip and food coloring and roll using a spoon. One roll is recommended so that the colors don’t mix. Repeat with as many eggs as you choose.
- Let the eggs set in the cool whip mixture covered in the color for 10-30 minutes. This allows the egg to absorb the food coloring.
- Rinse the eggs with cool water and then dry!
- Repeat with different colors and combinations.
keikilani says
I love this idea! What a fun way to die eggs. although I am sure the kids won’t keep their fingers out of the cool whip!
Wendy Polisi says
That is such a cool idea! My family always gathers to color eggs. I am totally trying this!
Lisa Favre says
These look like so much fun to make! I think it’s amazing that you can use whipped cream to color eggs – I had no idea!
Subhashish Roy says
The eggs look so colourful and nice. It was great learning too about which eggs to have and which ones not to. Nice educative post for me.
Sara | mshealthesteem.com says
This is such a cool technique! I’ve never heard of this. Thank you for sharing! I’ll be showing my sister in law so that she can do this with the nieces and nephews nexy year. 🙂
Snehal says
Well I am gonna have some fun dying eggs with my lil cousin. We both love such fun DIY stuff. 😀
Ruth I says
Thank you for all of these ideas! I would choose the edible option, I don’t want to waste a precious egg. haha!
Jennifer says
I just learned about this technique! It’s crazy how easy it is to dye eggs this way.
KeshiaRichmond says
I would definitely try to make these eggs with whipped cream but not shaving cream although it appears to work really well.
Catalina says
This is genius! Now I know what I need to make this weekend with my kid!