
Ever want to create a Pinterest pin from your own image with a link? Or wonder how to create a Pinterest board, secret or public? This simple tutorial on How to Create A Pinterest Pin From Scratch will help you do both in a flash!
UPDATED: JULY 2018
I think almost everyone uses Pinterest these days. For those who may not, it is a search tool to help discovery and catalog visual images on theme boards created from pictures, and linking to websites.
Why Use Pinterest?
Pinterest is a fantastic discovery and collection tool. It is essentially a search engine for creative content. Their goal is to help users discover new things, locate content like desired recipes and encourage trying new things.
Plan Trips
It is a fantastic way to plan trips, by creating a board and ‘pinning’ different pieces of information such as sights to see, places to eat, informational articles or pictures that make you anxious to go!
DIY Project Ideas or Gift Ideas
Want to start thinking of DIY Gift Ideas for the Holidays? Create a board and use the Pinterest search feature to find fantastic options that appeal to your fancy all year long.
Party Planning
Planning a birthday party? Start collecting ideas so all your links are in one place when you are ready to start shopping, creating, baking and having fun.
Recipes
Bloggers like me also use boards to chronicle our own recipes as well as other beautiful images that inpsire us. Pinterest really is a visual wonderland for everyone.
Creating From Scratch Pins for Pinterest
Have you ever wanted to upload your own photos into a Pinterest board? Or maybe a photo from the web?
For Bloggers, have you created a collage of photos from a certain post and want to link it back to the post but aren’t sure how? Or want to create a pin of a related photo that might not be in the blog post and link it back to the post?
It’s very easy to do! Following is a Step-By-Step guide for Creating a Pinterest Pin from Scratch: Uploading Photos or Collages with or without a Linking URL.
2018 Pinterest Update
Pinterest continues to make changes that make it even easier for users to create pins, boards, move pins around on a board, archive a board, delete content in mass and more. These changes have made the creation of a pin from scratch simplier too, as well as creating boards.
This guide has been fully updated in 2018 to include all new step-by-step screenshots for:
- Creating a Board (secret or public)
- Creating a Pin from Scratch
- Editing a Pin Board
- Deleting a Pin
Tools for Creating Photo Collages or Text Overlays on Images
I have two preferred tools I use to both create photo collages or to add text overlays on images for my blog and pinning to Pinterest.
Picmonkey
I historically have used Picmonkey, a creative photo editing site, for adding titles to photos in my blog posts or to create collages.
It has a photo editing element as well, which is very easy to use. Picmonkey no longer offers a free option. There are two subscription levels with the main difference is the number of options for fonts and embellishment detals.
Picmonkey is great for seasonal projects as well due to their fun options for effects, fonts, backgrounds and more. You can create cards, collages, edit photos; the project opportunities are endless.
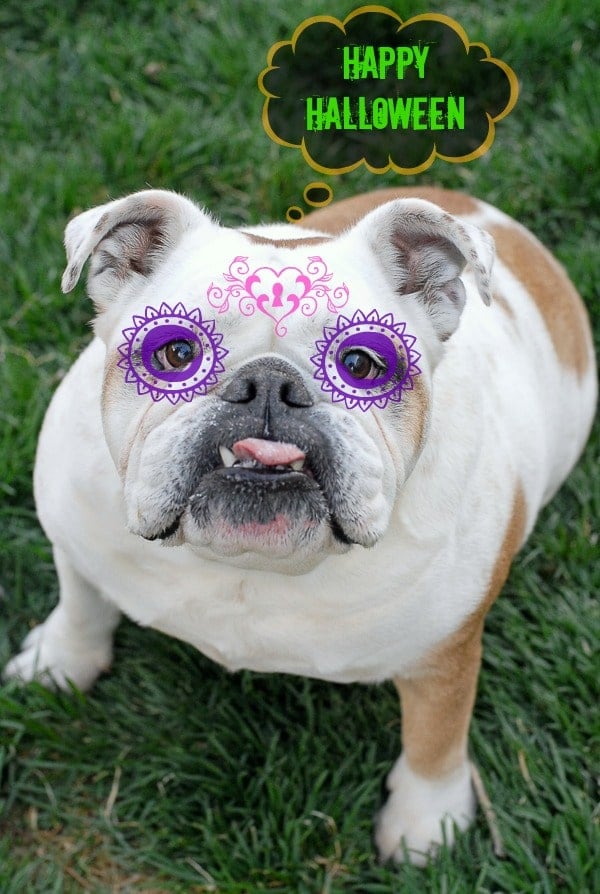
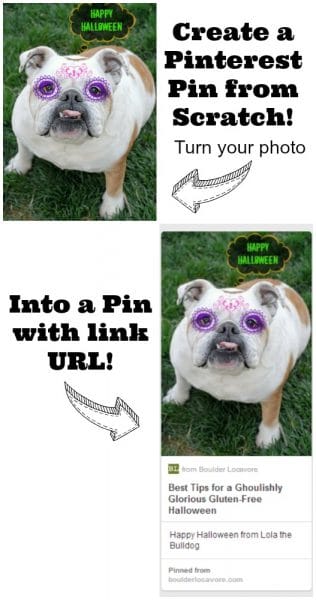
For this example (done on Picmonkey) I edited a photo of our bulldog, Lola, using some Halloween embellishments on Picmonkey and saved it to my computer. Here is a Step-by-Step to turning that photo into a Pin.
Canva
I’ve also begun to use Canva for adding overlays on photos, and to create collages. It’s a FREE photo design and graphic editor tool with loads of drag-and-drop featues, fonts, and templates (for personal projects like greeting cards too you may want to make and look professional).
The photo with title overlay of Grilled Peach Mascarpone Ice Cream in the screenshots was created in minutes on Canva.
They have many fonts and the graphics tool helps create title graphics quickly. Canva also has premade templates that can be easily modified with your script. They have many standard social media templates matching the dimensions for each social media platform for easy editing too.
HOW TO CREATE A PINTEREST BOARD (Secret or Public)
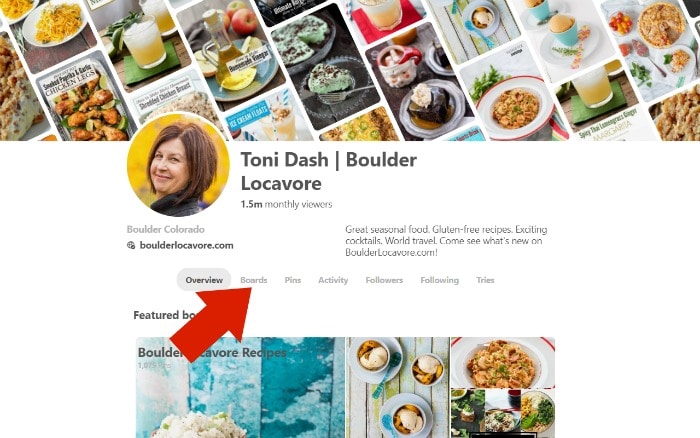
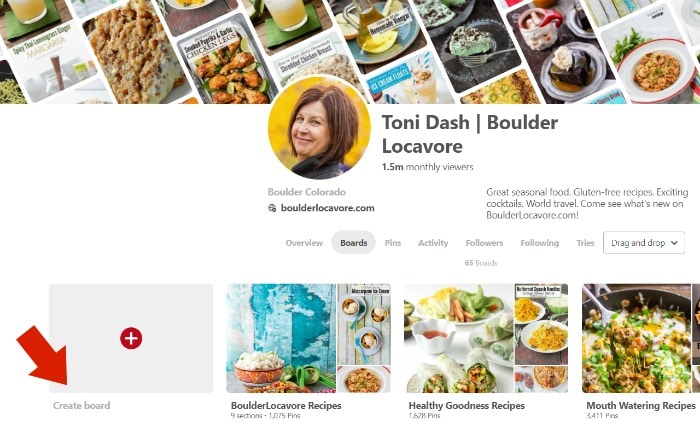
STEP 1: Open your Pinterest Profile and Select ‘Boards’ from the menu above the Boards. Click on ‘Create Board’:
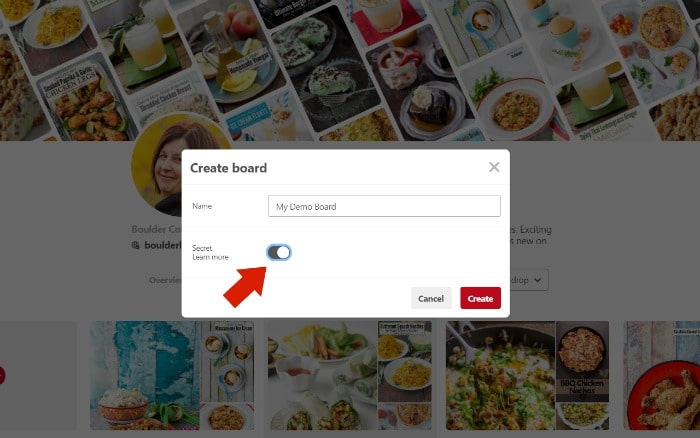
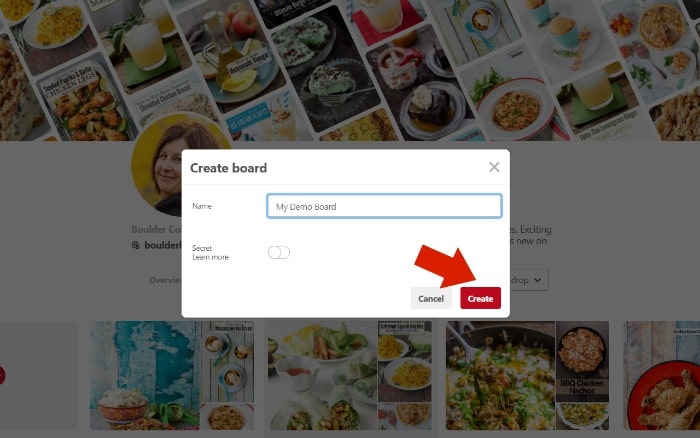
STEP 2: Give your Board a name (once it has been created you can edit to add a description too if desired), toggle the ‘Secret’ button to be ON (for Secret: first photo) or OFF (for public; second photo), and click ‘Create’:
STEP 3: Fill in the Board details (once it has been created you can edit to add a description too if desired), the Description, Category and select SAVE:
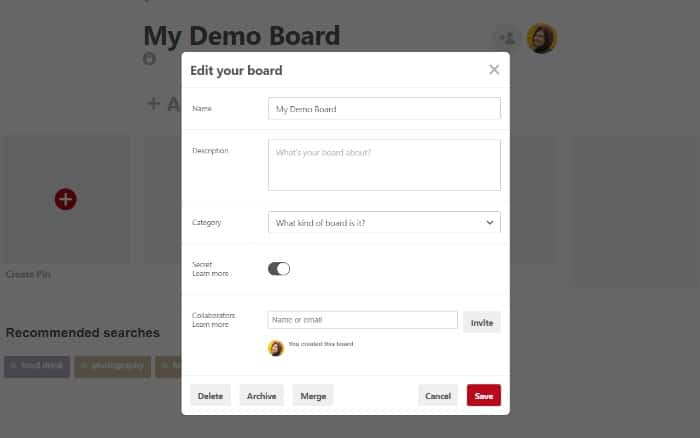
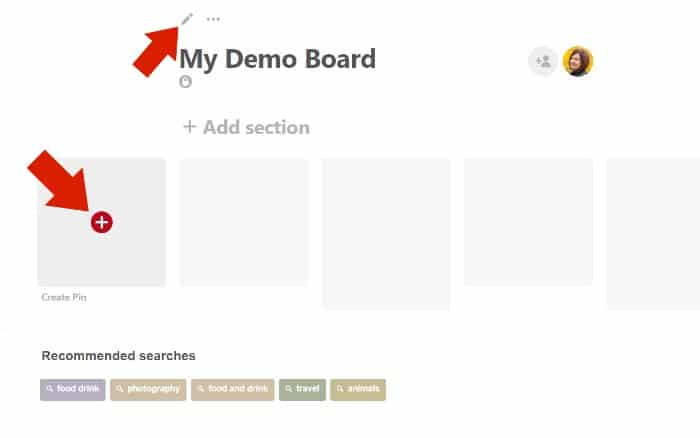
After Selecting SAVE, the Board will appear as below. To EDIT the board, select the pencil icon above the Board Title and the second image below will appear.
You can change the board name, fill out the description, select a category, change the secret/public setting or invite others to collaborate on the Board.
To add Pins, either pin from an existing board, the Pinterest Feed or Create a Pin by selecting the icon “+” shown below:
HOW TO CREATE A PINTEREST PIN FROM SCRATCH
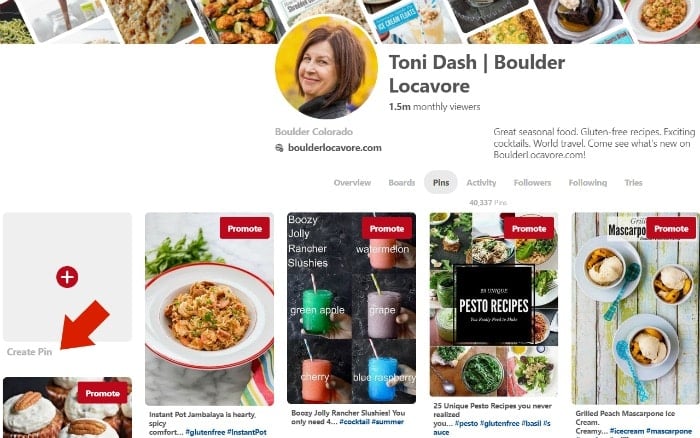
STEP 1: In your Pinterest profile, the first square will have a red circle with a ‘+’ symbol and ‘Create Pin’. Select the ‘+’ symbol:
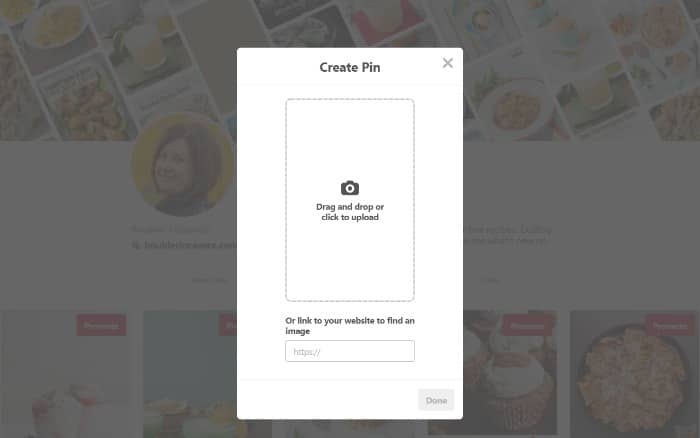
STEP 2: When selected, this image below will pop up. Click to upload the image (or drag and drop it) OR insert the URL to a photo you wish to use.
For this example I will show how to build a pin from a photo on your device:
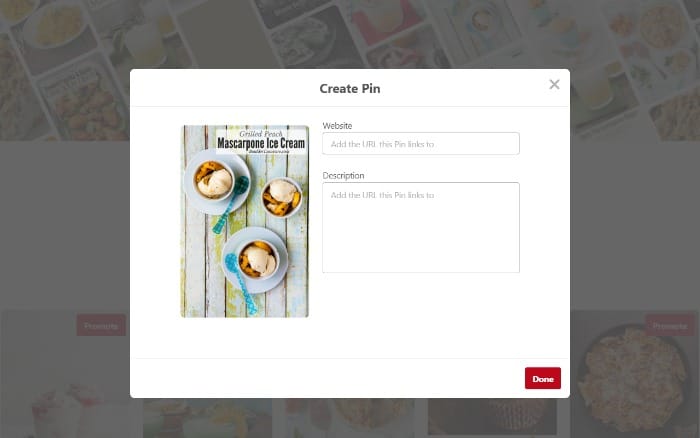
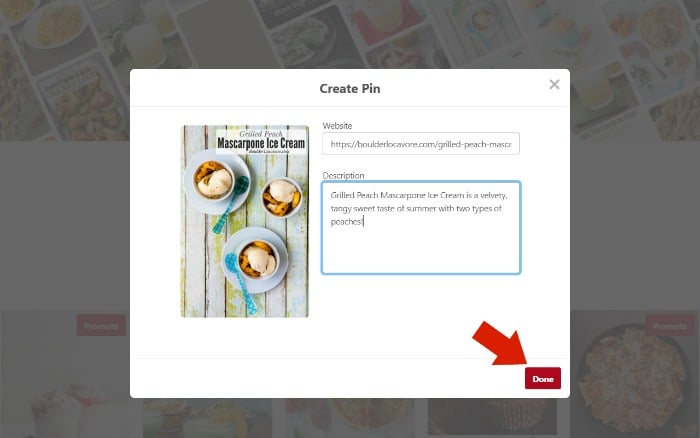
STEP 3: The top image will appear after selecting the photo from your device (this example for saving from ‘Your Device’ but the same will happen if inserting a photo URL instead).
Fill out the URL the pin should link to (the site that will open when the pin is clicked) AND the pin description; press DONE when finished:
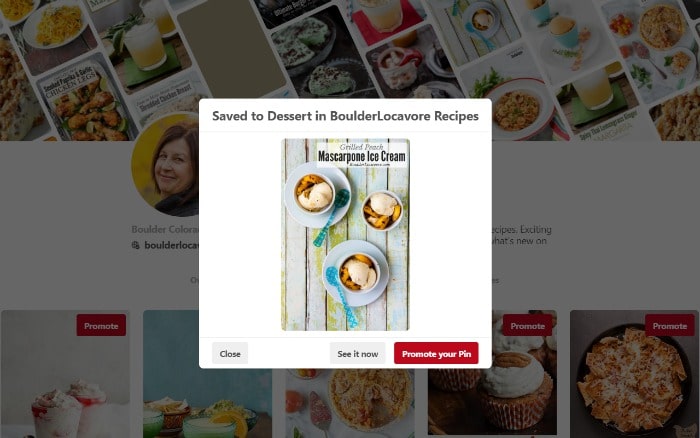
STEP 4: Select a Board for your new Pin. The second image is what will display after the Board is selected:

How to EDIT a Pinterest Pin
Once a pin is created you may decide to edit the description. In the Pin mode (not looking at the pin in Board mode), select the pencil icon above the pin image:

This image will appear. Edit the description as desired (you can change the URL in this step too), and select SAVE:

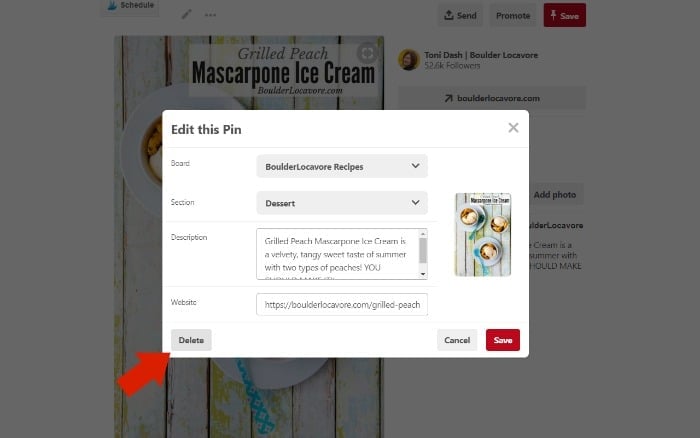
How to DELETE a Pinterest Pin
If for any reason you decide you’d like to DELETE a Pinterest Pin, select the pencil icon above the pin (when the pin is open, not in the Board view) and the image below will appear.
Select DELETE in the bottom left corner. NOTE: this is a permanent action and cannot be reversed!
Ontavia says
Thank you for sharing! Very helpful!
Toni Dash says
I’m so glad! It’s easy once you do it but can be tricky to figure out.
Brenda says
Thank you very much
Marie Grabo says
Great! Thanks so much! Simple, easy to follow.
Michelle Taylor says
Worked great!
Thank you so much!
Toni Dash says
I’m so glad! Thanks for letting me know.
Karen says
Thank you! I was searching all over for this. Exactly what I needed.
Toni Dash says
I’m so glad!
Green Apple Cottage - Carrie says
Thanks for the post! It was so simple to follow and helpful. Love your pup too!
Carl Gundestrup says
I created the secret board as you suggested. But THE BOARD DID NOT HAVE THE “ADD A PIN”. I am looking at my secret board and there is no way to “add a pin”. My other boards worked what did I do wrong?
Carl
Toni Dash says
Hi Carl! Thank you for bringing this to my attention! Pinterest has been making a number of changes and I too could not make it work as it worked before when trying it after reading your comment. I did however find a new way to do it. I’ll update all the screen shots and instructions in this post to reflect how it is working now but in the meantime let me list the steps for you personally.
This may be done in either a secret or public board but will take two main steps to turn a photo into a clickable pin that leads to a URL. First select a board where you’d like to build the pin (it will not obligate you to pin to that board). When you open the board, notice in the lower right corner a ‘+’ sign in a small gray circle, press that. Select ‘upload pin’ which will open your photos; select the photo you’d like to use. This will upload the photo into a ‘pinnable window’, basically allowing you to select the board where you want to pin the photo. At this step be sure to fill in the Description of the pin. Next, select the board where you’d like your pin to go. Once pinned, go to the pin on the board and select ‘Edit’ in this step you can enter the URL, ‘save’ and you will have a regular pin!
Please let me know if you run into any difficulties and again thanks for flagging the change!
Toni Dash says
Carl, I’ve updated the Pinterest Pin tutorial with screen shots of the current process. Thanks again for flagging this to my attention!
Maureen says
Thank you, thank you, THANK YOU for posting this tutorial! It was so easy to follow and so easy to do. It’s so nice to find generous bloggers eager to share their tips and tricks. So, again, thank you! This newbie appreciates it!
Toni Dash says
Maureen you are SO welcome! These little things can end up taking hours to figure out and for me they often don’t work exactly how they are suppose to. I’m so glad it was helpful and thank you for leaving your generous comment!
Fiona @TIFFIN bite sized food adventures says
Thanks for this Toni. I found it easy to follow and had always wondered how it was done. Now if you could just do a tutorial on Rich Pins… I find the advice on Pinterest is not very helpful. cheers!
Anne-Marie @ This Mama Cooks! On a Diet says
Awesome tips, Toni. And Lola looks fabulous, as usual.
Toni Dash says
Her beauty plays well to this type of ‘modeling’ opportunity!