

I have loved to grow things all my life. I would steal legumes from our pantry as a child and put them in pots in my room to grow. I did not care what it was I grew; I just wanted to grow plants.
As an adult I care much more about what I grow since I plant a food garden yearly. Living in a seasonal climate provides I need to be ready at the starting line when the time is safe to plant outdoors. It always feels like a starting gun firing for an all too quick race when the last frost departs. Our regional guideline is not to plant before Mother's Day and indeed we've had big dumps of snow in May. Especially for the coveted warm weather crops such as tomatoes, peppers and eggplant, having hardy plants ready to go into the ground when the time is right is crucial. Poor planning or immature seedlings leave us whiny with loads of green tomatoes when the fall frost visits!
The general rule of thumb is to start seeds 8 weeks before the last proposed frost date. I have found to have really sturdy plants by the last frost for Colorado type climate, beginning warm weather seeds indoors now is about perfect. If the seedlings are ready earlier than can be planted outdoors they can always go through a longer hardening off period (the process of taking indoor germinated plants outside a bit at a time daily to allow them to acclimate to living outdoors all the time) but if they are not robust for the transition to the garden, the penalty is garden yield.
Over the years I've experimented with how best to start seeds and have learned a lot along the way. Though it's fun to begin seeds in an egg carton on a windowsill my finding is that does not produce plants ready to get growing when put into the ground. Warm weather seeds like warmth to germinate and all seedlings like about 15 hours a day of sunlight once sprouted, which is very difficult to get under normal home conditions. My experience has been when growing with natural light only, the seedlings are more spindly, not nearly as mature as desired and often do not weather the transition to the garden well. The plants I now produce from seed are the quality of a good nursery if not better.
A few years ago I decided to work with grow lights and concerned over the cost I originally endeavored to build my own lighting set up. However after researching I discovered some very cost effective resources that made my seed starting a completely different experience. With some simple items starter plants will rival any good garden store, at a fraction of the cost and to your exact variety choices. There are many wonderful seed catalogs (I'll list some favorites at the end of this post) and for a few dollars per seed packet you can select exactly what you want to grow and what works best in your region.
I have included links for all the items I use to start seeds on Amazon.com. The grow light system I did purchase originally on Amazon.com. You can find peat pots, seedling mats and trays at most nurseries, home improvement stores and 'Big Box' retail stores with a garden center if you'd rather buy locally.
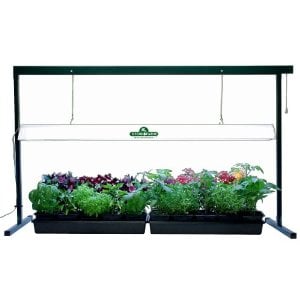
The grow light system I use is a suspended light on a frame. It is very lightweight in comes in two sizes allowing flexibility for your space needs. I have two four feet long lights (the lights come in 2 foot lengths as well) and when not in use I remove the hanging light and stash the entire things for the next season.

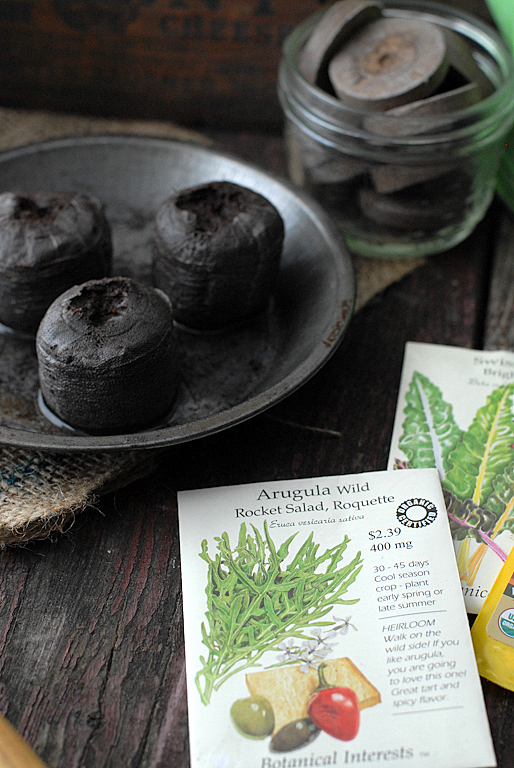
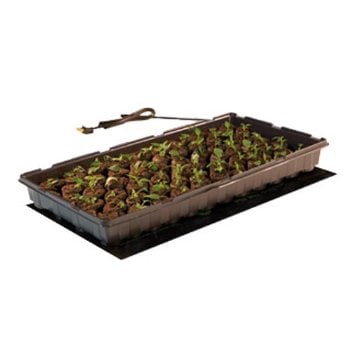
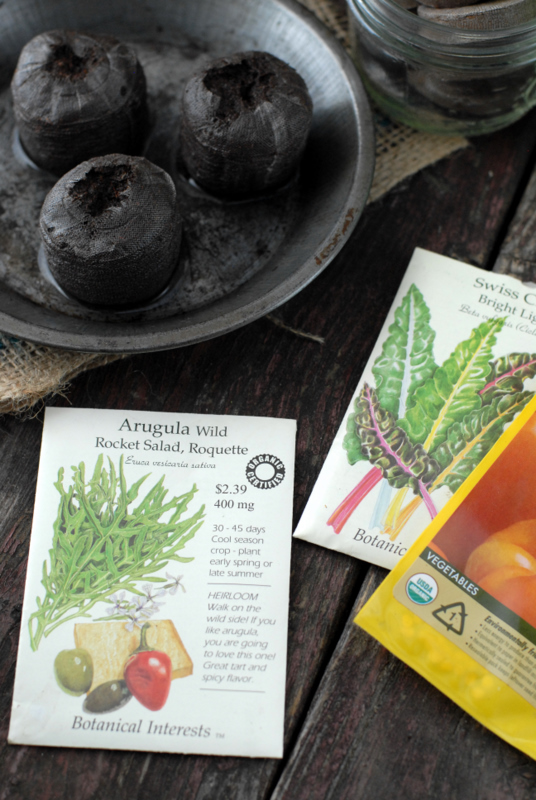
I have found expandable peat pellet pots are a great way to begin seeds. They start as a flat disk and when soaked briefly in water pop into a small cylinder of peat, a growing substrate ideal for seeds. They provide excellent drainage and room for the seedlings to easily take root. I also like them because as the plant gets larger they can be transplanted into a larger peat pot with seed starter soil which can be planted directly in the garden when the time is right. No transplanting of tender roots into the ground. There are many brands of these pots. I found an offbeat source for the larger peat pots online what was far cheaper in bulk than most sources so it pays to shop around.
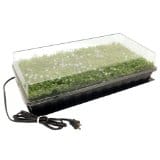
The easiest way to care for your seedlings is in a plastic seedling tray with a clear lid. These are only a few dollars and are reusable annually. It allows watering directly, no worries about spilling and by using a lid a naturally humid environment is produced which seedlings love. Once the plants begin to get taller, a taller lid can be purchased to maximize the time plants enjoy the greenhouse effect.
For warm season crops a seedling heat mat is helpful to quickly germinate the seeds. It fits underneath the seedling tray (outside the seedling tray). The mat is left on only until the seeds germinate and is not required for cool weather crops. I noted when fetching the link for this there is a windowsill heat mat that is long and narrow should you want to use natural light but to speed germination.
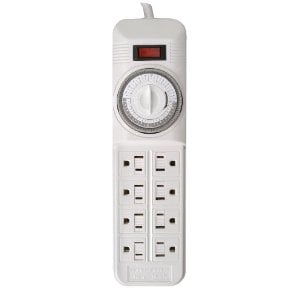
Since seedlings like about 15 hours a day of light I purchased a timer with outlets allowing the grow lights to be controlled by the timer automatically. When not in use (or if desiring the same timing cycle) the timer can be used for setting regular lights on a timer if desired as well (this link is for an example product, there are many manufacturers for this type of timer).
Based on my research and experience this is an incredibly affordable way to get your garden going especially if you have an area of any size to plant. The cost of the supplies (other than the peat pots which need to be replenished with each planting) is extended over multiple growing seasons and you'll definitely save on buying seeds instead of full grown plants.
Favorite Seed Catalogs:
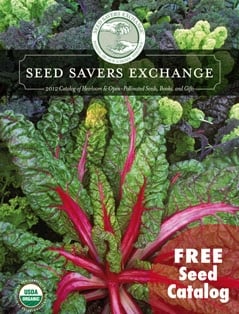
Seed Savers Exchange: they have been in the business of saving seeds from all over the world providing an extensive collection of heirloom seeds. I've grown fantastic varieties such as lemon tomatoes whose seeds were traced back to a bird market in Russia in the late 1800's.
Seeds of Change is an organic seed company that offers a wide variety as well as guidance for urban and four season gardens.
Botanical Interests has a beautiful selection of vegetable and flower seeds in hand illustrated seed packets.
Product photos courtesy of Amazon.com; seed catalog photo courtesy of Seed Savers Exchange.
Anonymous says
Ohh thanks for this.. I hope there is a followup post for the next stage! What/how do you transfer them into when they outgrow the peat pellets? You say a larger peat pot with soil, but an example would help- can you share the site where you bought the pots you transferred into. Do they fit onto a tray under the grow light? Also you mentioned a taller hood to keep the greenhouse effect going- again a link to what you used would be great.
I found big peat pellets somewhere last year, and they were great… atleast 3″ tall when they expanded. I can't remember where I got them- and it's nearly impossible to tell the size on Amazon.
I'm also having a hard time estimating how many plants I will need… any pointers there?
Thanks!
Boulder Locavore says
Thank you for your interest! Here are some of your answers now. You can tell when they need more room because the roots will extend from the bottom of the peat pot and they will be substantial (meaning a solid stem, multiple leaves). I get a larger peat pot and add seed starting soil and put the entire peat pellet and seedling into the larger pot; I do NOT remove the seedling from the peat pellet. I sadly don't have the link for my source of the peat pots from last year.
They do still fit under the grow light though take up more space so will not fit as compactly. I keep them under the humidity dome as long as possible but eventually they will be too large.
I use the Square Foot Gardening method which specifies the number of a specific species in a square foot. It is a more dense gardening method allowing high yield, low wasted space and weeds. Assuming you are planting a regular plot I would use the spacing guidelines on the back of your seed packets to plan out your plot. I start more plants than I'll need as there is some failure at each stage (germination, transplanting, hardening off and outdoor garden adjustment). It allows you to plan your vegetable garden. When getting the link I noted they've added some tutorials to the site as well. I have not looked at them but it is a good site; worth poking around!
Hope this helps and thanks for the prompt on the 'next stage' post!
Rebecca Subbiah says
wonderful tips I am going to start a wee garden this yr 🙂 thanks Toni
Kita says
This is a great post. I started 'gardening' by accident a few years ago with the desire to just make our property look better. Without much knowledge, I found that our soil can grow pretty much anything – tall and hearty – and ever my one and done plants have come back season after season. This year I am determined to actually educate myself a bit and try to organize a small vegetable garden. I have been itching for an indoor system to carry over my herbs and get me started before things can go out into the ground. Even here, as BFs mother has told me, we aren't supposed to plant before Mother's Day, but its so hard! The weather gets so nice before then and I get the urge. Now to convince the BF to let me have the space for the lights… or they may just show up 😉
itstwoam says
Awesome post!! I've been sharing it with some friends as we're all getting ready to get our seeds started in the next week or two!!
I wanted to point you to another site that has the peat pellets at about half the price… just found it yesterday and thought you might be interested ::
I haven't purchased any yet, so I can't vouch for speed or anything, but I'm going to place an order in the next day or so!
Boulder Locavore says
Thank you for your comment and the link. I actually only have purchased the grow light set up on Amazon. The rest of the supplies I purchased locally. I wanted to give readers 'one stop' to see everything however in the event they wished to purchase Amazon does have free shipping for orders over $25. There are definitely less expensive places to buy things like the jiffy pots as your sleuthing shows! This has prompted me to look up the site where I bought the larger peat pots I used for planting the seedlings in the peat pellets once they need a larger environments before hitting the garden! Have fun planting!
Kiri W. says
What a lovely informative post 🙂 Thank you for the advice!
Boulder Locavore says
Thank you Kiri as always for reading and commenting!
Pennie says
This post has so much great information! I have been trying to get up my nerve to start a home garden–I have the perfect spot in my backyard, but I also have a terrible brown thumb! Thanks for sharing–maybe I'll finally take the plunge!!
Boulder Locavore says
I think gardening can feel pretty intimidating. If you read alot about it, as with so many topics, you can get into so much detail and instruction it can be paralyzing if it is unfamiliar. I say start simple. Maybe if you have never had a garden you buy plants this year and get your sea legs on just tending to them. Or start seeds in the ground. Many plants are directly seeded and do not or should not be started indoors (beans, chard, carrots). Take it slow, make it easy, fun and stress free. You will feel so good to eat some of your own food it will be worth it! Feel free to email me if I can help!