
Candy Cane Place Card Holders
This quick DIY place card holder project will turn ordinary candy canes into a beautiful table decoration for the holidays!NOTE: the supplies listed are PER place card holder. If making multiple place card holders multiply the supplies listed with the desired number of place card holders.
Servings 1 instructions included are PER place card holder
Calories
Equipment
- hot glue gun
Ingredients
Supplies PER place card holder
- 3 standard size Candy Canes plastic cover removed (see notes)
- Hot glue or small Sticky Dots (used for scrapbooking)
- 6 inches Decorative ribbon, tinsel or trim, or narrow width washi tape
- Place cards, Photos or Envelopes I got these exact ones at Micheals craft store this season.
Instructions
- If using a glue gun (recommended): Heat glue gun. Set it up so you can quickly pick it up while holding the candy canes in place. NOTE: if using sticky dots, open the package for quick use.

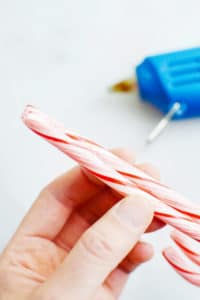
- Hold the long sides of the candy canes together, so the curved ends are evenly spaced. Holding them tightly together place the bottoms on a flat surface to ensure the bottom is level.

- Glue or stick them them together, starting with two of the candy canes. Then glue the third in place when the first two have set and are sturdy.
- Wrap the ribbon, trim or washi tape around the candy cane cluster for decoration.

- Use festive cards (refer to photos) or print name place settings.

- Store candy cane place card holders at room temperature until you’re ready to use them.

Notes
I removed the plastic wrapping from the candy canes before creating the place card holders.
To allow the candy canes to still be edible, leave the plastic wrapping ON and use tape to snugly affix the candy canes. Cover the tape with decorative ribbon or wider Washi tape.