
How to Make Toy-Filled Cascarones
Toy-filled Cascarones are a great addition to Easter egg hunting. They are a fun project to make too!
Servings 12 NOTE: the yeild will be however many Cascarones you choose to make. The instructions will be the same.
Calories
Equipment
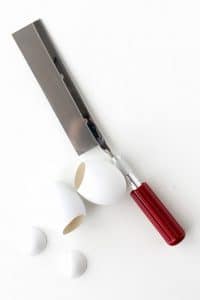
- Xacto razor saw
- Cups to dye the eggs
- Baking sheet
- Small paint brush (optional)
Ingredients
- Food Coloring
- White Vinegar
- Decorating Easter Eggs (dyeable artificial eggs available at craft stores or online)
- Latex (or vinyl) Gloves
- Paper Towels
- Colorful Tissue paper (1 sheet or multiple if desiring different color), cut into 1-3/4 inch diameter circles (large enough to allow 1/4 inch to extend past the hole in the egg); enough circles for the amount of cascarones you will be making
- White Glue
- Small party favor toys that would fit inside the eggs (tattoos, necklaces, squishy bugs, balls, bubbles, confetti, rings, etc)
Instructions
- Using an Xacto razor saw (adults only please!), saw across the egg ½-3/4 inches from the pointed top straight across the egg. Discard the removed egg point and dust off any particulate from sawing. Repeat for the number of eggs you wish to make.
- Line a baking sheet with 2 layers of paper towels. Set up dying cups. Add 20 drops of a given color in dye cup with 1 teaspoon of white vinegar (note: for the egg to absorb the color well no water is added to the dye and vinegar). I suggest wearing gloves for dying the eggs.
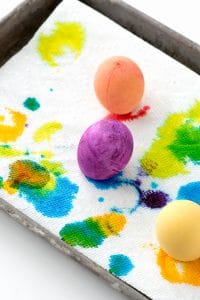
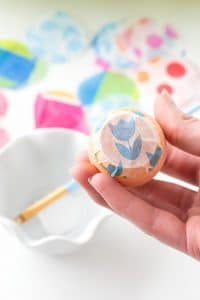
- Place a cut egg in a dye cup. Roll is around to fully cover with dye. When the color is to your liking, remove and place the egg with the cut side down on the prepared baking sheet to fully dry; eggs may be placed in the dye a second time after dry to deepen the color. Repeat to dye any other eggs.
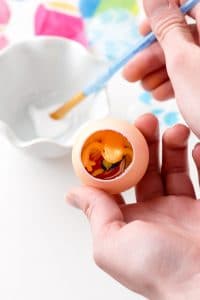
- When the eggs are dry (be sure to wipe out any dye inside the eggs with a paper towel before proceeding), add some confetti and trinkets inside the dyed egg.
- Make a thin line of glue around the outside cut edge of the egg (I like to paint it on with the small brush).
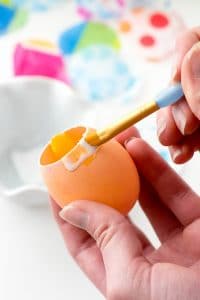
- Place a tissue paper circle over the top of the opening of the egg allowing equal amounts of tissue paper to extend around the opening.
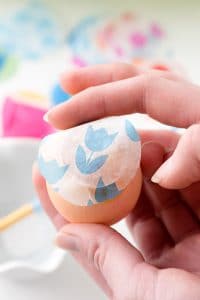
- Gently smooth down the tissue paper onto the glue and pat to adhere. Set aside to fully dry.
Notes
Total time for project dependent on the quantity being made. Time of 1 hour listed above is an estimate only.